Two weeks ago, Red Balloon Security attended DEF CON 31 in Las Vegas, Nevada. In addition to sponsoring and partnering with the Car Hacking Village, where we showed off some of our latest creations, we contributed two challenges to the Car Hacking Village Capture the Flag (CTF) competition. This competition was a “black badge CTF” at DEF CON, which means the winners are granted free entrance to DEF CON for life.
Since it’s been a little while since DEF CON ended, we figured we’d share a write-up of how we would go about solving the challenges. Alternatively, here is a link to an OFRAK Project (new feature since OFRAK 3.2.0!) that includes an interactive walkthrough of the challenge solves.
Challenge 1: Inside Vehicle Infotainment (IVI)
Description: Find the flag inside the firmware, but don’t get tricked by the conn man, etc.
CTF participants start off with a mysterious, 800MB binary called ivi.bin. The description hints that the file is firmware of some sort, but doesn’t give much more info than that. IVI is an acronym for “In Vehicle Infotainment,” so we expect that the firmware will need to support a device with a graphical display and some sort of application runtime, but it is not yet clear that that info will be helpful.
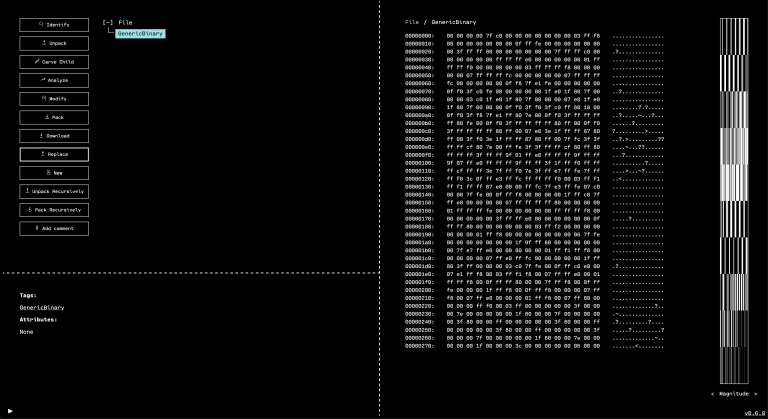
To begin digging into the challenge, the first thing we do is to unpack the file with OFRAK. Then, we load the unpacked result in the GUI for further exploration.
					# Install OFRAK
python3 -m pip install ofrak ofrak_capstone ofrak_angr

# Unpack with OFRAK and open the unpacked firmware in the GUI
ofrak unpack --gui --backend angr ./ivi.bin
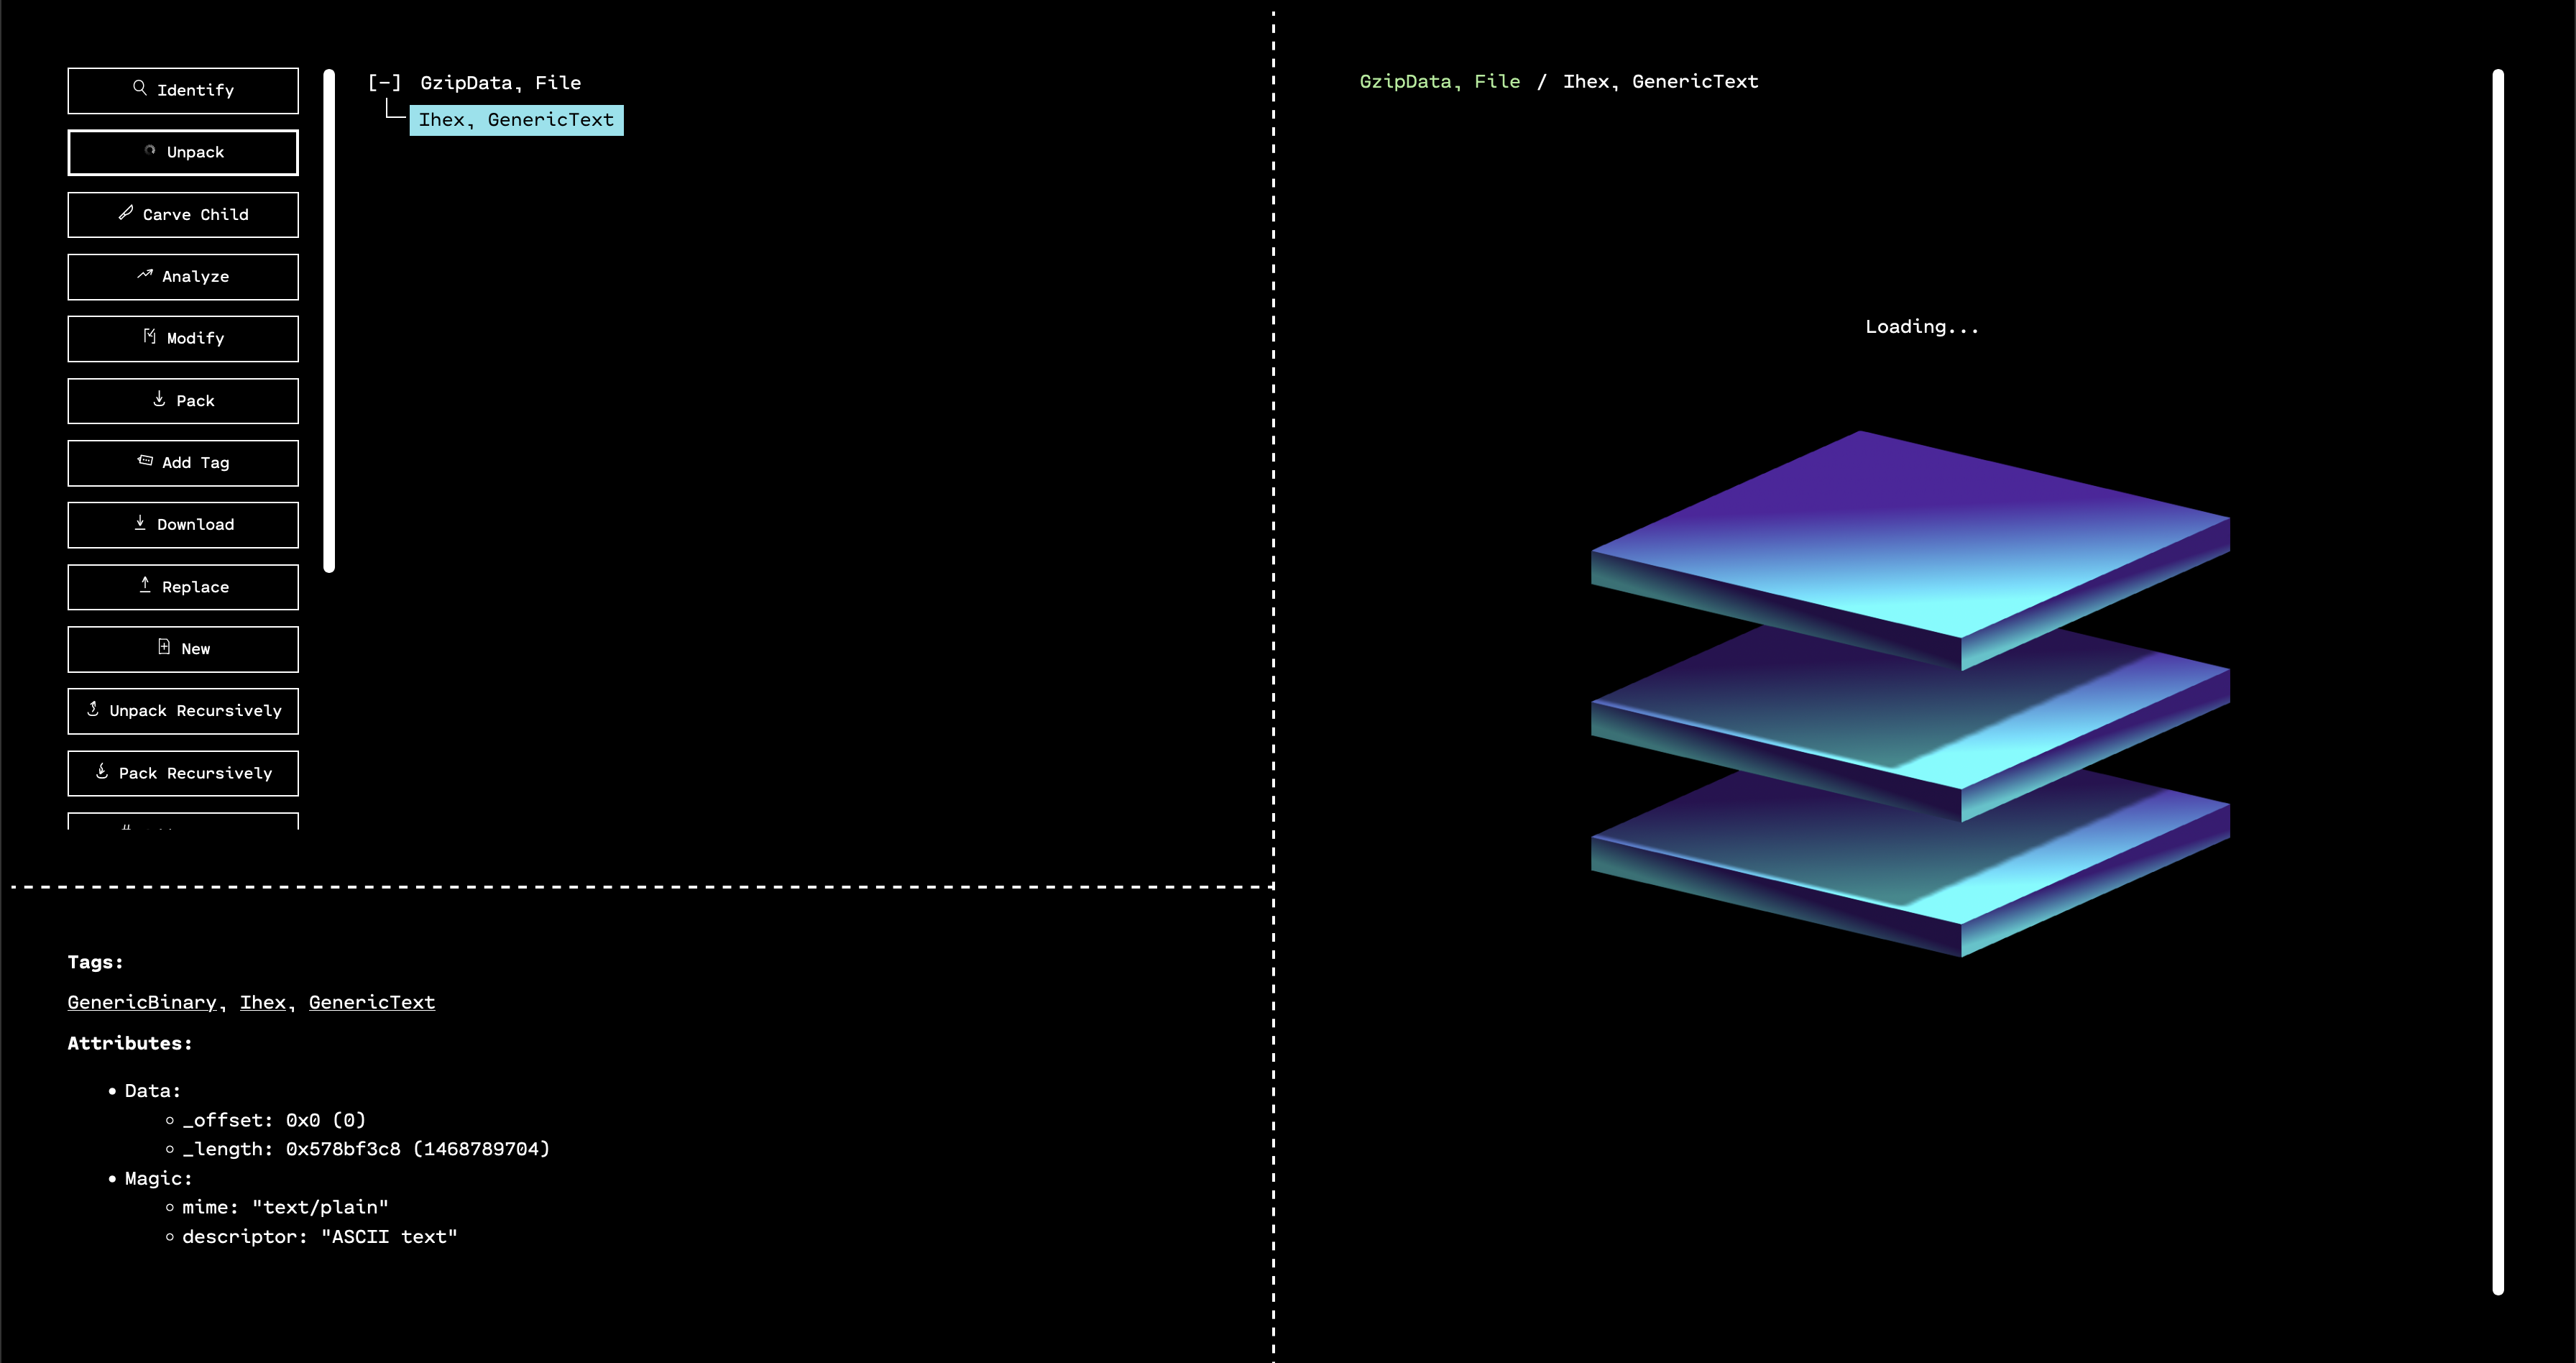
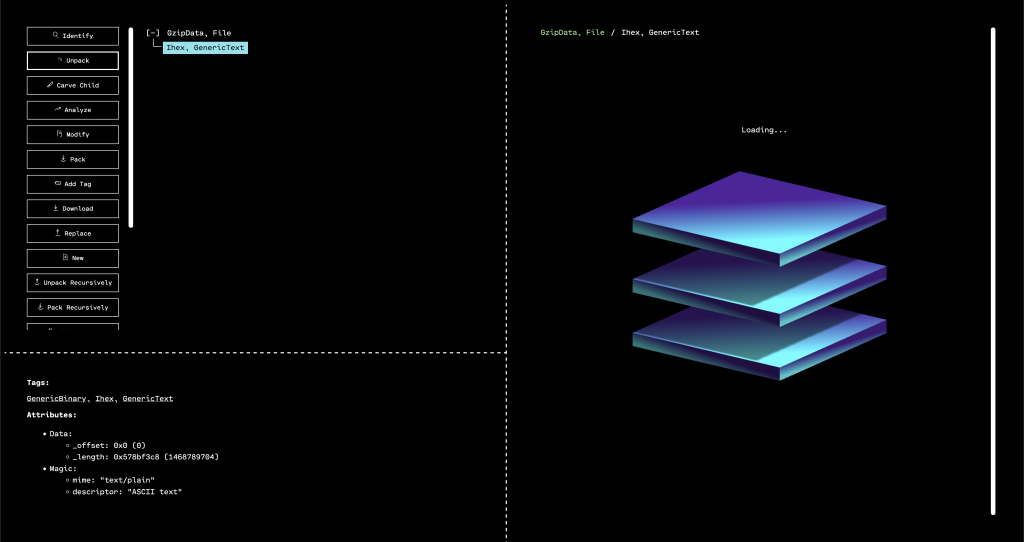
When the GUI opens, we see that the outermost layer that has been unpacked is a GZIP. By selecting the only child of the GZIP in the resource tree, and then running “Identify,” we can see that OFRAK has determined that the decompressed file is firmware in Intel Hex format.
Luckily, OFRAK has an Intel Hex unpacker built-in, so we can unpack this file to keep digging for the flag.
OFRAK unpacks the Ihex into an IhexProgram. At this point, we’re not sure if what we’re looking at is actually a program, or is a file that can unpack further. Looking at the metadata from OFRAK analysis in the bottom left pane of the GUI, we note that the file has only one, large segment. This suggests that it is not a program, but rather some other file packed up in IHEX format.
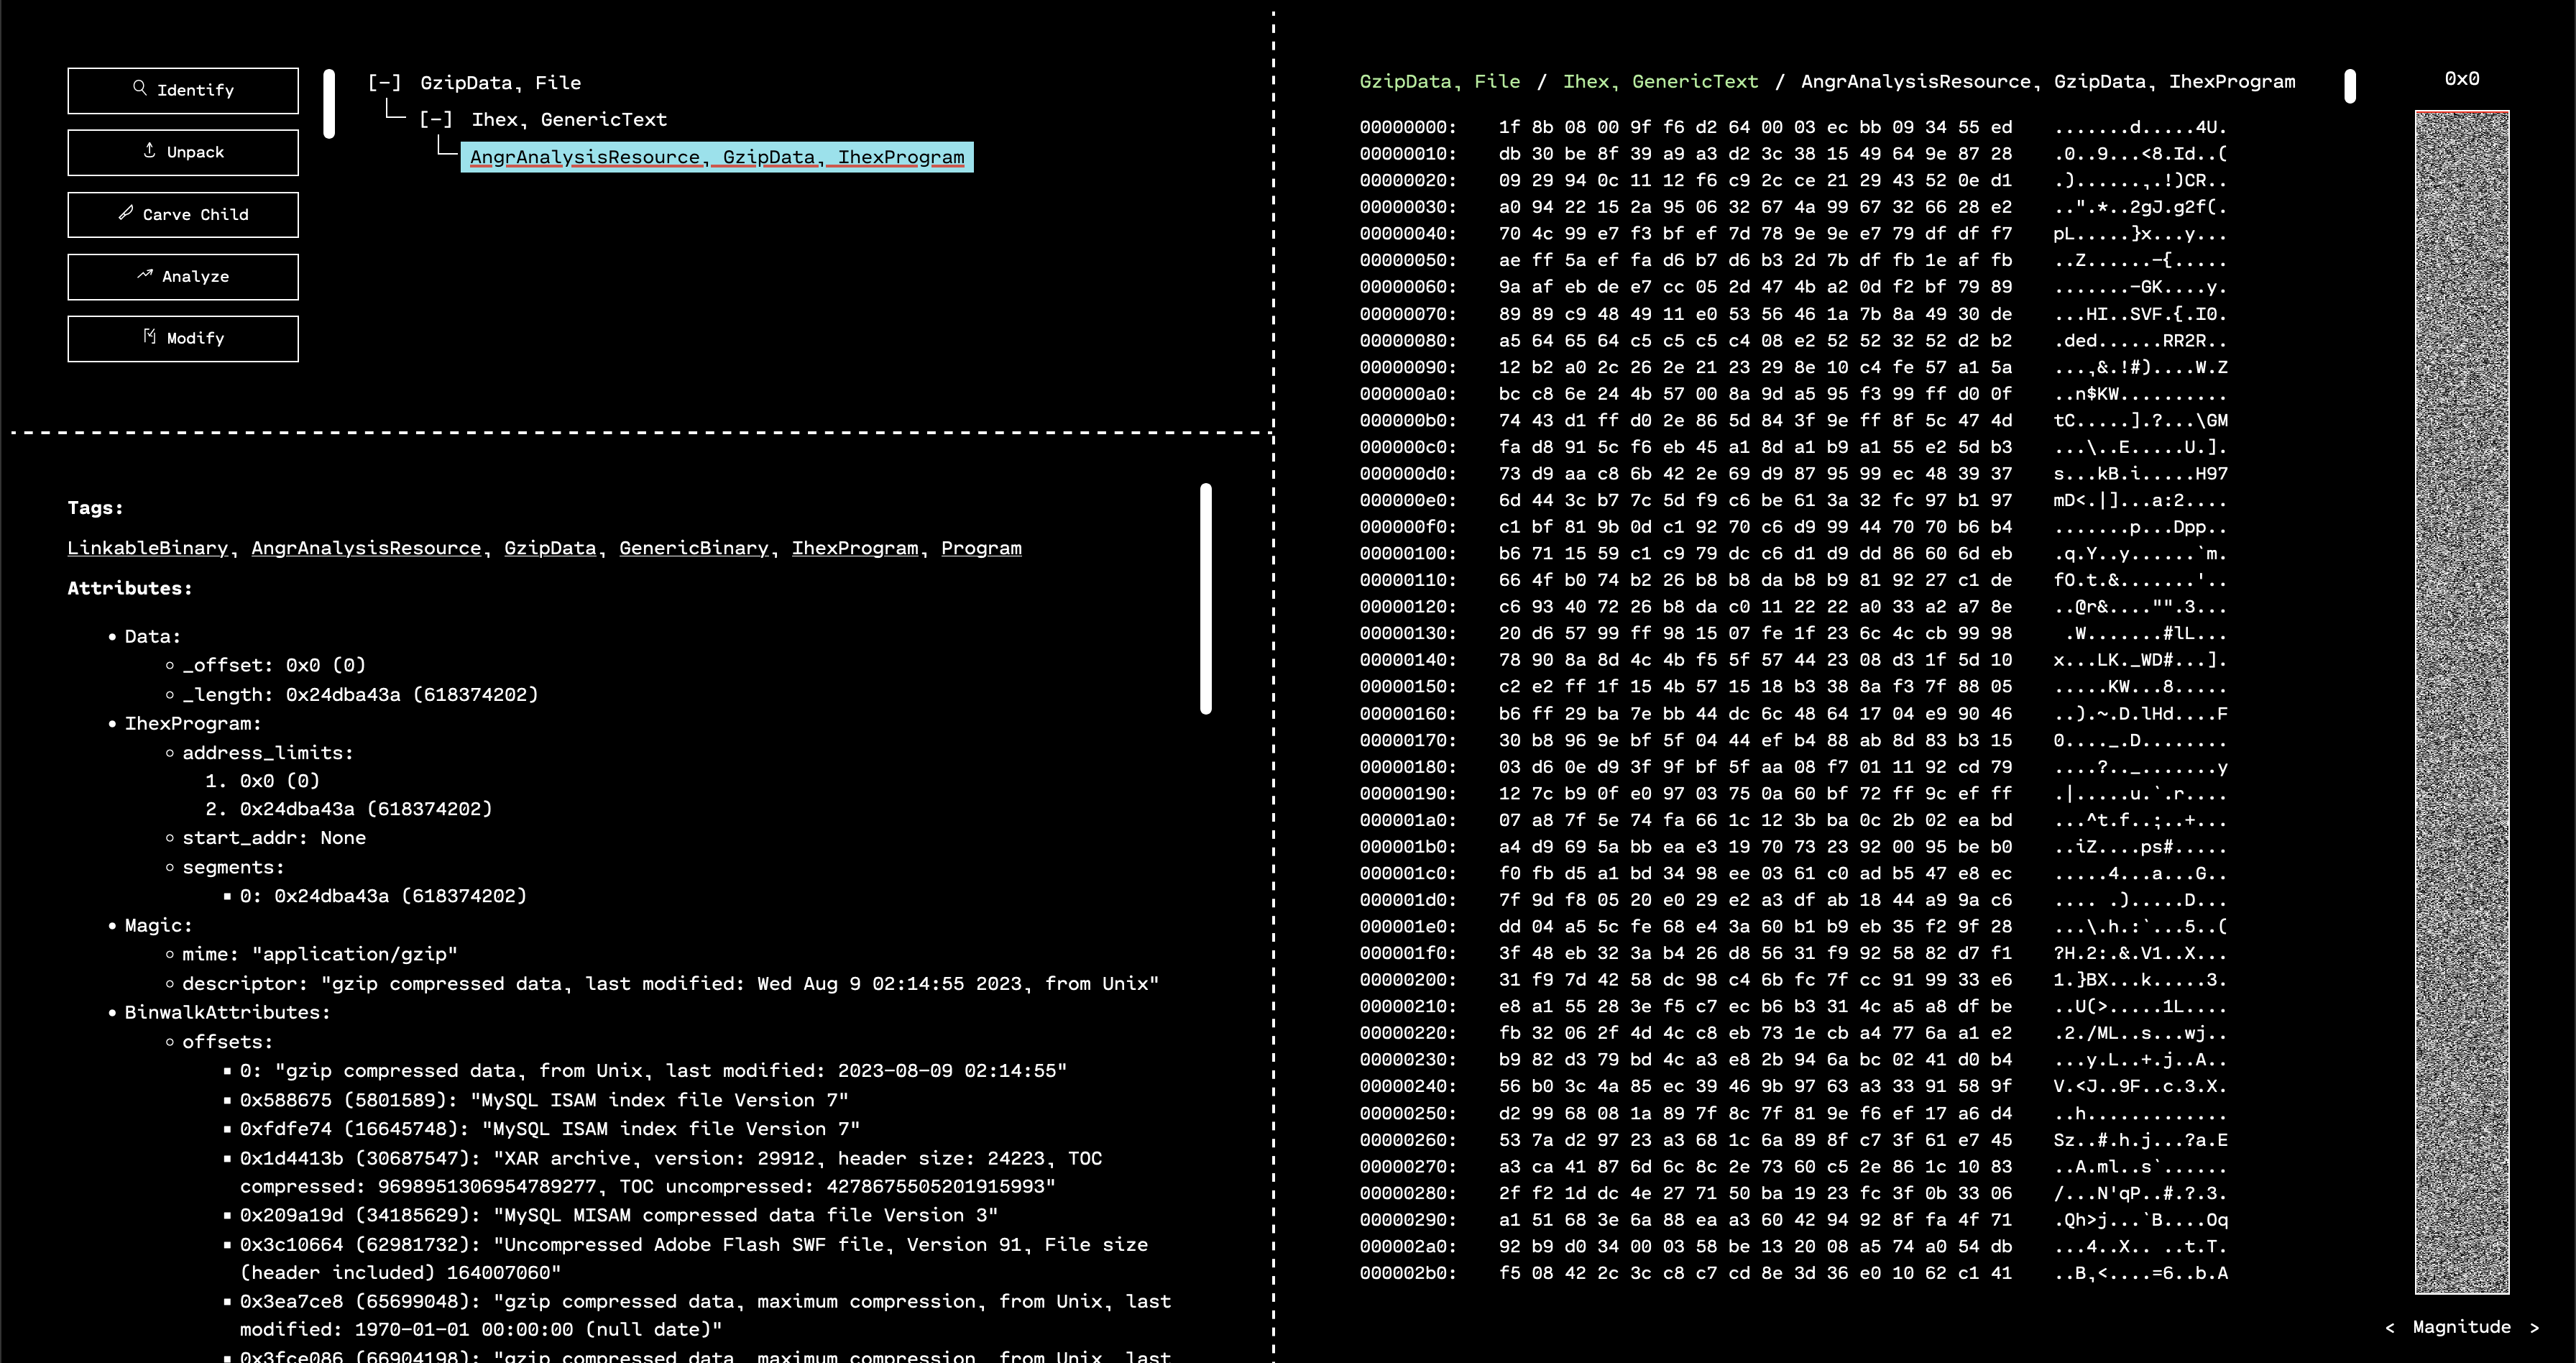
If we run “Identify” on the unpacked IhexProgram, OFRAK confirms that the “program” is actually GZIP compressed data.
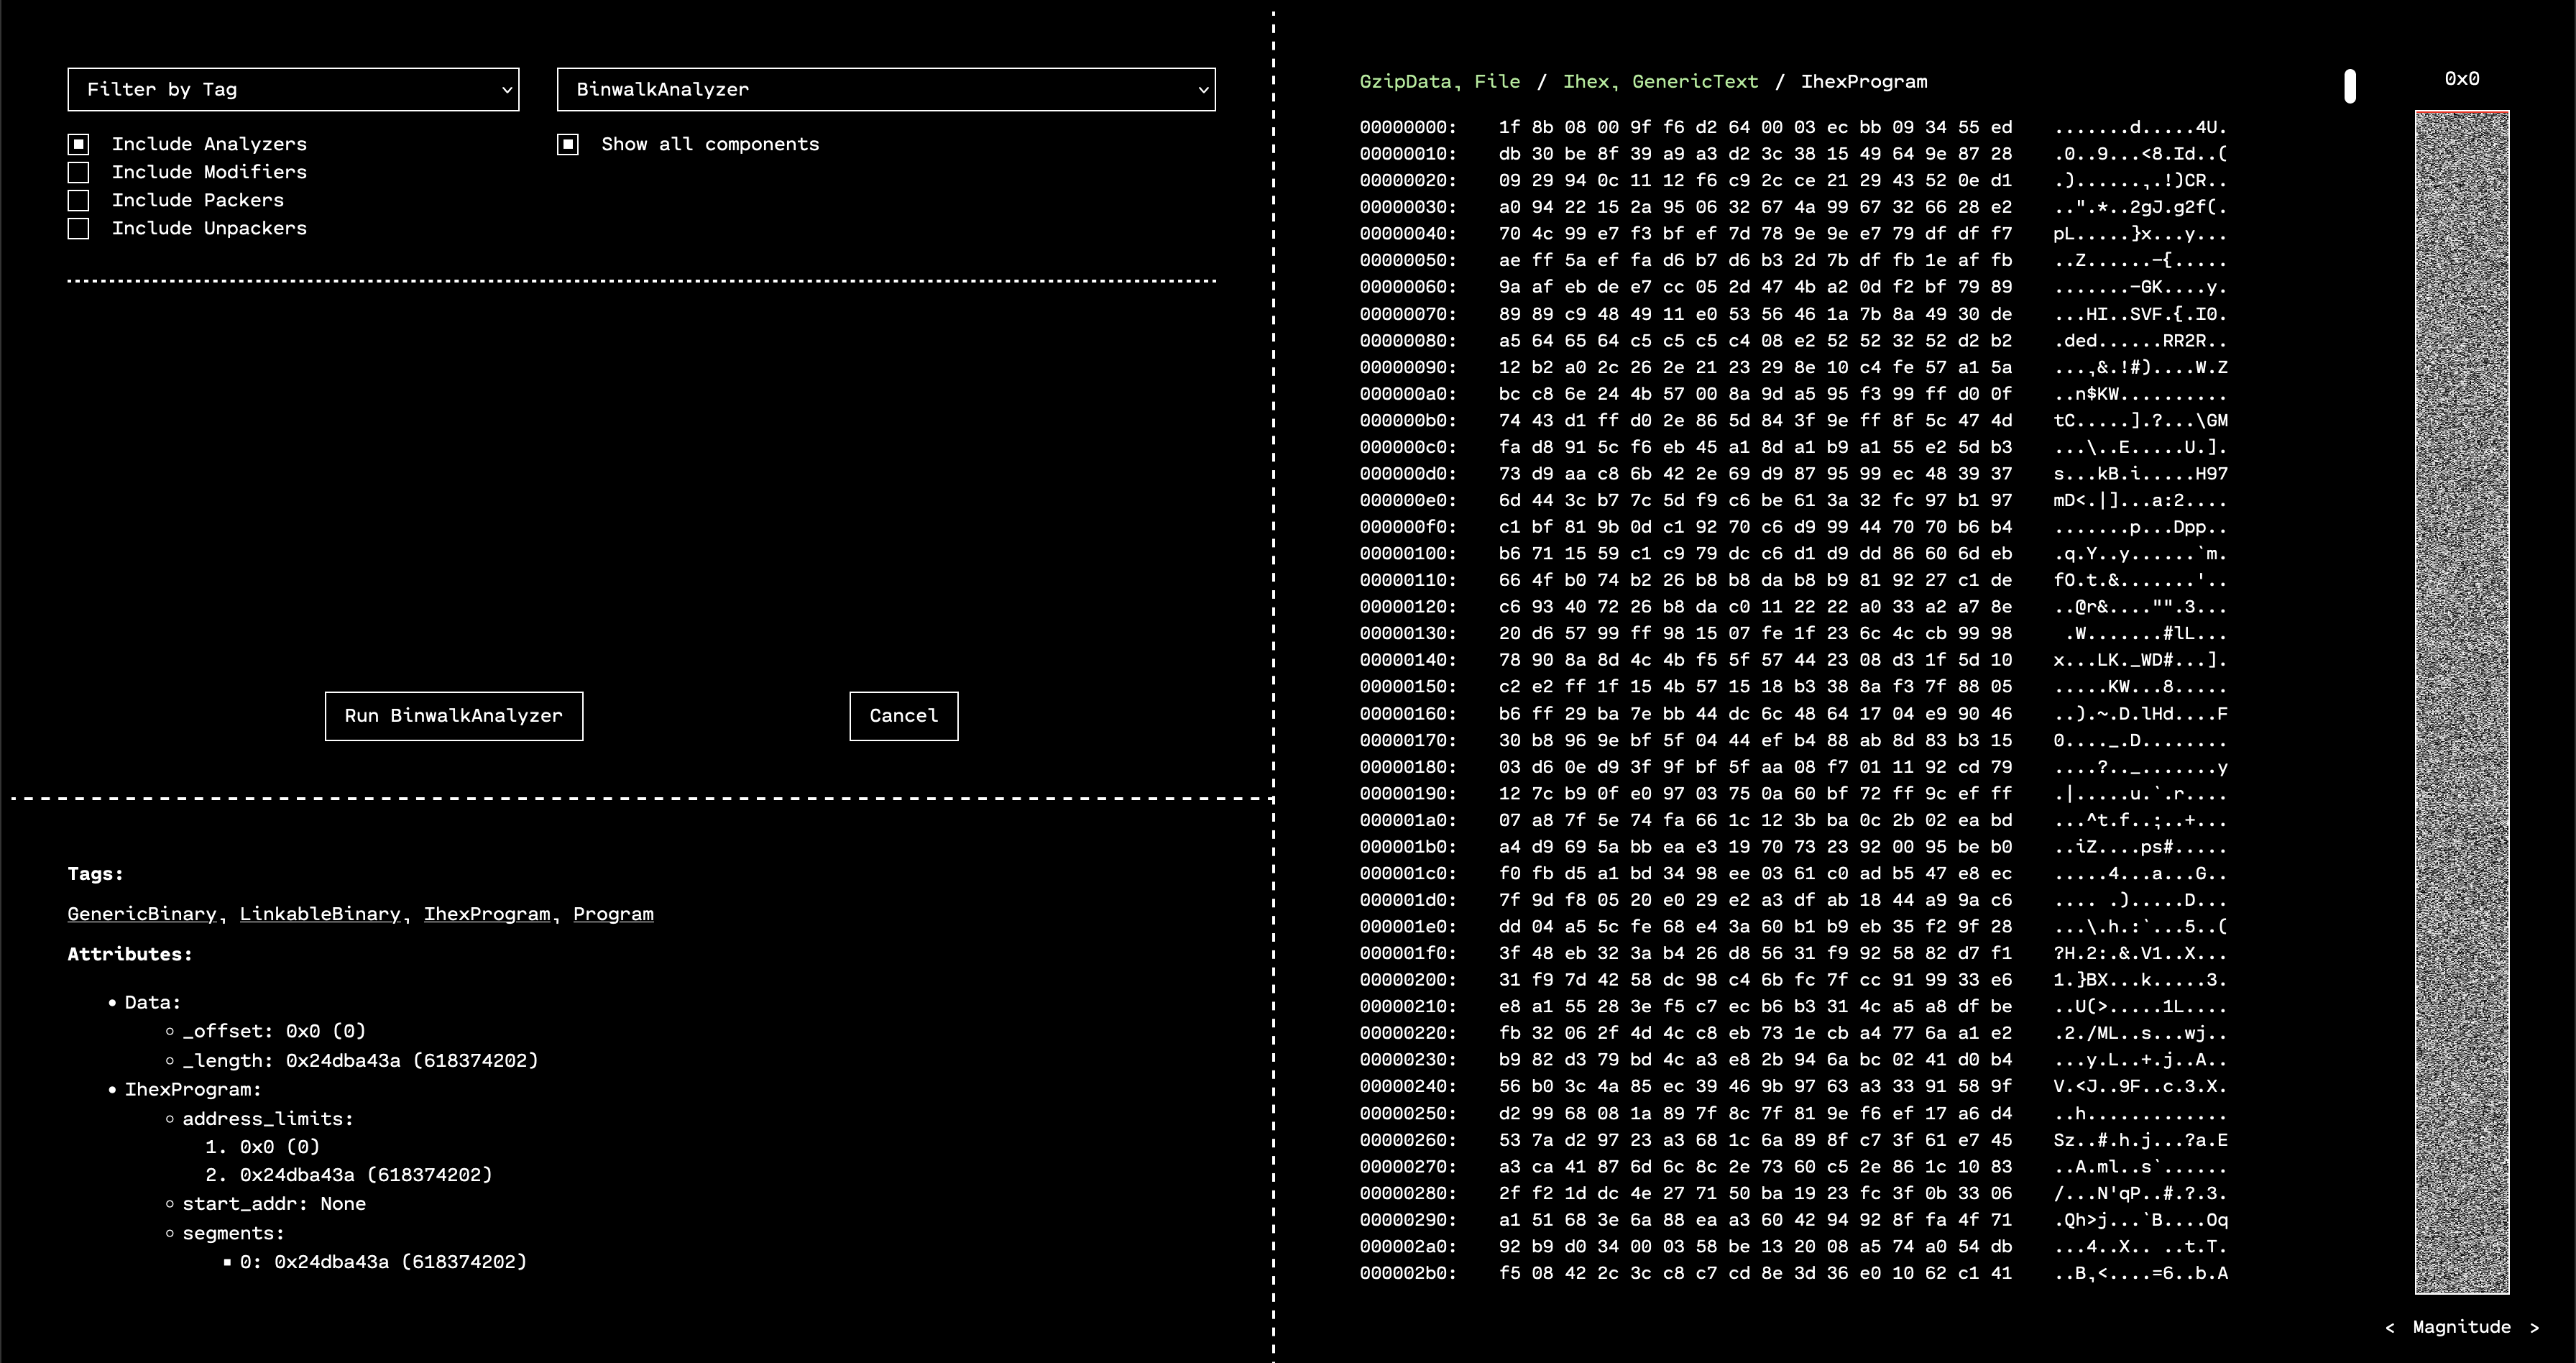
To gather more information, we can make OFRAK run Binwalk analysis. This will happen automatically when clicking the “Analyze” button, or we can use the “Run Component” button to run the Binwalk analyzer manually.
Binwalk tends to have a lot of false positives, but in this case, it confirms that this resource is probably a GZIP. Since we know this, we can use the “Run Component” interface to run the GzipUnpacker and see what is inside.
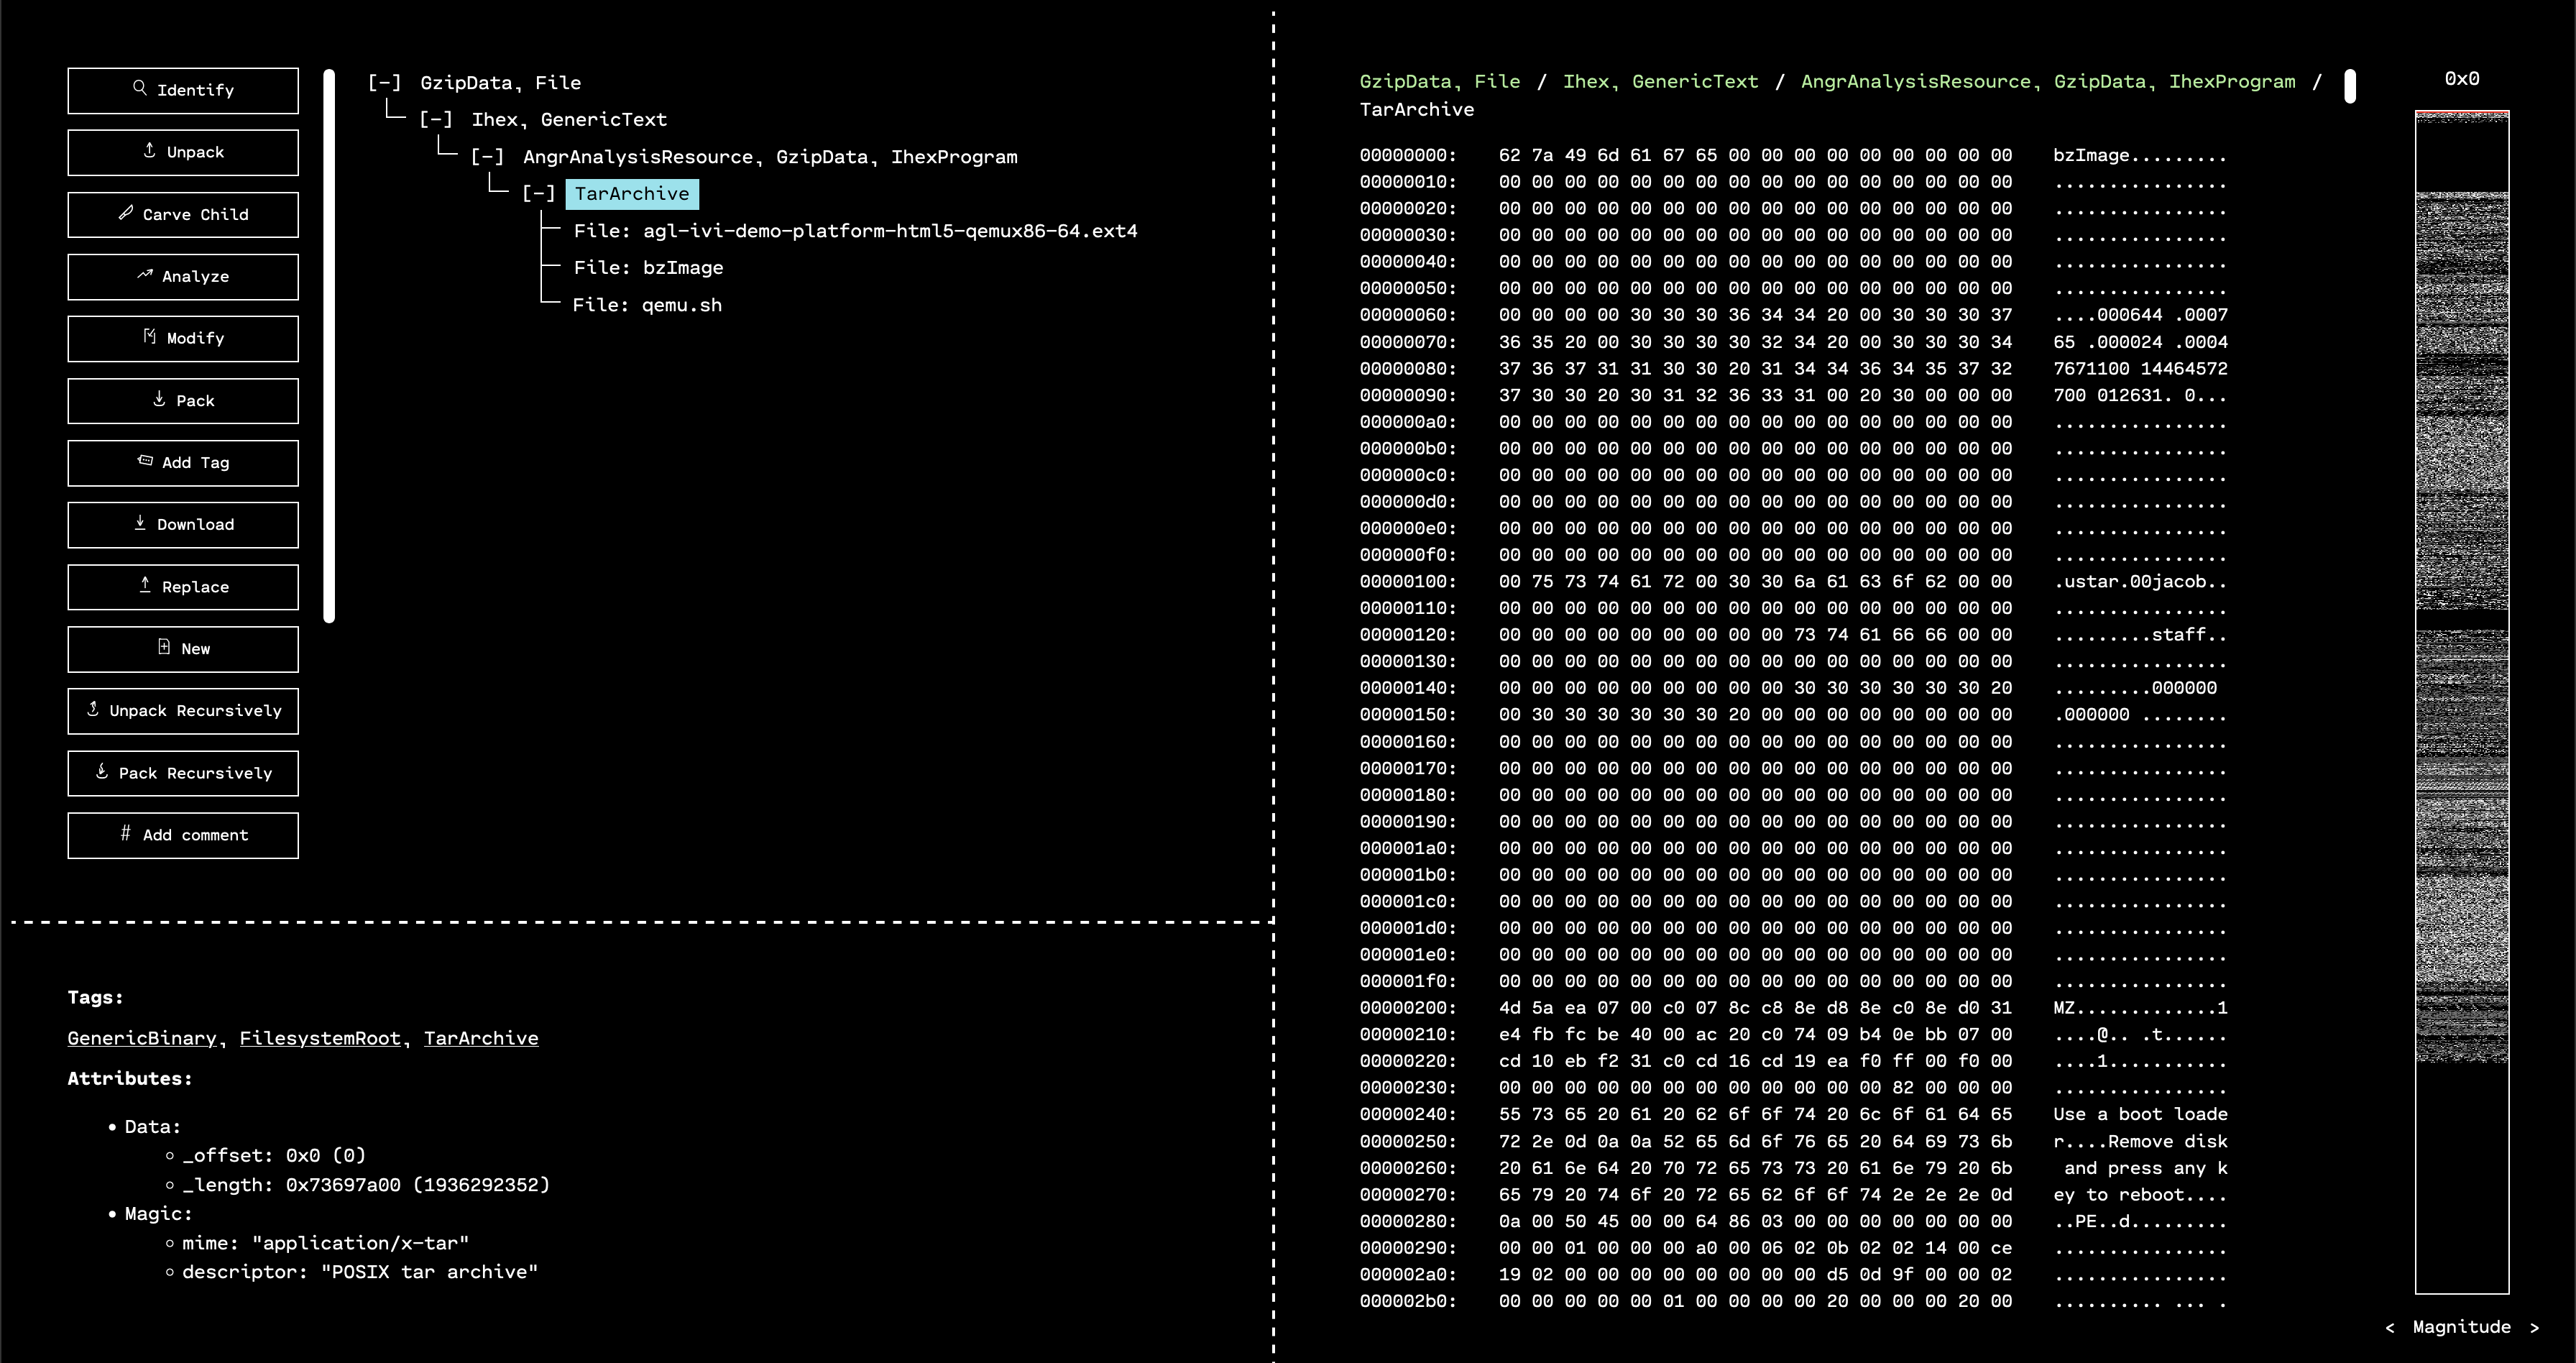
Running “Identify” on the decompressed resource shows that there was a TAR archive inside. Since OFRAK can handle this easily, we click “Unpack” on the TAR. Inside of the archive, there are three files:
qemu.shbzImageagl-ivi-demo-platform-html5-qemux86-64.ext4
The first file is a script to emulate the IVI system inside QEMU. The second file is the kernel for the IVI system. And the third file is the filesystem for the IVI.
Based on the bzImage kernel, the flags for QEMU in the script, and the EXT4 filesystem format, we can assume that the IVI firmware is Linux-based. Moreover, we can guess that AGL in the filename stands for “Automotive Grade Linux,” which is a big hint about what type of Linux applications we’ll encounter when we delve deeper.
Since the description talks about “conn man” and “etc,” we have a hint that it makes sense to look for the flag in the filesystem, instead of the kernel.
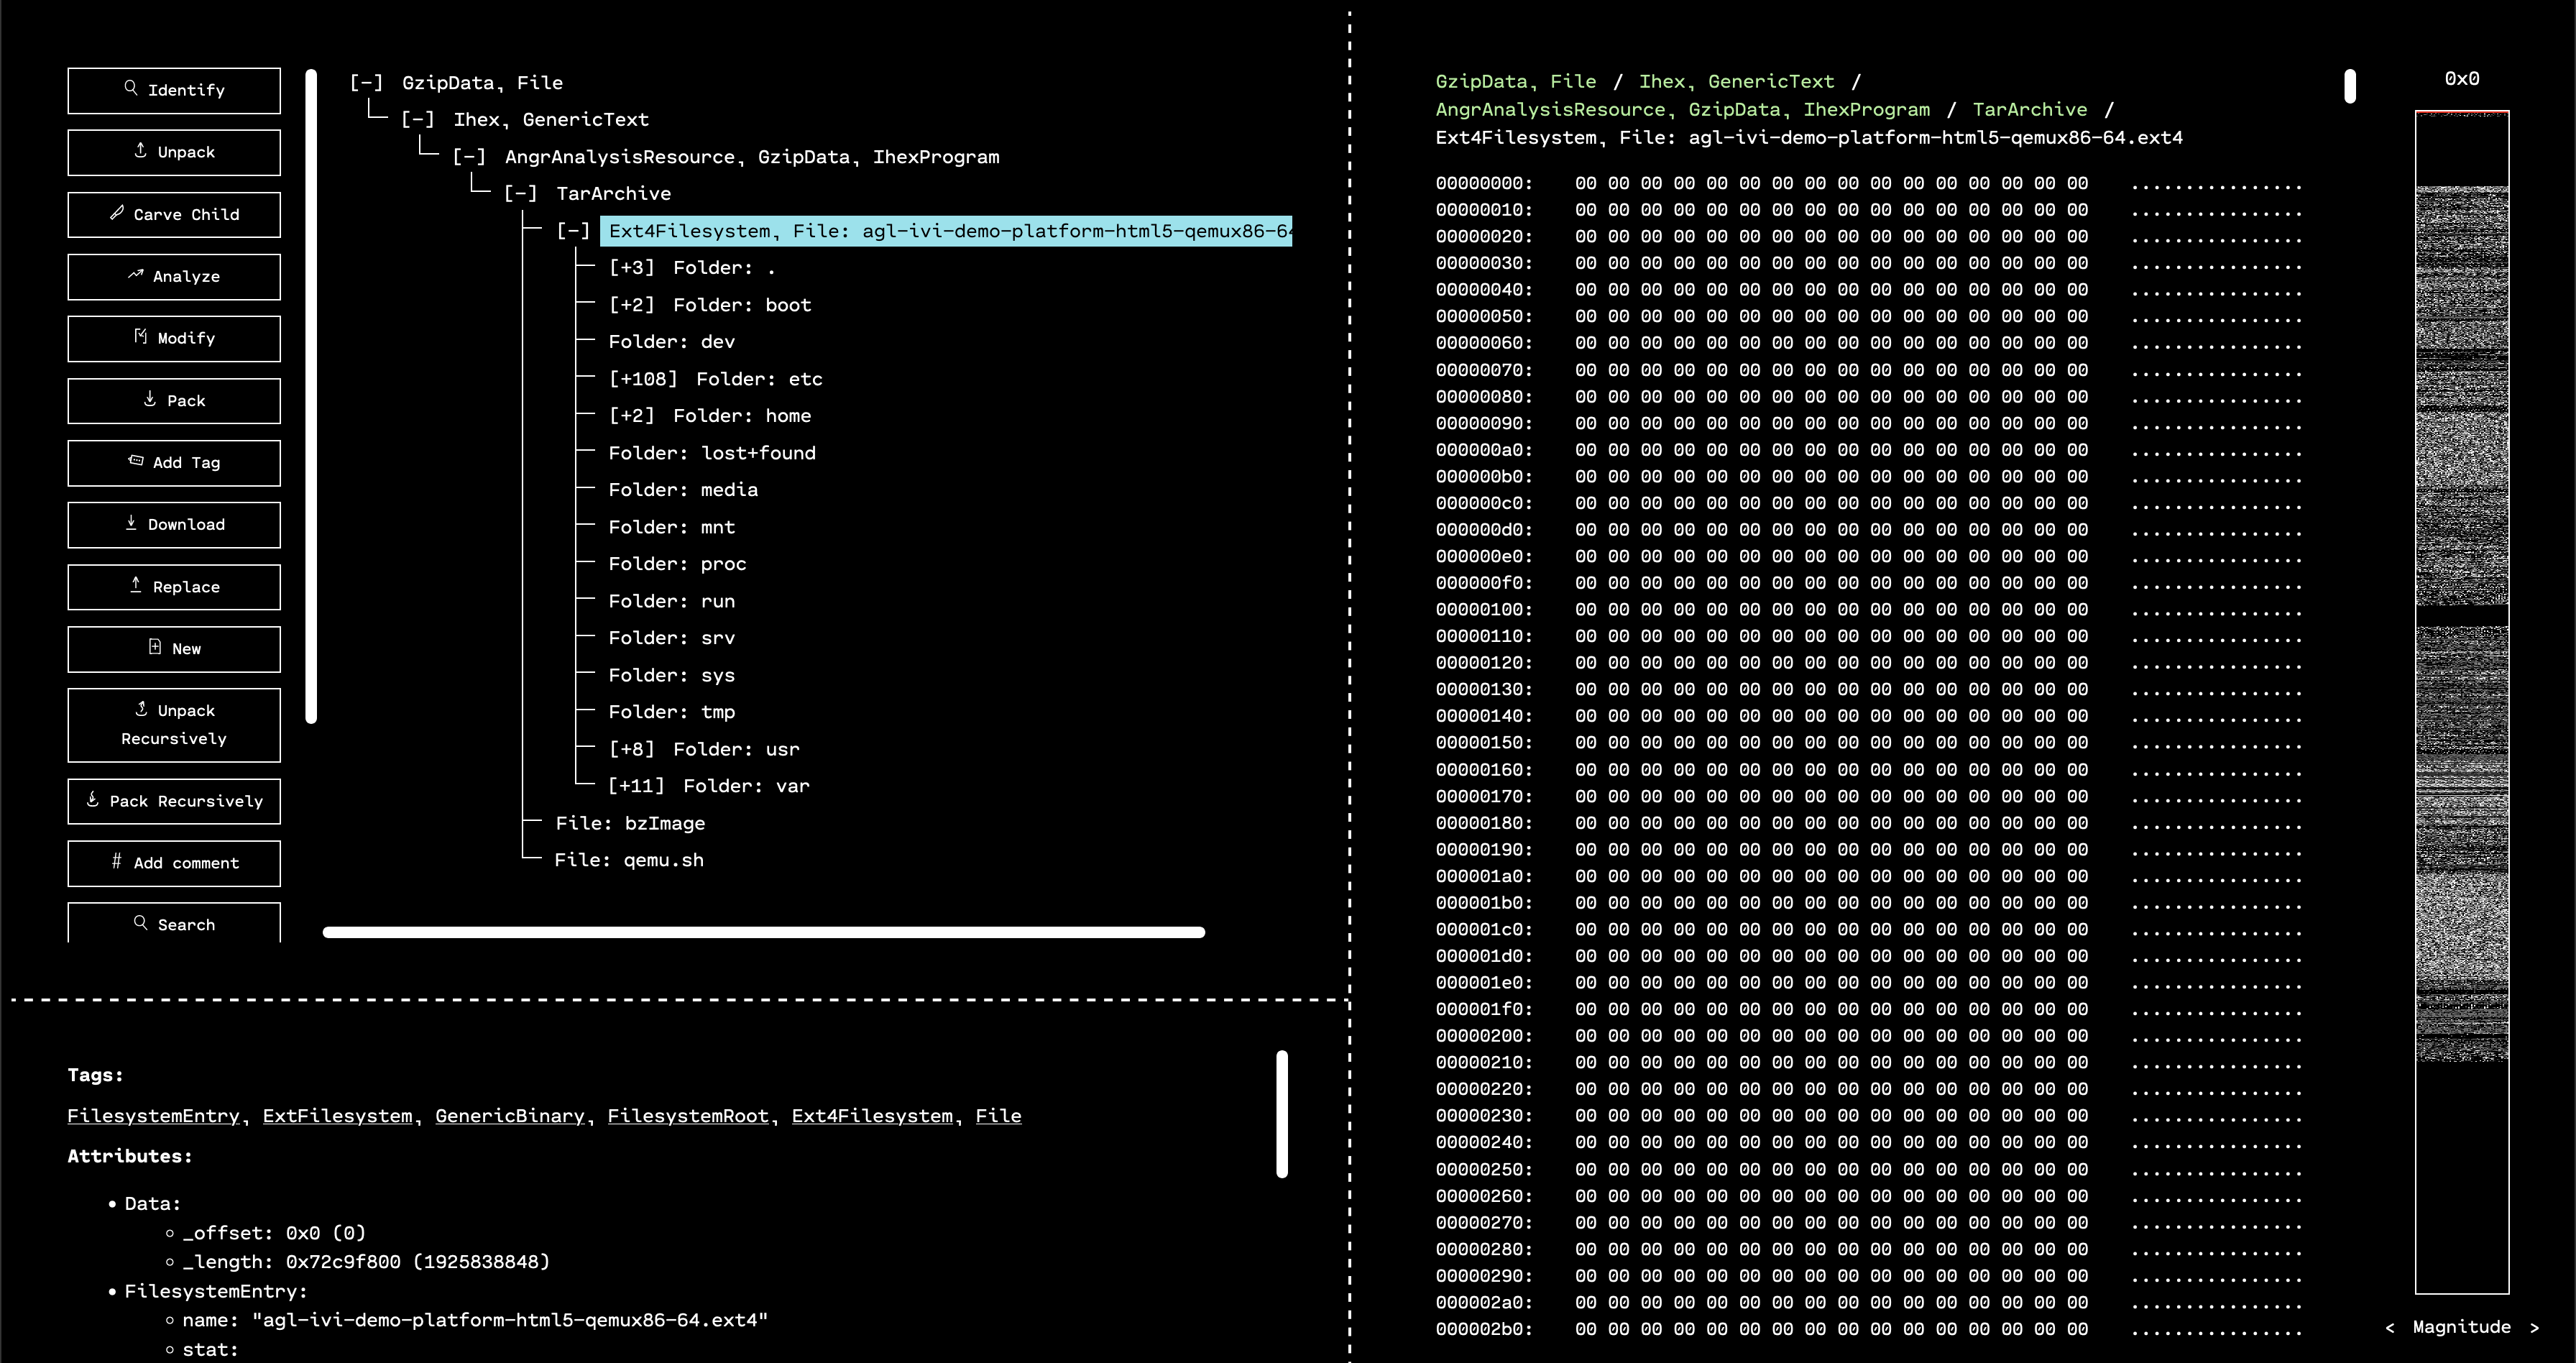
OFRAK has no problem with EXT filesystems, so we can select that resource and hit “Unpack” to explore this firmware further.
From here, there are two good paths to proceed. The easiest one is to use OFRAK’s new search feature to look for files containing the string flag{, which is the prefix for flags in this competition.
The second is to notice that in the hint, it mentions etc and connman, both of which are folders inside the AGL filesystem.
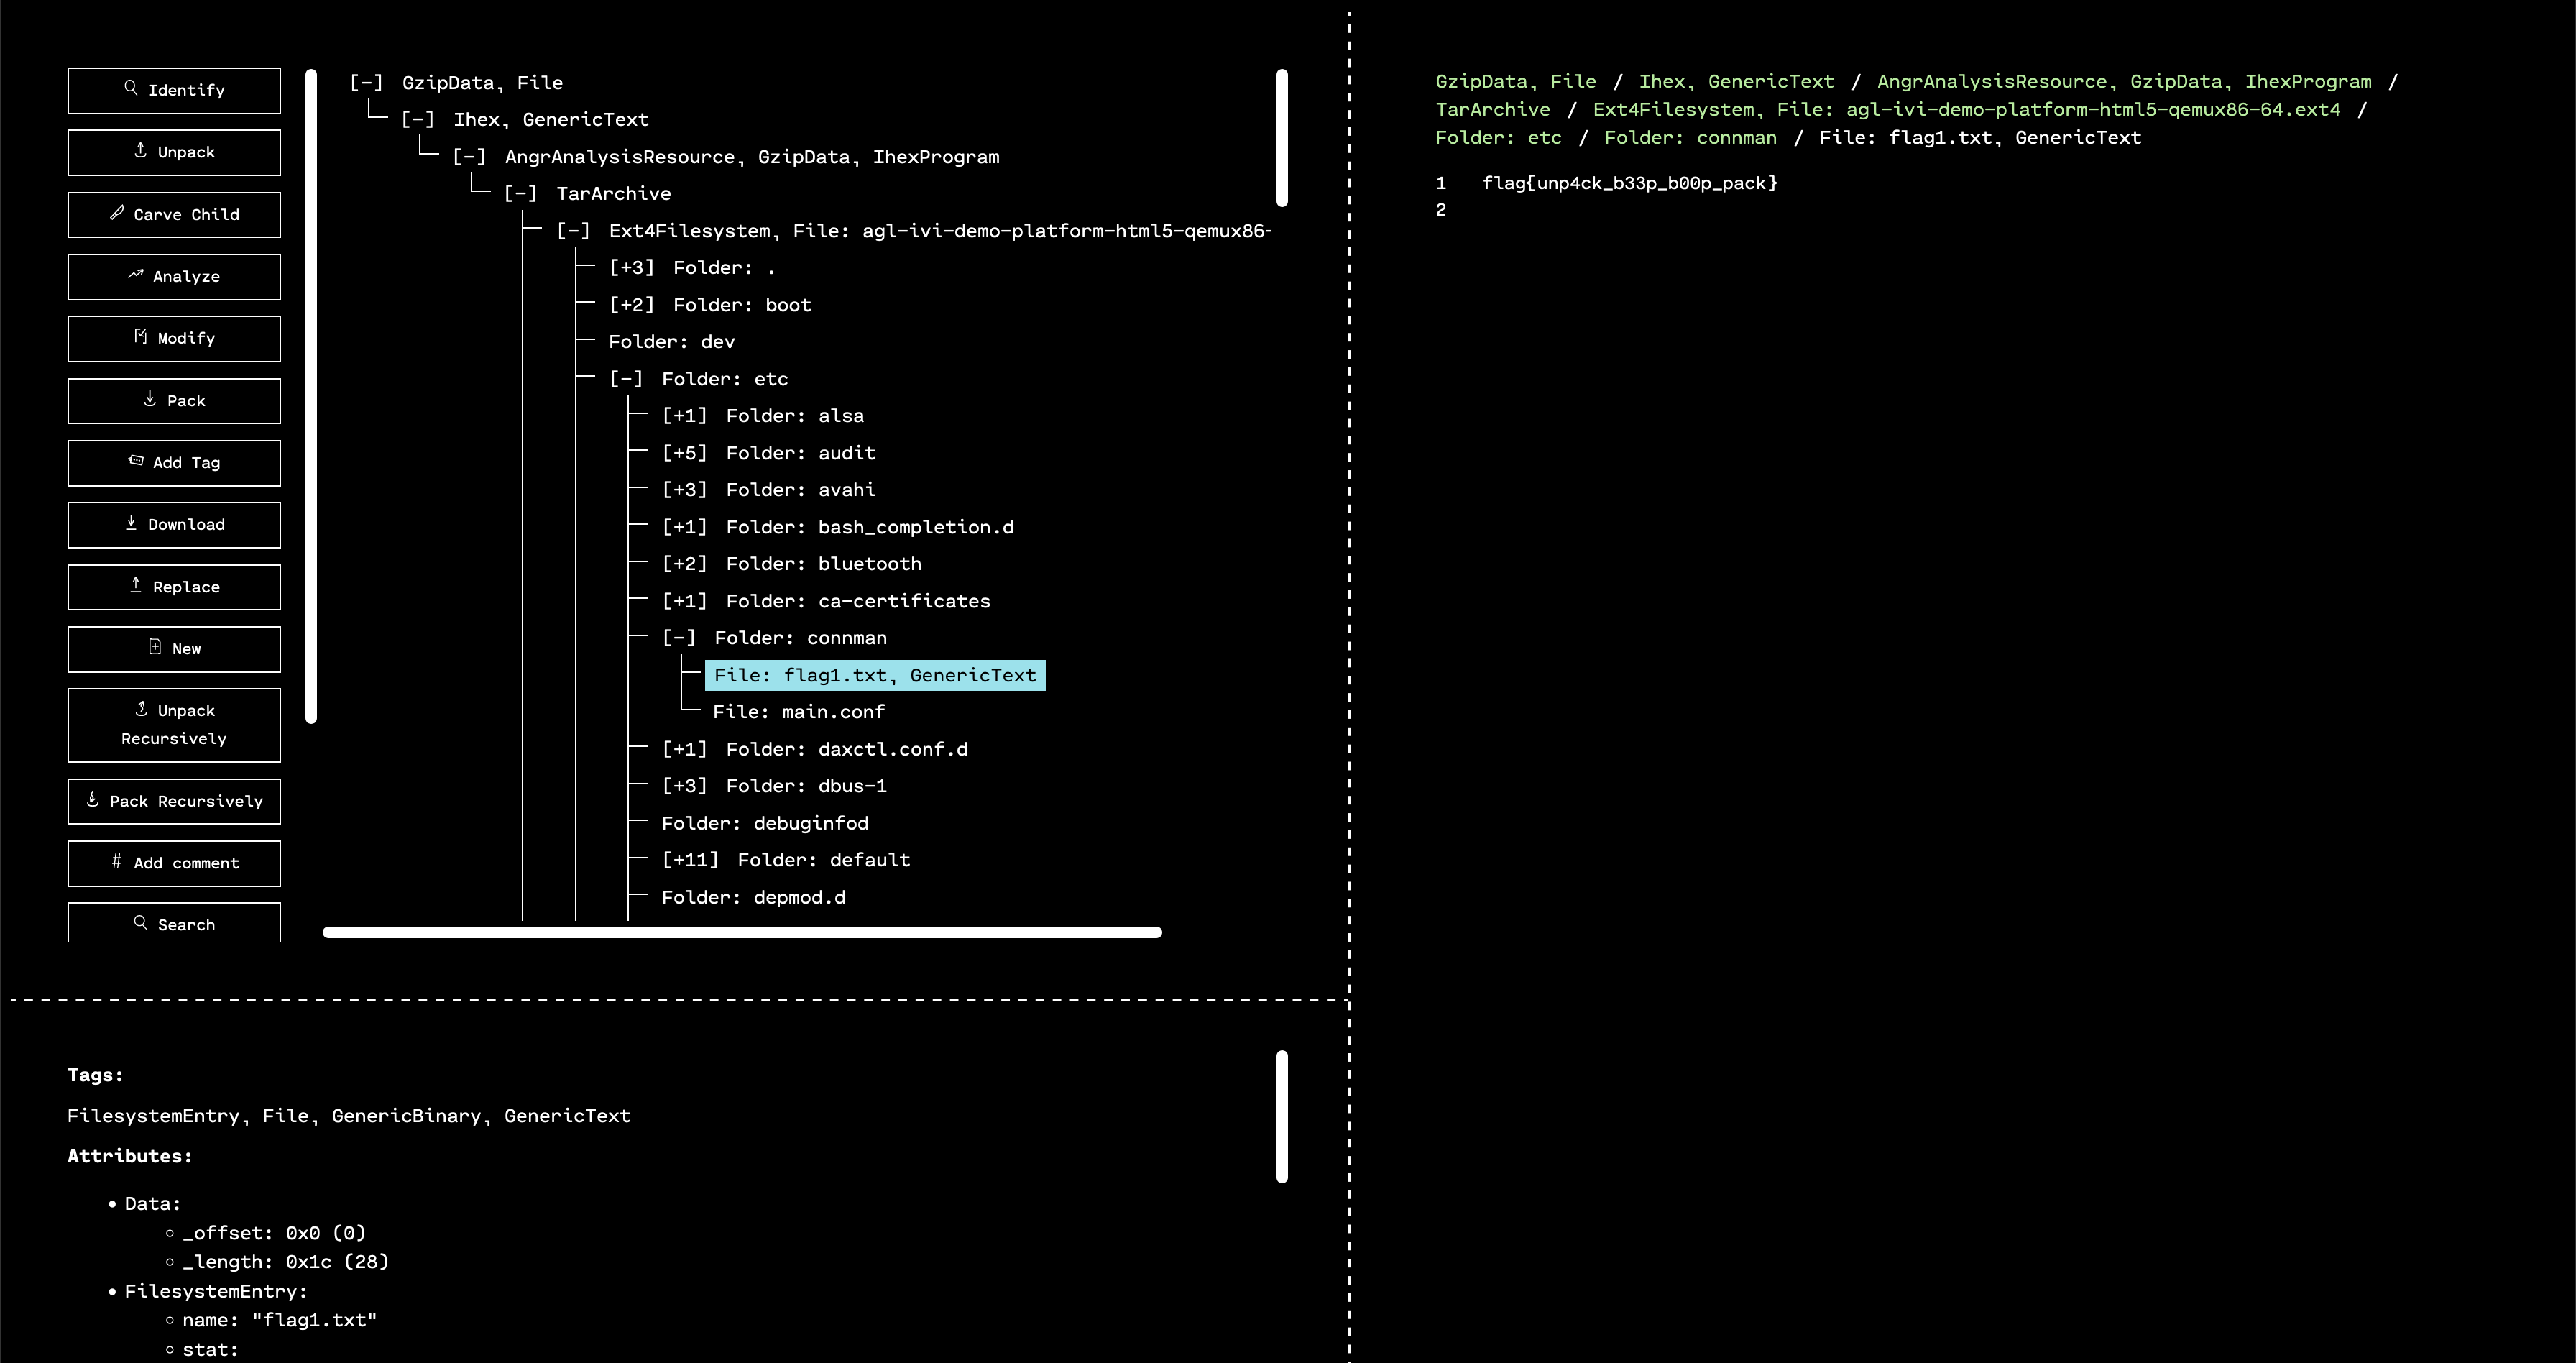
Navigating into the /etc/connman folder, we see a file called flag1.txt. Viewing this gives us the first flag!
flag{unp4ck_b33p_b00p_pack}
Challenge 2: Initialization Vector Infotainment (IVI)
Description: IVe heard there is a flag in the mechanic area, but you can’t decrypt it without a password… Right?
The hint provided with the challenge download makes it clear that this second challenge is in the same unpacked firmware as the first one. As such, the natural first step is to go looking for the “mechanic area” to find the flag.
One option is to use the qemu.sh script to try and emulate the IVI. Then it might become apparent what the description means by “mechanic area.” However, this is not necessary if you know that “apps” for Automotive Grade Linux are stored in /usr/wam_apps/<app name> in the filesystem.
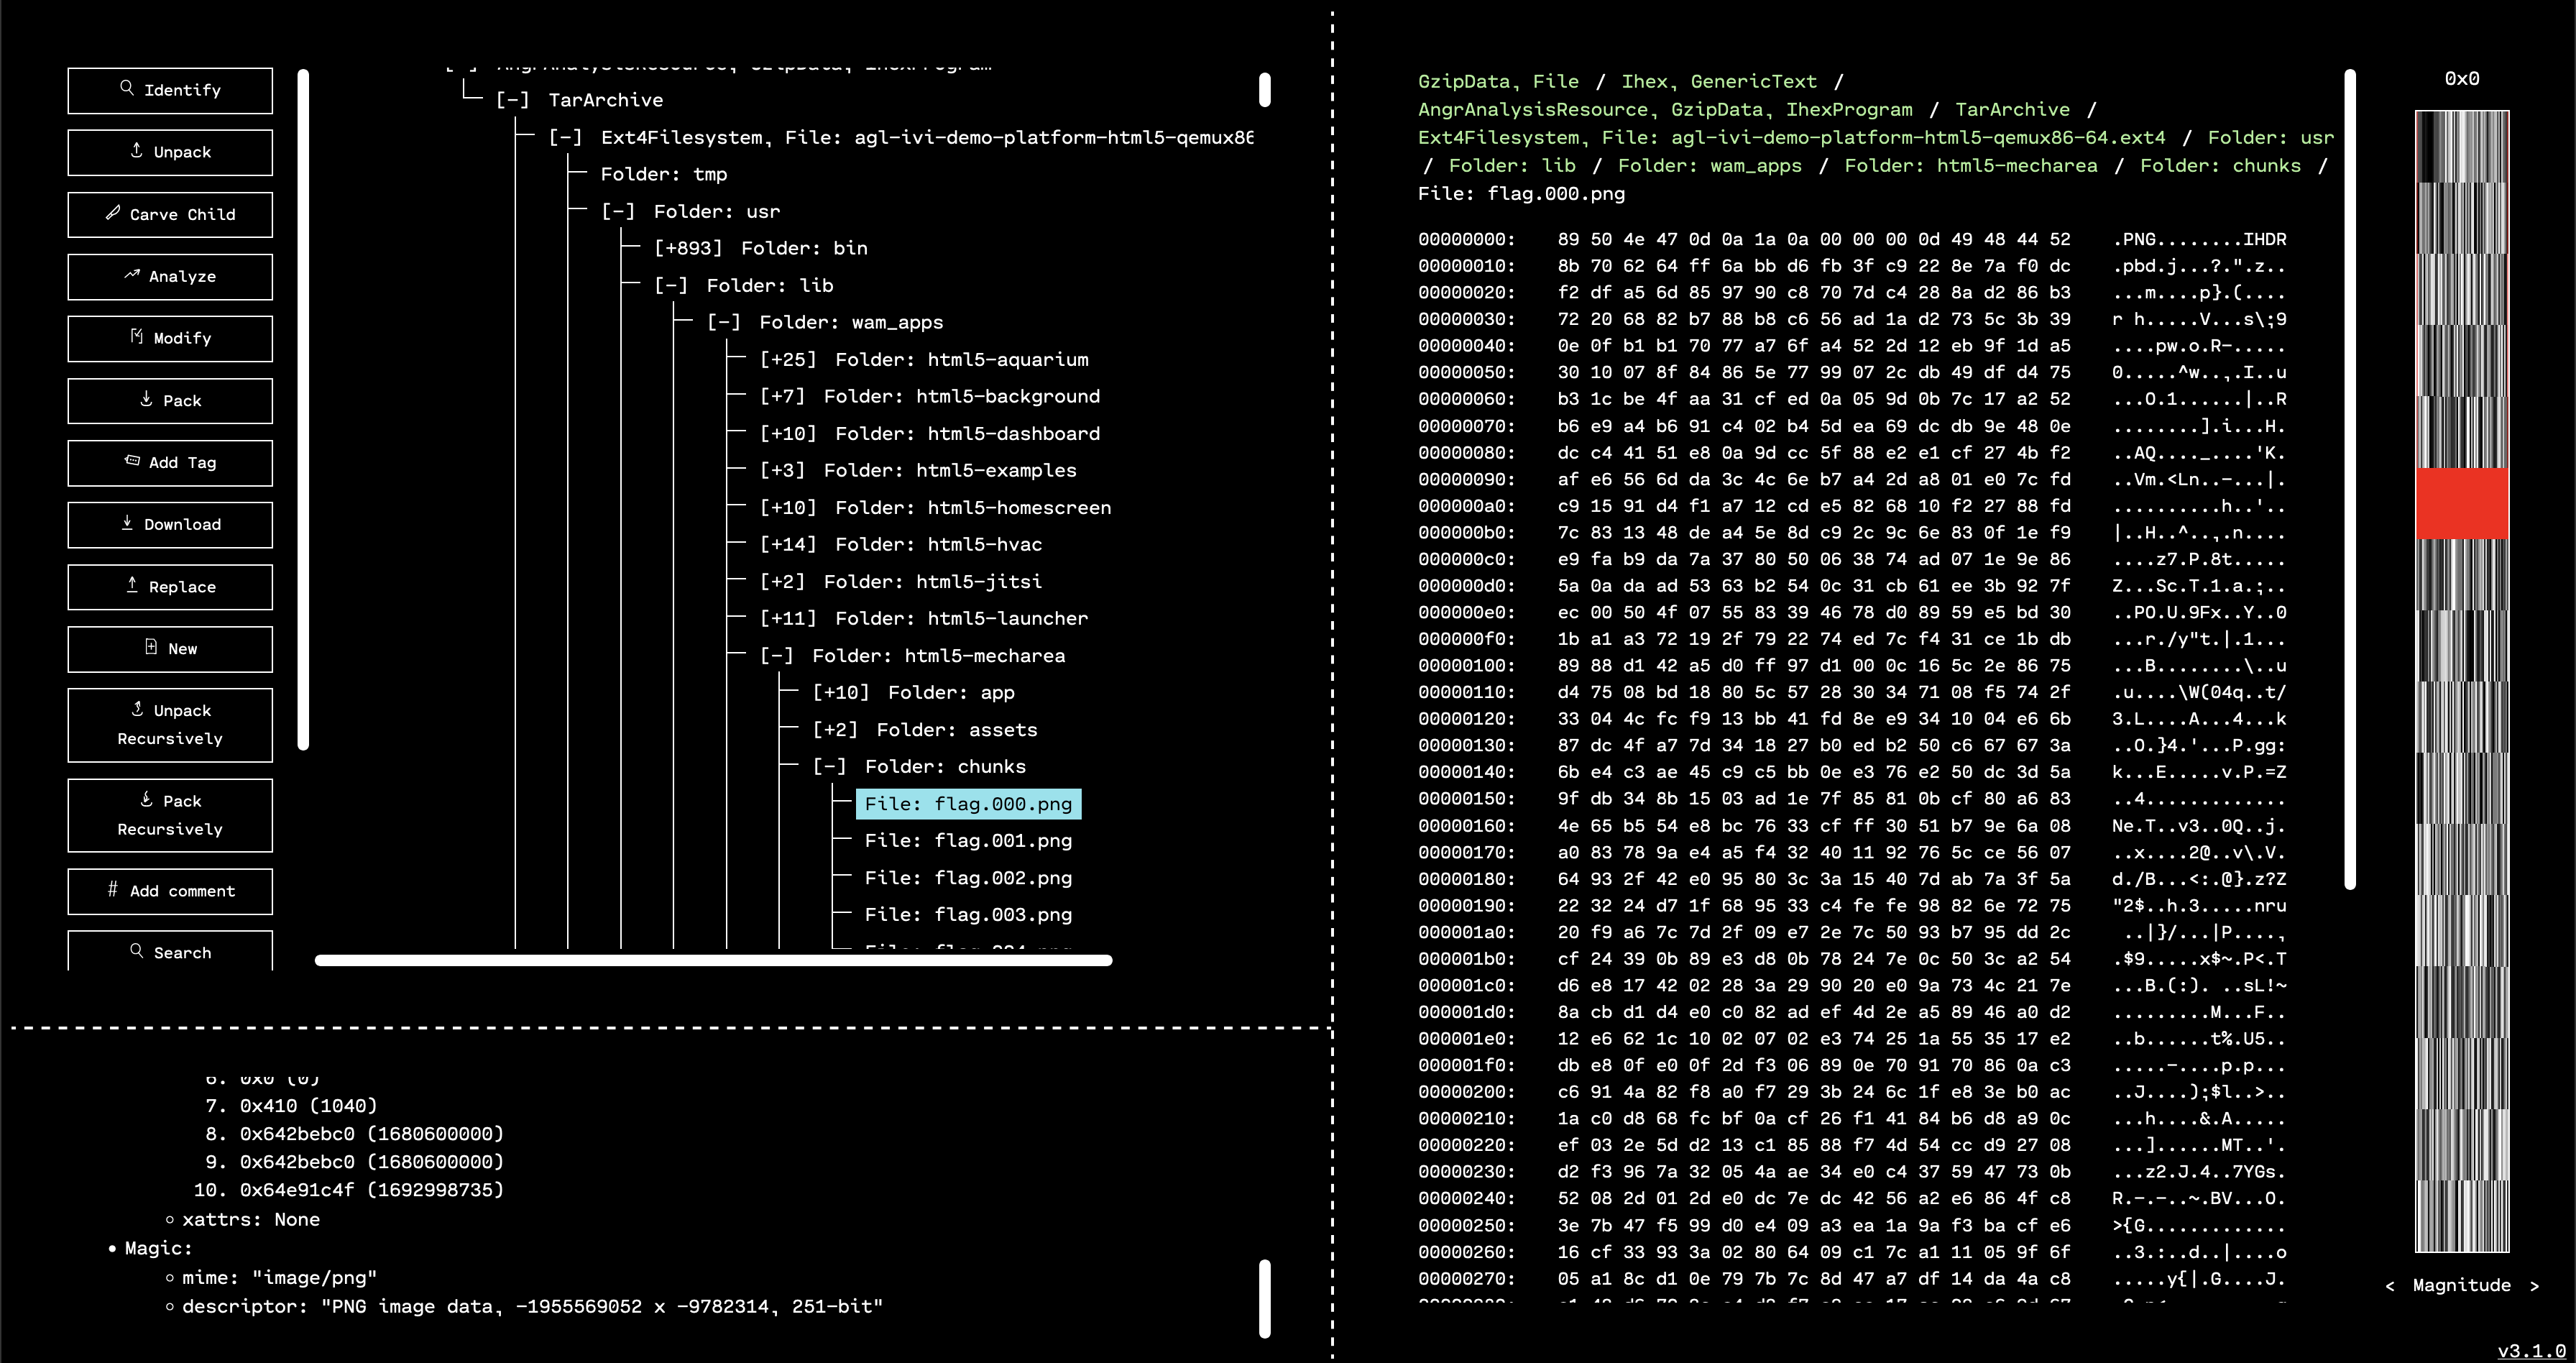
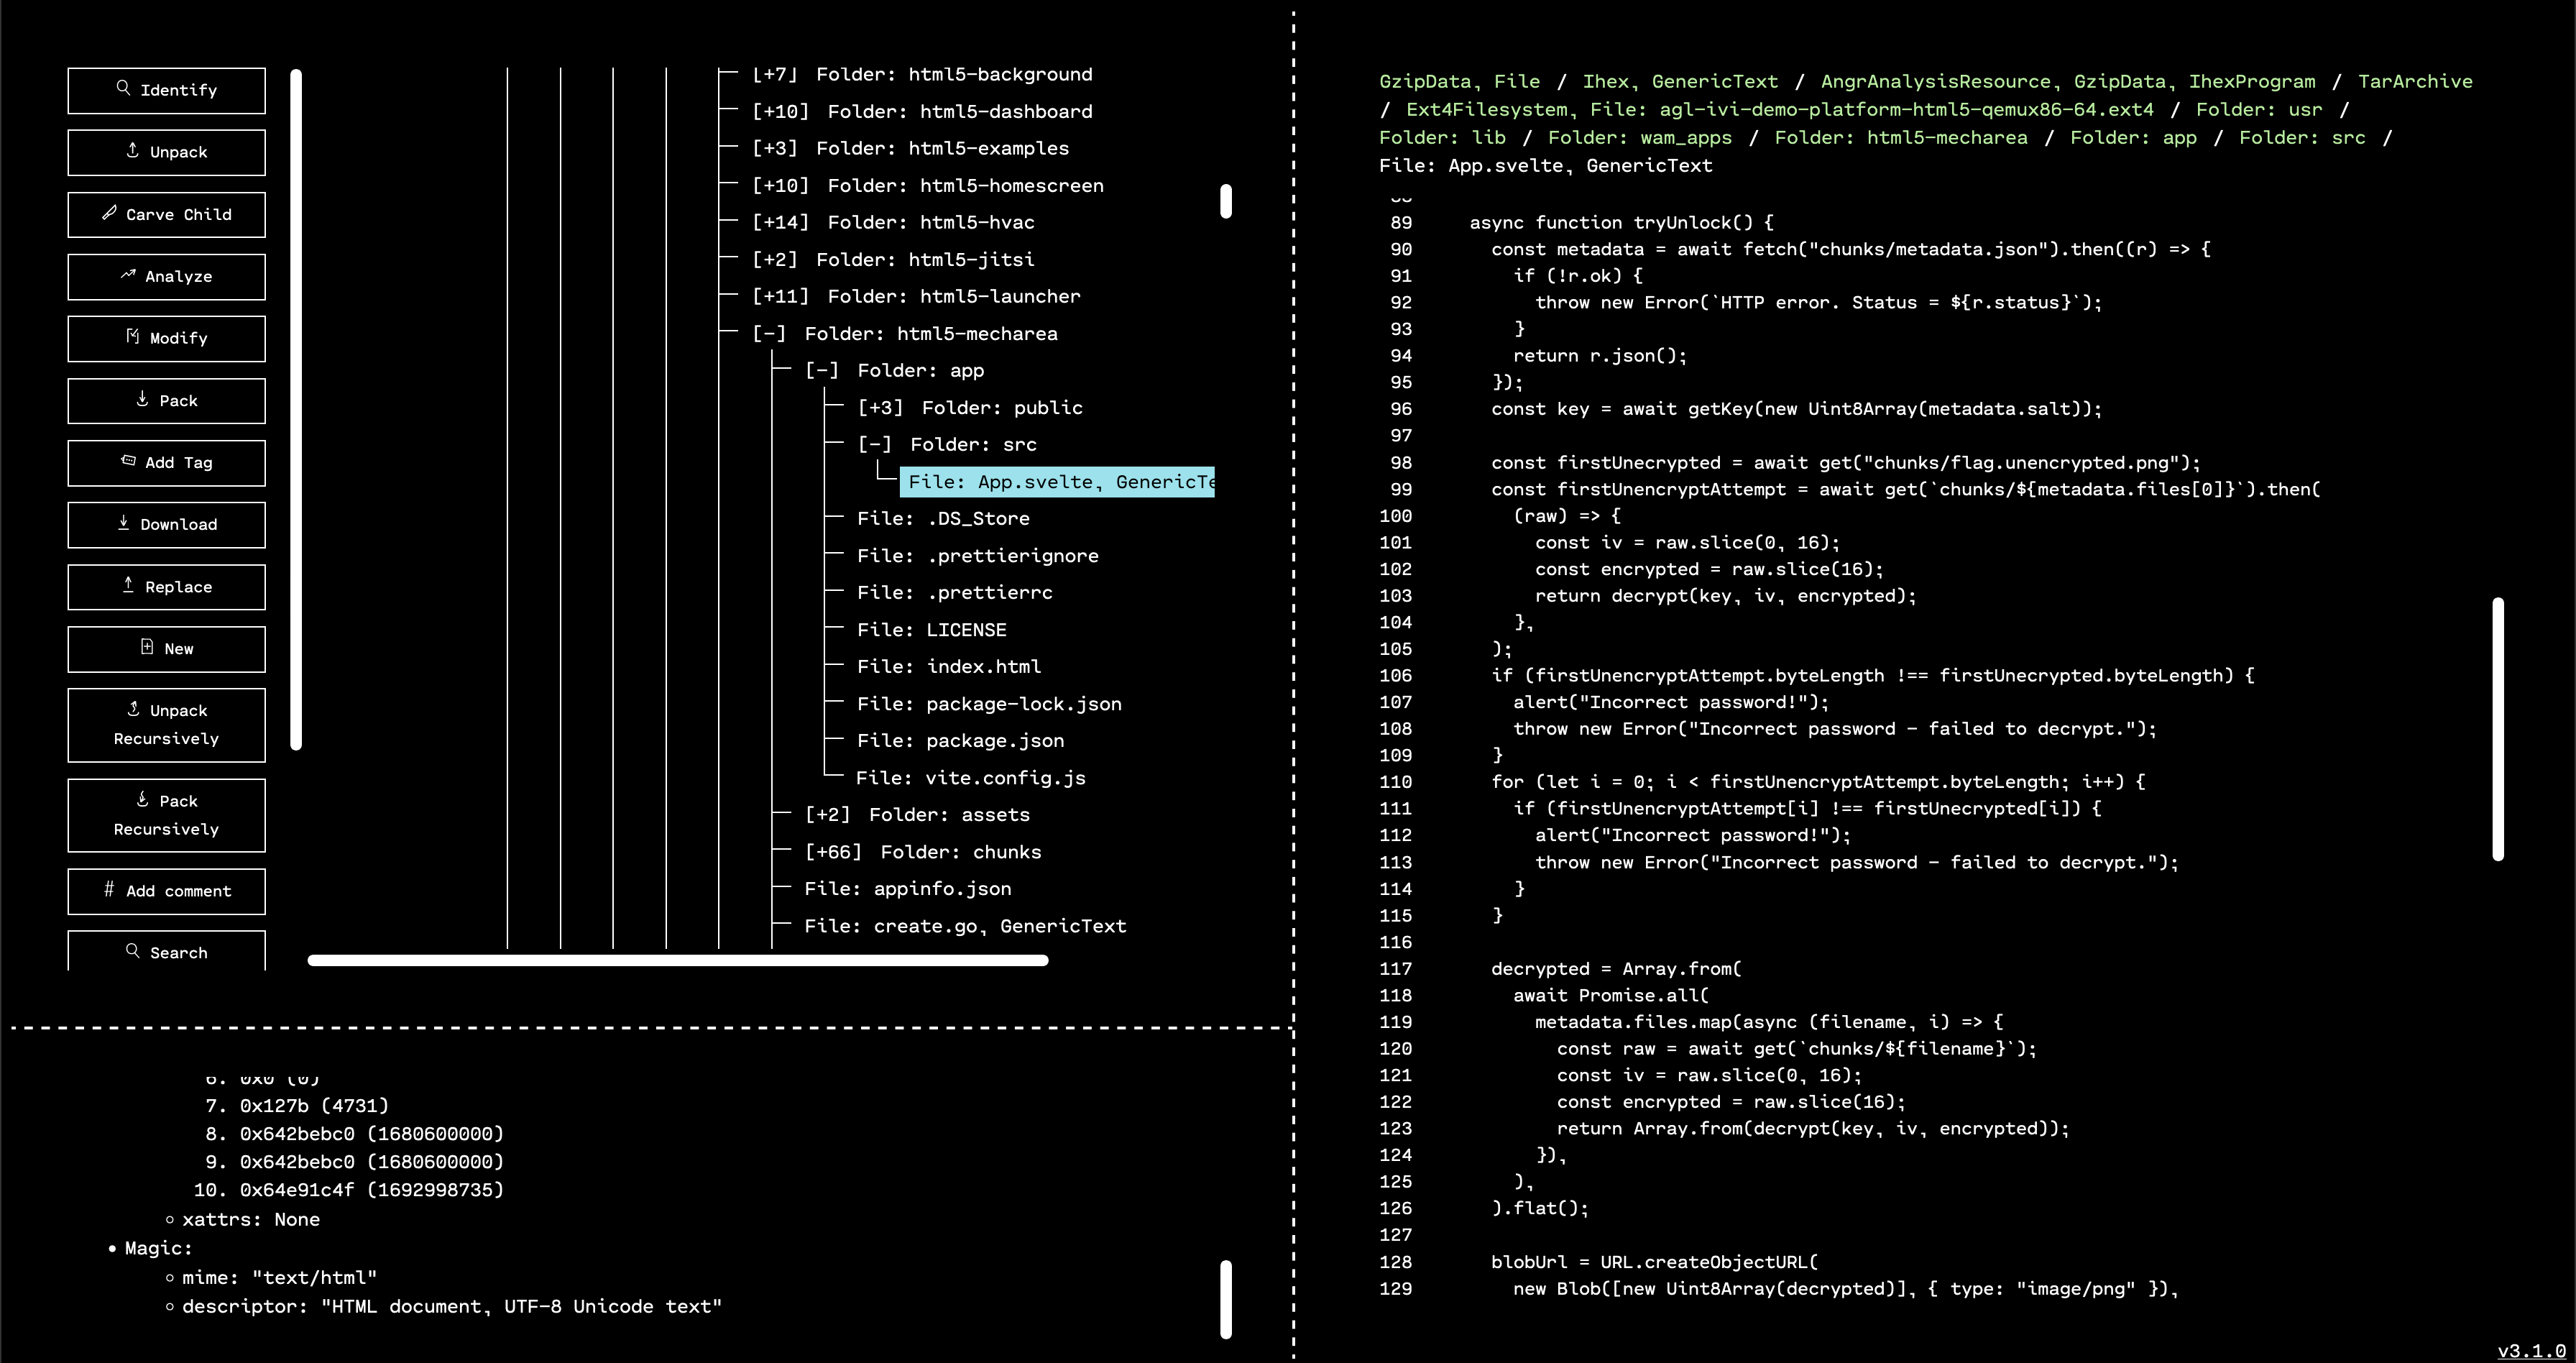
Navigating directly to that directory, we can see that there is an app called html5-mecharea. One subdirectory of that folder is called chunks, and contains many files with the name flag.XXX.png. This is a pretty good hint that we’re on the right track.
The only problem is that if we try to view any of those PNG files, they appear corrupted.
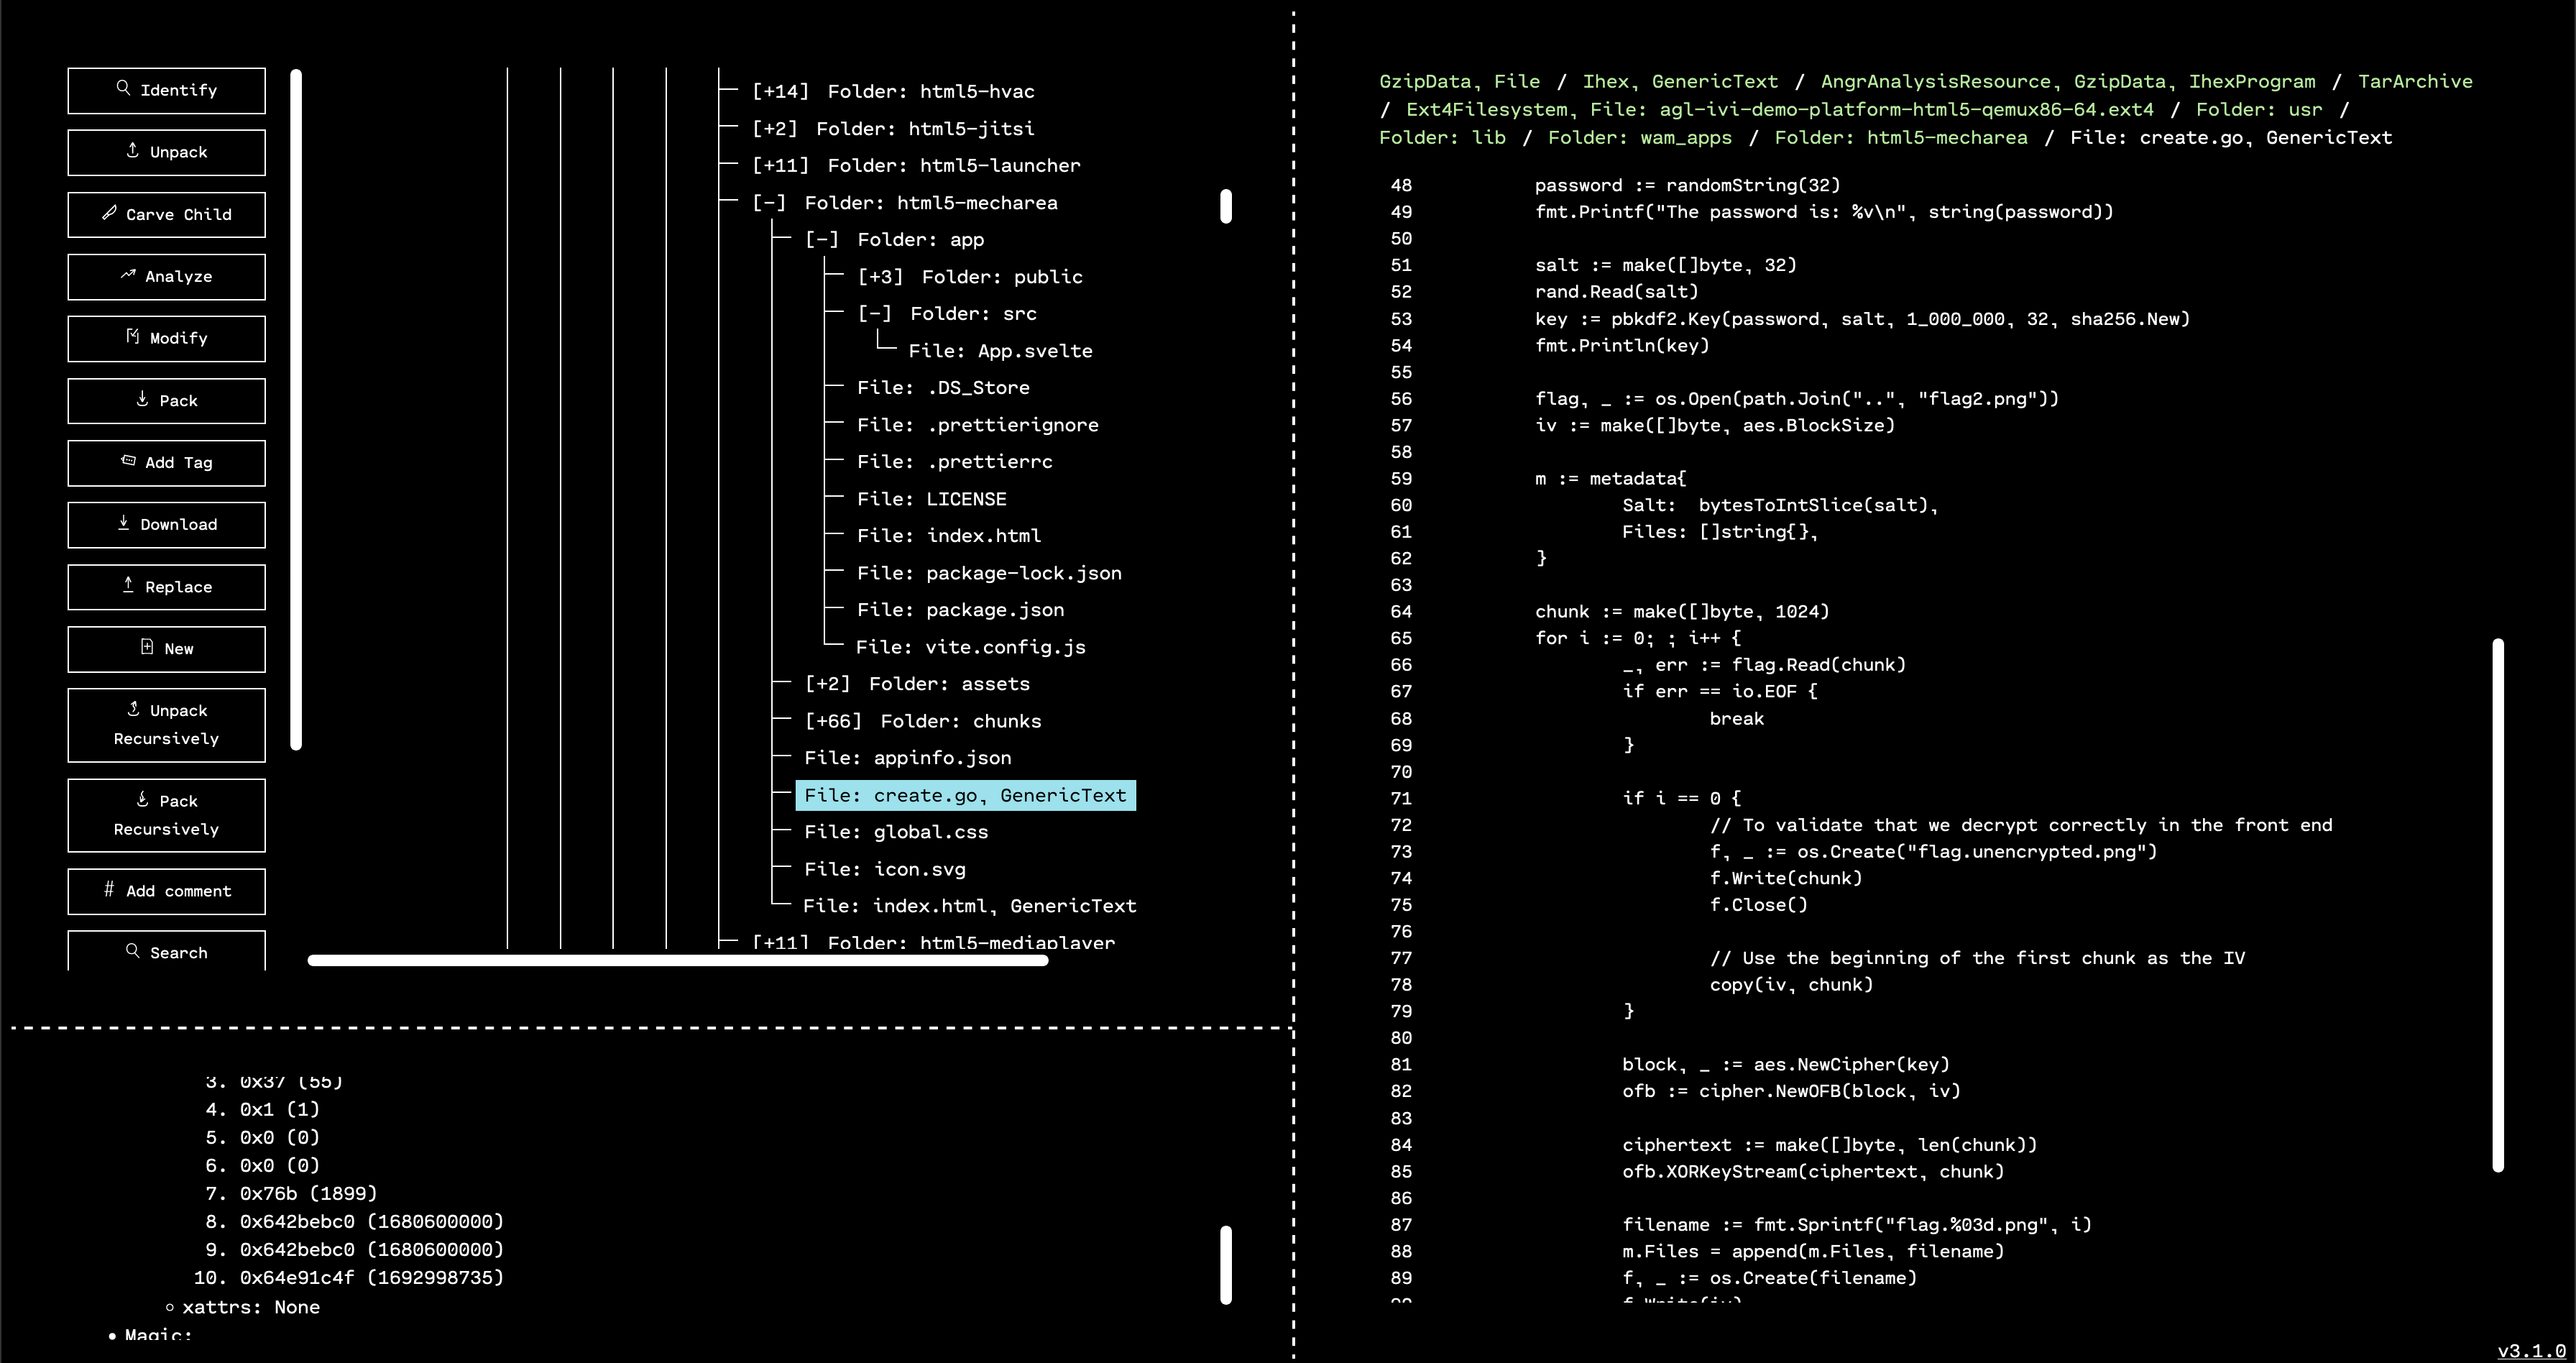
Poking around the folder a bit more, we see two useful files: create.go, and app/src/App.svelte. It looks like create.go was used to break an image with the flag into chunks, and then encrypt them separately. App.svelte is responsible for taking a password from a user, and using that to try and decrypt the chunks into a viewable image.
create.go seems to be a Golang program to generate a (truly) random password string, use PBKDF2 to generate an AES key from the password, generate a truly random IV, break an image into 1024-byte chunks, encrypt each chunk with AES in OFB mode using the same key and IV, and then dump the encrypted chunks to disk.
Similarly, App.svelte does the inverse process: get a passphrase from a user, do PBKDF2 key derivation, load chunks of an image and try to decrypt them, then concatenate and display the decrypted result.
Looking at these two source files, it’s not apparent that the implementation of randomness or the crypto functions themselves are unsafe. Instead, the most eyebrow-raising aspect (as hinted by the challenge description and title) is the reuse of the same key and Initialization Vector for every chunk of plaintext.
In the OFB mode of AES, the key and IV are the inputs to the AES block cipher, and the output is chained into the next block. Then all of the blocks are used as the source of randomness for a one-time pad. Specifically, they are XORed with the plaintext to get the ciphertext. In other words, the same key and IV generate the same “randomness,” which is then XORed with each plaintext chunk to make a ciphertext chunk.
One fun feature of the XOR function is that any value is its own inverse under XOR. The XOR function is also commutative and associative. This means that the following is true if rand_1 == rand_2, which they will be because the same key and IV generate the same randomness:
cipher_1 XOR cipher_2 == (plain_1 XOR rand_1) XOR (plain_2 XOR rand_2)
                      == (plain_1 XOR plain_2) XOR (rand_1 XOR rand_2)
                      == (plain_1 XOR plain_2) XOR 0000000 ... 0000000
                      == plain_1 XOR plain_2
To reiterate: the resuse of the same key and IV tell us that the rand_N values will be the same for all of the ciphertexts. This tells us that the result of XORing any two ciphertexts together (when the same key and IV are used in OFB mode) is the two plaintexts XORed together.
Luckily, based on a closer inspection of the source, one of the chunks is saved unencrypted in the chunks folder. This is used in the code for determining if the passphrase is correct, and that the beginning of the image was successfully decrypted. But we can use it to XOR out the resulting parts of the plaintext. Therefore, we are able to do the following for every ciphertext chunk number N to eventually get back all of the plain text:
plain_1 XOR cipher_1 XOR cipher_N == plain_1 XOR (plain_1 XOR plain_N)
(by above reasoning)
                                  == (plain_1 XOR plain_1) XOR plain_N
                                  == 00000000 ... 00000000 XOR plain_N
                                  == plain_N
The last step is to write a little code to do this for us. A simple solution in Golang is included below, but should be straightforward to do in your favorite programming language.
					package main

import (
	"crypto/aes"
	"crypto/subtle"
	"os"
	"sort"
)

func main() {
	outfile, _ := os.Create("outfile.png")

	os.Chdir("chunks")
	chunkdir, _ := os.Open(".")
	filenames, _ := chunkdir.Readdirnames(0)
	sort.Strings(filenames)

	var lastEncrypted []byte = nil
	lastDecrypted, _ := os.ReadFile("flag.unencrypted.png")
	for _, filename := range filenames {
		if filename == "flag.unencrypted.png" {
			continue
		}

		data, _ := os.ReadFile(filename)
		encryptedData := data[aes.BlockSize:]
		xorData := make([]byte, len(encryptedData))

		if lastEncrypted != nil {
			outfile.Write(lastDecrypted)
			subtle.XORBytes(xorData, encryptedData, lastEncrypted)
			subtle.XORBytes(lastDecrypted, lastDecrypted, xorData)
		}

		lastEncrypted = encryptedData
	}

	outfile.Write(lastDecrypted)
	outfile.Close()
}
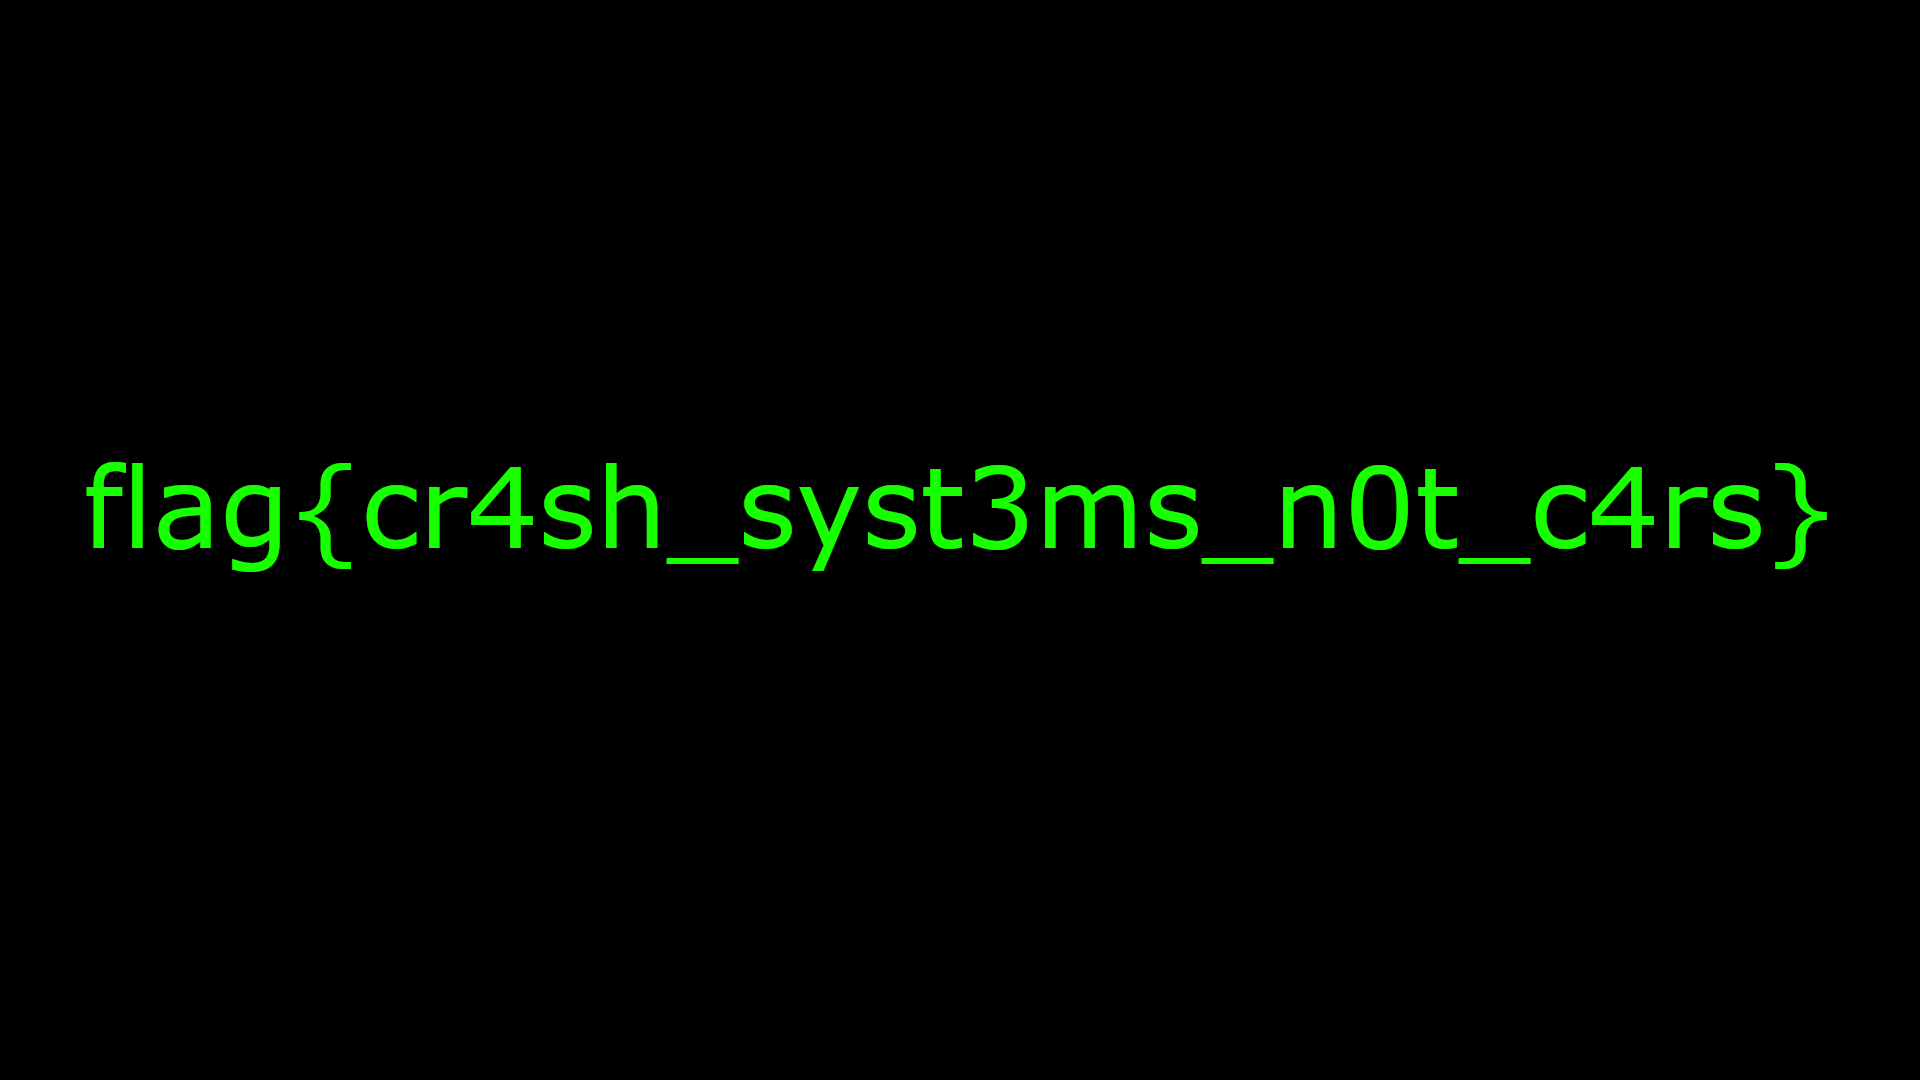
When we do this and concatenate all of the plaintexts in the right order, we get a valid PNG image that contains the flag.
flag{cr4sh_syst3ms_n0t_c4rs}Brief Tour of OFRAK 3.2.0
In the meantime, we published OFRAK 3.2.0 to PyPI on August 10!
As always, a detailed list of changes can be viewed in the OFRAK Changelog.
We’ve had several new features and quality of life improvements since our last major release.
Projects
OFRAK 3.2.0 introduces OFRAK Projects. Projects are collections of OFRAK scripts and binaries that help users organize, save, and share their OFRAK work. Acessable from the main OFRAK start page, users can now create, continue or clone an OFRAK project with ease. With an OFRAK Project you can run scripts on startup, easily access them from the OFRAK Resource interface, and link them to their relavent binaries. Open our example project to get started and then share your projects with the world, we can’t wait to see what you make!
Search Bars
OFRAK 3.2.0 also introduces a long awaited feature, search bars. Two new search bars are available in the OFRAK Resource interface, one in the Resource Tree pane, and one in the Hex View pane. Each search bar allows the user to search for exact, case insensitive, or regular expression strings and bytes. The Resource Tree search bar will filter the tree for resources containing the search query while the Hex View search bar will scroll to and itereate on the instances of the query. The resource search functionality is also available in the python API using resource.search_data.
Additional Changes
- Jefferson Filesystem (JFFS) packing/repacking support.
- Intel Hex (ihex) packing/repacking support (useful for our Car Hacking Village DEFCON challenges).
- EXT versions 2 – 4 packing/repacking support.
Learn More at OFRAK.COM
Introducing RASPUTIN: Automated Hardware Reversing by Red Balloon Security
Hacking Secure Software Update Systems at the DEF CON 32 Car Hacking Village
Red Balloon Security Identifies Critical Vulnerability in Kratos NGC-IDU
Hacking In-Vehicle Infotainment Systems with OFRAK 3.2.0 at DEF CON 31
Brief Tour of OFRAK 3.1.0
We published OFRAK 3.1.0 to PyPI on June 12, 2023!
As always, a detailed list of changes can be viewed in the OFRAK Changelog.
We’ve had several new features and quality of life improvements since our last major release.
Themes, Colors, and Settings
In OFRAK 3.1.0 we’ve added a new settings window. From here you can switch to “dark mode” or “light mode,” and customize any color in the OFRAK GUI. In addition to the customization features, we’ve added some more advanced settings described below.
Experimental OFRAK Features
OFRAK 3.1.0 now gives you access to new, experimental features. Selecting “Enable Experimental OFRAK Features” in the settings pane will enable new toolbar buttons. “So, what are experimental features?” you might ask. Experimental features are the latest and greatest OFRAK changes. But beware! They might be buggier than other parts of OFRAK, and are subject to change in later versions. We are including two new, experimental OFRAK features in this release: running any component in the GUI, and running pre-recorded scripts in the GUI.
Run Component
In the past, the OFRAK GUI only had a limited subset of the full suite of OFRAK Components available. Now, with the new Run Component feature, you have access to every OFRAK component on your system. When selecting which component to run, you can filter by type (Unpacker, Analyzer, Modifier, and Packer), and by target tags. Selecting a component will reveal the ComponentConfig so you can fill in the necessary parameters and start using the full power of OFRAK.
Run Script
In our last update, we gave you the ability to generate a script based on your actions. In OFRAK 3.1.0 you can now run those scripts directly in the GUI. Take your generated script, make modifications to it, or even totally rewrite it, then run the script, and see what effect it has on your binary live in the OFRAK GUI using this new, experimental feature.
Additional Features
Along with the major new features above, we have these new minor features in OFRAK 3.1.0.
- ElfLoadAlignmentModifier finds free space in a binary between adjacent PT_LOAD segments.
- Select an alternative backend server in the settings pane under “developer options” instead of modifying
backendUrlin stores.js. - Copy your generated script directly to the clipboard with a new button option.
- Navigate the OFRAK GUI resource tree with a USB Dance Dance Revolution pad.
Bug Fixes
The following bug fixes are also included in OFRAK 3.1.0.
- Taking an action too soon after loading a large file no longer causes the OFRAK GUI to freeze.
importlib-metadatabumped to version 4.1.3.libmagicandstringstagged as internal dependencies.- The minimap will no longer overlap the version number in the OFRAK GUI.
Learn More at OFRAK.COM
Hacking Randomized Linux Kernel Images at the DEF CON 33 Car Hacking Village
Introducing RASPUTIN: Automated Hardware Reversing by Red Balloon Security
Hacking Secure Software Update Systems at the DEF CON 32 Car Hacking Village
Red Balloon Security Identifies Critical Vulnerability in Kratos NGC-IDU
Hacking In-Vehicle Infotainment Systems with OFRAK 3.2.0 at DEF CON 31
Brief Tour of OFRAK 3.1.0
Alright, listen up y’all, ’cause we’re about to tell you how we took those bland, boring output strings from a Cisco router and turned ’em into something that would make even the most seasoned network engineer crack a smile. And with did it all with the help of SassyStringModifier, an OFRAK component powered by ChatGPT.
First off, we unleashed the power of OFRAK to unpack and extract those ASCII strings from the firmware. OFRAK ain’t no joke, y’all — it’s a tool that can reverse engineer and analyze firmware like nobody’s business. With OFRAK, we were able to extract those strings and get ’em lookin’ real nice and pretty.
But pretty ain’t enough for us — we wanted those strings to have some real sass. So we hit up the ChatGPT API to give ’em a whole new personality. ChatGPT is like a language model on steroids, y’all — it can generate all sorts of natural language responses. And by passing those extracted Cisco strings to ChatGPT, we got ourselves some new, sassified versions of those strings.
Now, you might be wonderin’ what we mean by “sassified.” Well, let us give you an example. A boring old Cisco output string might look like this:
But with the help of ChatGPT and our SassyStringModifier component, we turned it into something like this:
Hot dang, that’s some sass right there! And once we had those new sassified strings, we used OFRAK to patch ’em back into the firmware. OFRAK made it easy as pie to unpack the firmware, locate the original strings and replace ’em with our new, sassified versions, and then repack up a valid firmware image.
So what was the end result, you might be askin’? A Cisco router that was more than just a hunk of metal and wires – it had personality and humor to spare:
This project shows y’all the power of combining different tools and technologies to achieve somethin’ truly unique and creative. And as a language model that’s been trained by the geniuses over at OpenAI, I know a thing or two about the power of natural language processing. When you combine that with the binary-level wizardry of OFRAK, you get a solution that’s both functional and downright hilarious.
So the next time you’re stuck with a boring old router, remember that a little bit of sass can go a long way. Just like us, you can use the power of ChatGPT and OFRAK to give your devices a whole lotta personality. Now go forth and get sassy, y’all!
And one more thing, folks – we’re excited to announce that we’re releasing OFRAK AI as a brand new package on GitHub. That’s right, y’all – now anyone can use our powerful firmware analysis and modification tool alongside ChatGPT to unleash their creativity and customize their devices to their heart’s content. We’re just getting started with OFRAK AI, a repo where we’ll be saving all our AI-fueled OFRAK components. So head on over and give it a spin. We can’t wait to see what y’all come up with!
Learn More at OFRAK.COM
Hacking Randomized Linux Kernel Images at the DEF CON 33 Car Hacking Village
Introducing RASPUTIN: Automated Hardware Reversing by Red Balloon Security
Hacking Secure Software Update Systems at the DEF CON 32 Car Hacking Village
Red Balloon Security Identifies Critical Vulnerability in Kratos NGC-IDU
Hacking In-Vehicle Infotainment Systems with OFRAK 3.2.0 at DEF CON 31
Brief Tour of OFRAK 3.1.0
One of the neat features we’ve had in mind for the OFRAK GUI, almost since it came out, is to be able to show you a Python script version of your actions in the GUI.
This is helpful for a few reasons: remembering what you did, learning the Python API, generalizing your work in the GUI to a reusable script or component, and probably more.
Well, now this feature is here in OFRAK version 3.0.0!
Now whenever using the GUI, it is possible to click the “Show Script” button to view or download the generated Python script. There are few basic types of API calls you’ll see in the generated scripts. The simplest ones are invocations of unpack, analyze, identify, etc. These correspond directly with the buttons in the GUI. Another type you might see are the modifier invocations that implement the string or bytes find-and-replace buttons in the GUI. There will also be a lot of get_only_child calls. What’s up with that? Well, OFRAK doesn’t know why the user selected the resources they clicked, so when you select a resource and run an action on it, OFRAK needs to come up with some logic to specify that resource before, for example, unpacking it. This generated logic may or may not match with why you actually did click the resource for some further action. It could be a good exercise to look for these in the generated script and consider how to alter these queries to fit what’s in your head.
This code isn’t necessarily going to “just work” like magic – for example, it needs the file you are using as the root resource to be in the script’s working directory, so that it can load it. If you run it on another file, the generated resource selection logic may be too specific to the file the script was initially generated on. But we encourage you to try it out – do a bit of exploration in the GUI, then hit “Show Script” to see the Python version. If you’ve only played around with the GUI, this could be a sign to try your hand at Python.
A couple helpful little arguments were also added to the command-line interface in this update, which are worth mentioning (these are in the subcommands gui, identify, and unpack). The --import <file-or-module> (shorthand: -i <file-or-module>) option allows specifying additional Python modules or files to discover when launching OFRAK. This is especially helpful when working on a small extension for OFRAK, defining some new components, tags, etc. because the file with those definitions can be imported to try out the new code live. The other argument is -f <file-path> which passes a file to be immediately loaded into the GUI, saving the step of dragging it into the GUI after launching. Both of these arguments can be repeated multiple times, to discover multiple modules or load multiple files as Resources.
Oh, and one more thing. The generated scripts will get much more interesting as we add more features to the GUI. In particular, the upcoming GUI interface to run any OFRAK component will allow a lot more to be done with the GUI. You’ll be able to select and run any component, and see that invocation show up in the generated script.
Okay, that’s all for now — if you haven’t already, go and pip install ofrak! Happy OFRAKing!
Learn More at OFRAK.COM
Hacking Randomized Linux Kernel Images at the DEF CON 33 Car Hacking Village
Introducing RASPUTIN: Automated Hardware Reversing by Red Balloon Security
Hacking Secure Software Update Systems at the DEF CON 32 Car Hacking Village
Red Balloon Security Identifies Critical Vulnerability in Kratos NGC-IDU
Hacking In-Vehicle Infotainment Systems with OFRAK 3.2.0 at DEF CON 31
Brief Tour of OFRAK 3.1.0
One of the most useful features in OFRAK is the powerful PatchMaker library, providing capabilities to build and inject C source code into existing binaries. OFRAK’s FunctionReplacementModifier provides an easy-to-use API that leverages the PatchMaker to replace one or more functions in a binary. This post will walk through how this works.
Consider the following program, validate_input.c, which rejects any input that contains the character “}”:
					int validate_input(char* user_input){
    int i = 0;

    while(user_input[i]){
        if (user_input[i] == '}'){
            return 0;
        }
        i++;
    }
    return 1;
}

int main(int argc, char** argv){
    char* input = argv[1];

    if (validate_input(input)){
        printf("Input accepted!\n");
        return 0;
    }else{
        printf("Input rejected!\n");
        return 1;
    }
}
We can build this program and quickly validate that it works as expected:
					>> gcc -o validate_input validate_input.c
>> ./validate_input "input1"
Input accepted!
>> ./validate_input "input}1"
Input rejected!
>>
Now let’s imagine that, for whatever reason, we need to change this program such that “}” is valid input if it is escaped with a backslash (the Voldemort of ASCII characters – never literally type it out unless absolutely necessary). Why does the customer need “}” in their input sometimes? Don’t ask me, I’m just the engineer.
A typical forward-engineering solution would involve updating the validate_input inside of our source file to something like this:
					int validate_input(char* user_input){
    int i = 0;

    while(user_input[i]){
        if (user_input[i] == '}'){
            // If this is the first character (no prev char) or the prev char is NOT backslash, fail validation
            if (i == 0 || user_input[i-1] != '\\') return 0;
        }
        i++;
    }
    return 1;
}
Next, the forward-engineer would recompile the program.
Consider, however, that you need to apply this patch with the constraint that you cannot recompile the entire program (maybe you don’t have the complete source code or toolchains needed to recompile, or just do not want to). How might you approach this?
Maybe you are an assembly whiz and enjoy writing, injecting, and debugging shellcode. For the non-masochists, however, OFRAK’s FunctionReplacementModifier allows us to easily take the above C patch (let’s call it validate_input_patch.c) and inject it into the binary without recompiling the entire binary or needing access to source code.
The OFRAK script to do this is pretty straightforward! The FunctionReplacementModifier takes a handful of arguments that are easy to summarize:
- Where are the source files? In this case, we should put all of our source files in a directory called “patch_src”.
- What function(s) are being replaced and what source file has the replacement?
- What are the parameters for compiled code? Most of this stuff is honestly irrelevant here, like DON’T force inlines, DO avoid emitting jump tables, etc.
- What toolchain should be used? x86-64 GNU Linux EABI is used in this case, but if we wanted a patch for different architecture, we can change this line to a different toolchain.
The script looks like this:
					from ofrak import *
from ofrak.core import *
from ofrak_patch_maker.toolchain.model import  *
from ofrak_patch_maker.toolchain.gnu_x64 import *

import ofrak_angr

async def main(ofrak_context, input_file):
    target_binary = await ofrak_context.create_root_resource_from_file(input_file)

    await target_binary.unpack_recursively()

    await target_binary.run(
        FunctionReplacementModifier,
        FunctionReplacementModifierConfig(
            SourceBundle.slurp("patch_src"),
            {"validate_input": "validate_input_patch.c"},
            ToolchainConfig(
                file_format=BinFileType.ELF,
                force_inlines=False,
                relocatable=False,
                no_std_lib=False,
                no_jump_tables=True,
                no_bss_section=True,
                compiler_optimization_level=CompilerOptimizationLevel.SPACE,
            ),
            GNU_X86_64_LINUX_EABI_10_3_0_Toolchain,
        )
    )

    await target_binary.flush_to_disk(input_file + ".patched")


o = OFRAK()
o.discover(ofrak_angr)
o.run(main, "validate_input")
This script takes a few seconds to run. As described previously, OFRAK will unpack and analyze the target (in this case using the angr backend), then build the patch, find the existing validate_input function, and overwrite it with our patch. Just to encourage you to give it a try as much as possible, we’ll leave out the oh-so-exciting payoff of the expected output from the patched binary. Actually applying and running the patch is left as an exercise to the reader.
We’ll leave you with a little bit of food for thought as well:
- We indicated that PatchMaker should optimize the patch for space. What happens if we change this to CompilerOptimizationLevel.NONE?
- Could we patch the
mainfunction instead ofvalidate_input? - What if we patched
mainandvalidate_input? Is it even still the same program? Has science gone too far? (This is a philosophical question, but not a rhetorical one. Discuss.)
Learn More at OFRAK.COM
Hacking Randomized Linux Kernel Images at the DEF CON 33 Car Hacking Village
Introducing RASPUTIN: Automated Hardware Reversing by Red Balloon Security
Hacking Secure Software Update Systems at the DEF CON 32 Car Hacking Village
Red Balloon Security Identifies Critical Vulnerability in Kratos NGC-IDU
Hacking In-Vehicle Infotainment Systems with OFRAK 3.2.0 at DEF CON 31
Brief Tour of OFRAK 3.1.0
We published OFRAK 2.2.1 to PyPI on March 8, 2023. As always, a detailed list of changes can be viewed in the OFRAK Changelog. There have been several notable improvements since the first PyPI OFRAK release that are worth highlighting below.
Easy PyPI Install
Getting started with ofrak is now as easy as running: pip install ofrak. This will give you a minimal OFRAK install that includes a handy command-line tool and the OFRAK GUI, in addition to the OFRAK Python library.
To immediately launch the OFRAK GUI and start exploring binaries, run:
% ofrak gui
The quickest, pure-Python way to start exploring OFRAK’s disassembler backends is to pip install ofrak-angr ofrak-capstone and then use the OFRAK angr backend:
% ofrak gui --backend angr
(For other backend options, see the Binary Ninja Backend or Ghidra Backend guides.)
Run ofrak --help to explore all of the available commands.
This release also includes some changes that address pip-install issues on Ubuntu and macOS, and adds baseline support for pip-installing OFRAK on Windows. Please continue to upstream these issues to us so that we can continue to improve the OFRAK install experience!
New GUI Features
The latest OFRAK includes the following improvements to the GUI tool:
- The GUI is now bundled with the
ofrakpackage and can be run with theofrak guicommand - Keybindings!
- A new “Tag” button to allow users to manually tag a resource (See #215)
- A “jump to offset” feature to quickly move to a specific offset in the GUI’s hexdump/minimap view
New & Updated Components
Support improved or added since OFRAK version 2.0.0:
Performance Improvements
OFRAK 2.1.1 is faster. Here are some highlights:
As always, we are eager to hear any feedback from OFRAK users! This feedback not only makes us feel warm and fuzzy, it helps prioritize us what we work on next. Feel free to open an issue in the OFRAK GitHub or email us directly at [email protected].
Hacking Randomized Linux Kernel Images at the DEF CON 33 Car Hacking Village
Introducing RASPUTIN: Automated Hardware Reversing by Red Balloon Security
Hacking Secure Software Update Systems at the DEF CON 32 Car Hacking Village
Red Balloon Security Identifies Critical Vulnerability in Kratos NGC-IDU
Hacking In-Vehicle Infotainment Systems with OFRAK 3.2.0 at DEF CON 31
Brief Tour of OFRAK 3.1.0
DEF CON 30 Badge Fun with OFRAK
The TL;DR? We used OFRAK to rewrite the badge firmware so that it auto-plays the solution for Challenge 1.
Est. read time: 20 min read
The code referenced in this writeup can be found here.
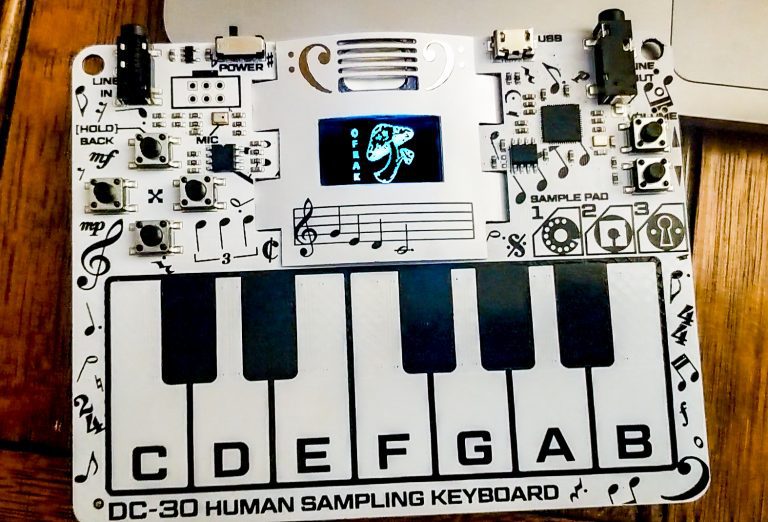
DEF CON 30 just ended, and the badge this year was awesome. It included a playable synthesizer with a few instrument presets, as well as buttons, a screen, and a small speaker. Everything on the badge was driven by a Raspberry Pi Pico. As usual, the badge also had an associated reverse engineering challenge.
Several of us from Red Balloon Security attended and manned booths in the Aerospace Village and Car Hacking Village. Many of our demos were based on OFRAK, which we released publicly at DEF CON 30. Since OFRAK is a binary reverse engineering and modification platform, it naturally became our tool of choice for badge firmware modification.
This post walks through using OFRAK to modify the DEF CON 30 Badge firmware in fun and exciting ways. We are unabashedly building off of this great write-up. @reteps, we owe you a beer! (Or a ginger ale, since it seems like you may not be old enough to drink just yet.)
This write-up is long, so feel free to skip ahead to the parts that interest you:
Table of Contents
Set up OFRAK
To walk through this writeup with us, you will need to install picotool and ofrak. Run these steps in the background while you read the rest of this document.
For this writeup, we used the redballoonsecurity/ofrak/ghidra Docker image.
-
Make sure you have Git LFS set up.
which git-lfs || sudo apt install git-lfs || brew install git-lfs git lfs install -
Clone OFRAK.
git clone https://github.com/redballoonsecurity/ofrak.git cd ofrak -
Build an OFRAK Docker image with Ghidra. This will take several minutes the first time, but should be quick to rebuild later on. Continue reading and come back when it is finished!
# Requires pip
python3 -m pip install --upgrade PyYAML

DOCKER_BUILDKIT=1 \
python3 build_image.py --config ./ofrak-ghidra.yml --base --finish
Check it is installed by looking for
redballoonsecurity/ofrak/ghidranear the top of the output of the following command.docker images -
Run an OFRAK Docker container. These instructions have more information about running OFRAK interactively.
mkdir --parents ~/dc30_badge docker run \ --rm \ --detach \ --hostname ofrak \ --name ofrak \ --interactive \ --tty \ --publish 80:80 \ --volume ~/dc30_badge:/badge \ redballoonsecurity/ofrak/ghidra:latest -
Check that it works by going to http://localhost. You should see the OFRAK GUI there.
We use picotoolto export the firmware image.
Install the dependencies. For example, on Ubuntu:
sudo apt install build-essential pkg-config libusb-1.0-0-dev cmake make

git clone https://github.com/raspberrypi/pico-sdk.git
git clone https://github.com/raspberrypi/picotool.git
Build
picotool.pushd picotool mkdir --parents build cd build PICO_SDK_PATH=../../pico-sdk cmake .. make -j sudo cp picotool /usr/local/bin/ popd
You can now use picotool to export the firmware image from the device. To do this, the badge must be in BOOTSEL. To put the badge in BOOTSEL, hold down the badge’s down button while powering the device, or short the J1 pins on the back with a jumper wire. You can now connect the device to your computer over micro USB.
If you have done this correctly, running picotool should give the following output:
					$ sudo picotool info -a
Program Information
 name:          blink
 description:   DEF CON 30 Badge
 binary start:  0x10000000
 binary end:    0x100177cc

Fixed Pin Information
 0:   UART0 TX
 1:   UART0 RX
 25:  LED

Build Information
 sdk version:       1.3.0
 pico_board:        pico
 boot2_name:        boot2_w25q080
 build date:        Jul 17 2022
 build attributes:  Debug

Device Information
 flash size:   2048K
 ROM version:  3
You can now dump the badge firmware as a raw binary file, badge_fw.bin, using the following command:
					mkdir --parents ~/dc30_badge
sudo picotool save -a -t bin ~/dc30_badge/badge_fw.bin
Insert logo with OFRAK GUI
First things first – let’s replace the DEF CON logo that appears when the badge is powered on with an OFRAK logo!
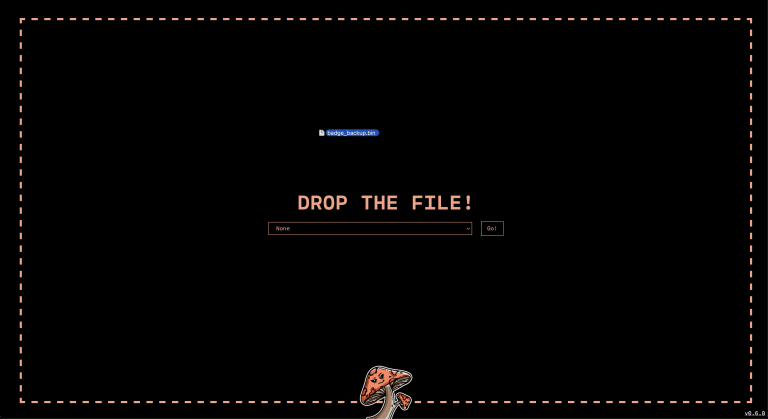
1. Load the image into the OFRAK GUI.
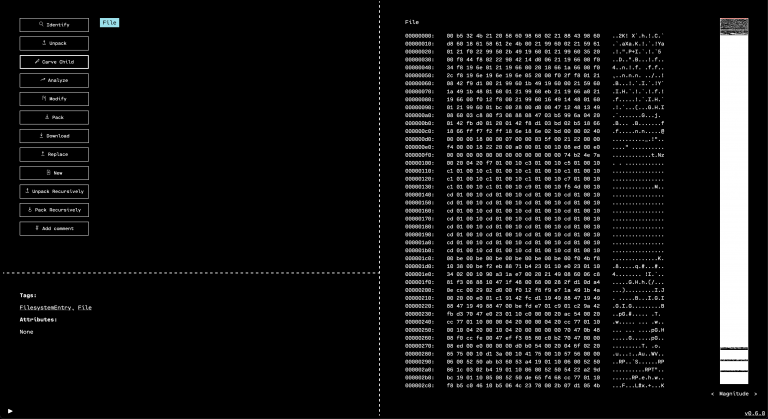
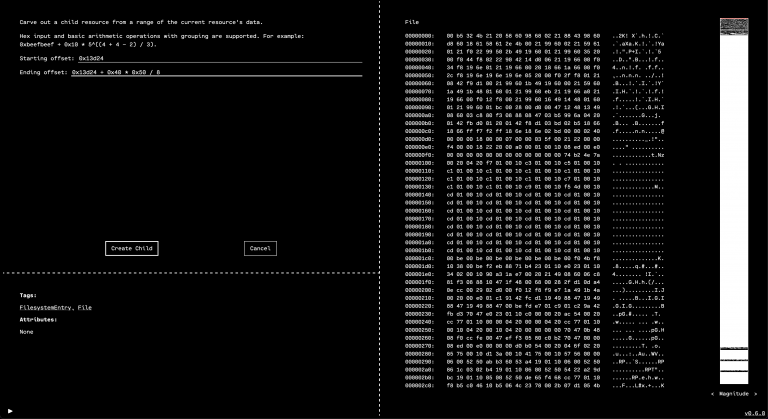
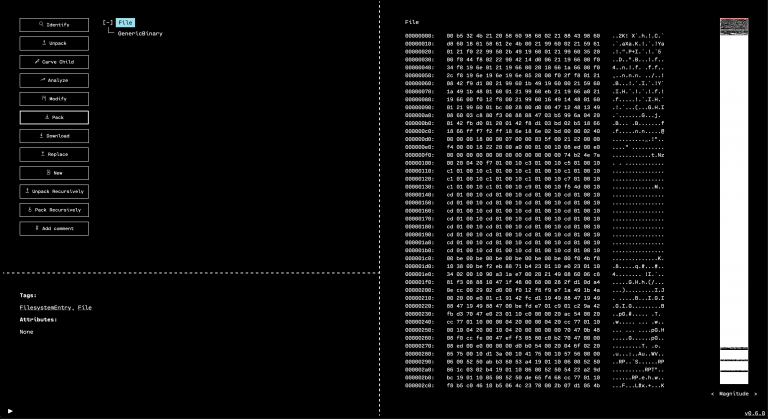
2. We know from the reteps writeup that the DEF CON logo is at offset 0x13d24, so we can use the “Carve Child” feature in the OFRAK GUI to unpack it as a separate resource.
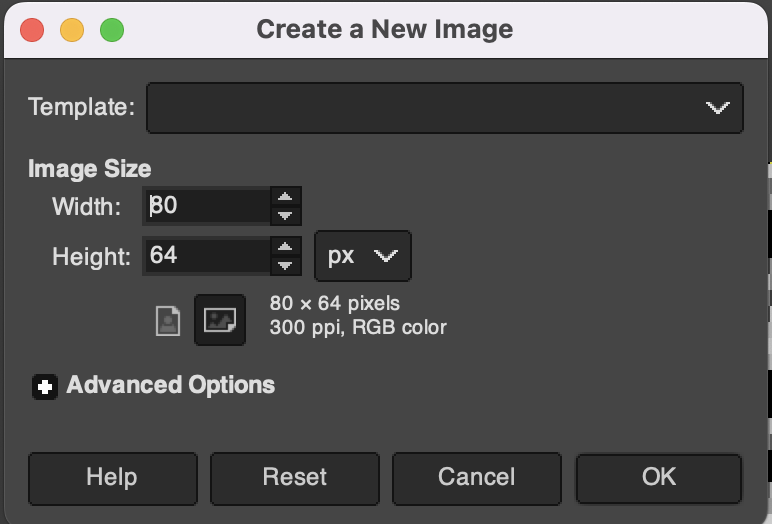
Carve from offset 0x13d24 with a size of 80 by 64 pixels, each of which is stored in a single bit (so divide by 8 to get the number of bytes).
3. Download the child and verify that it’s the correct range by loading it in GNU Image Manipulation Program (GIMP).
Looks good!
4. Download this pre-built OFRAK Logo from here, or expand more information about building a custom image below.

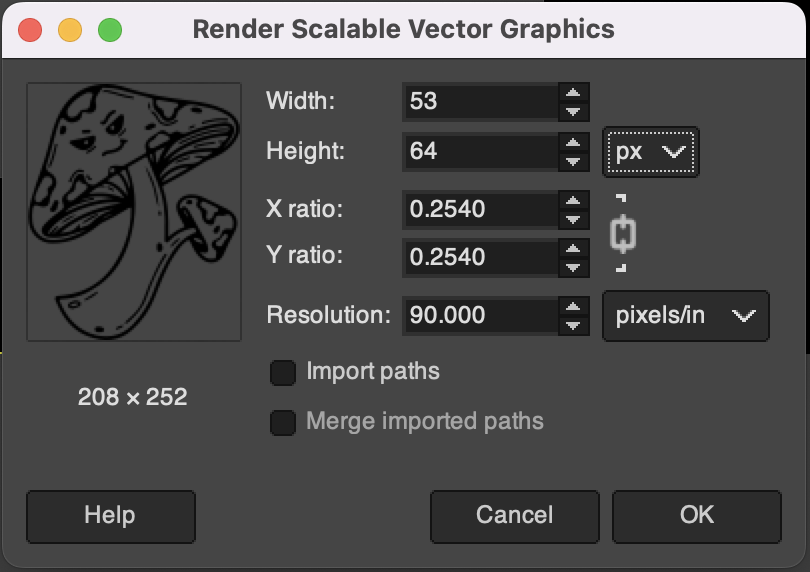
For making a custom image, first, create a new canvas and load your image as a layer resized for the canvas.
Load your image, and resize it and invert the colors if necessary. The OFRAK Logo is a great candidate image.
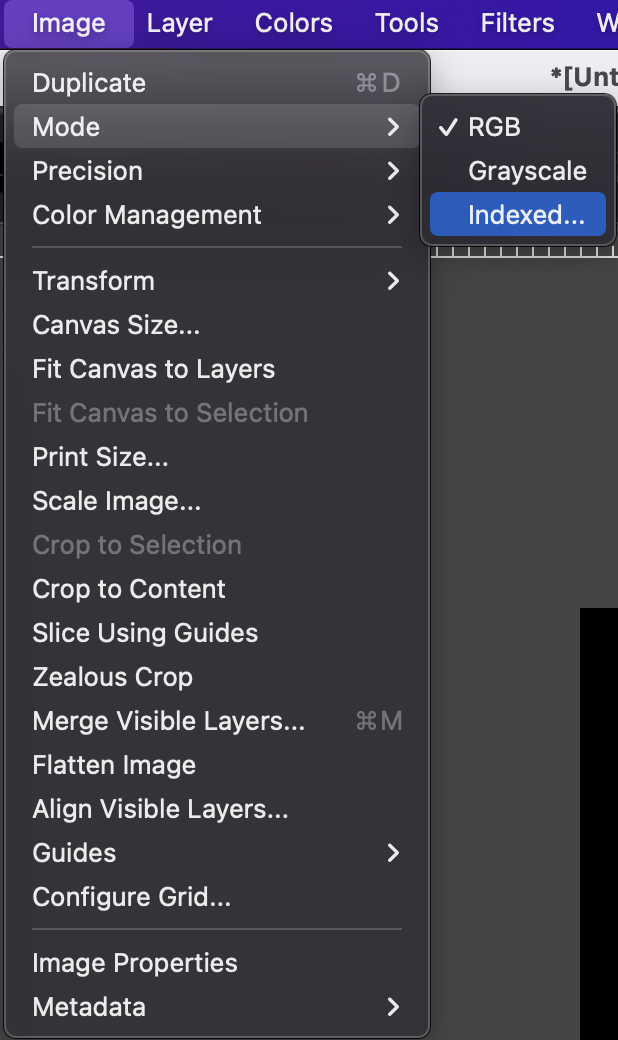
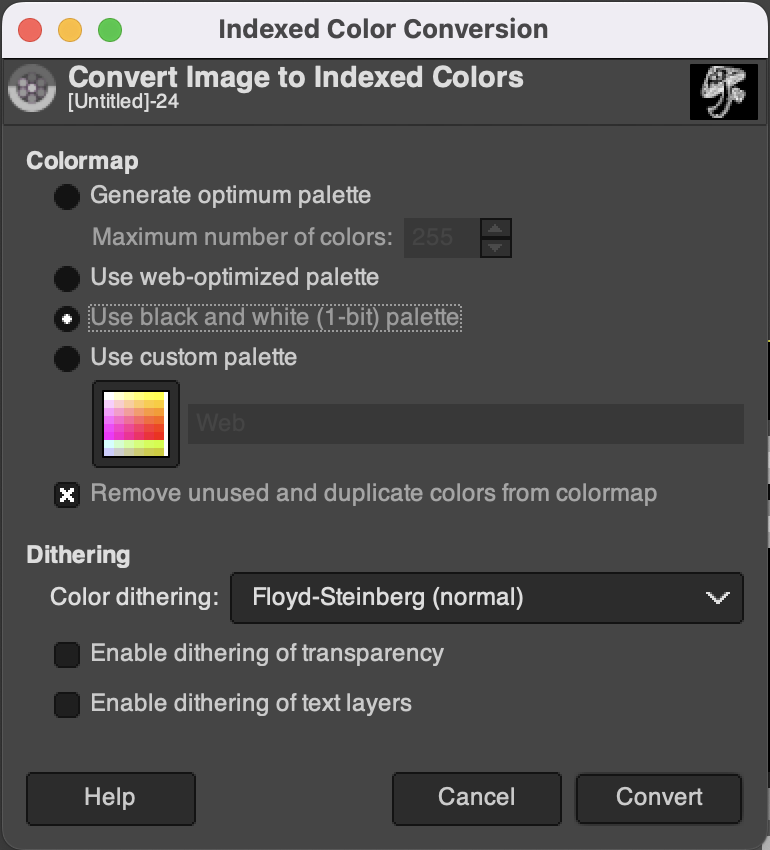
Convert the image to 1-bit color depth with dithering. (For more about dithering, check out this article.)
Merge all the layers into one by right-clicking in the layers pane on the left.
Export the image with Ctrl+Shift+E (Cmd on Mac), or use
File > Export As.... Pick PNG.Convert the PNG to raw 1-bit data with ImageMagick, based on the instructions here.
# Install ImageMagick if you don't have it
which convert || sudo apt install imagemagick || brew install imagemagick

# Convert the image
convert myimage.png -depth 1 GRAY:shroomscreen.bin

# Verify that it is 640 bytes
wc -c shroomscreen.bin
5. Use the OFRAK GUI “Replace” feature to replace the data.
6. Pack the whole thing back up.
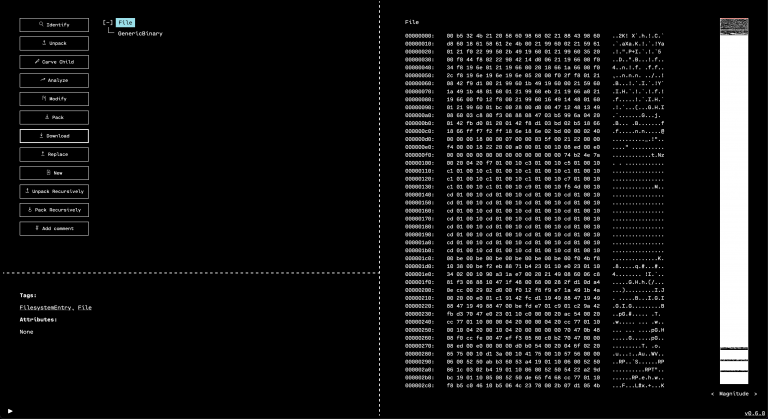
7. Download the resulting firmware image and flash it onto the device.
					cp "$(ls -rt ~/Downloads | tail -n 1)" ~/dc30_badge/ofrakked.bin
sudo picotool load ~/dc30_badge/ofrakked.bin
8. Verify that it works by booting up the badge.
Looks good!
We can now automate this step in future firmware mods by using the following Python function:
					async def ofrak_the_logo(resource: Resource):
      """
      Replace the DEF CON logo with OFRAK!
      """
      logo_offset = 0x13d24
      ofrak_logo_path = "./shroomscreen.data"
      with open (ofrak_logo_path, "rb") as f:
          ofrak_logo_bytes = f.read()
      resource.queue_patch(Range.from_size(logo_offset, len(ofrak_logo_bytes)), ofrak_logo_bytes)
      await resource.save()
Change some strings
It is easy to use OFRAK to change strings within the badge firmware. The function ofrak_the_strings (listed below) changes the “Play” button on the badge’s menu to display “OFRAK!” and hijacks the credits, giving credit to OFRAK mascots (“mushroom”, “caterpillar”) and “rbs.”
					async def ofrak_the_strings(resource: Resource):
        """
        Change Play menu to OFRAK!

        Update credits to give credit where due
        """
        # First, let's overwrite Play with "OFRAK!"
        await resource.run(
            StringFindReplaceModifier,
            StringFindReplaceConfig(
                "Play",
                "OFRAK!",
                True,
                True
            )
        )
        # Let's overwrite credits with OFRAK animal names
        await resource.run(
            StringFindReplaceModifier,
            StringFindReplaceConfig(
                "ktjgeekmom",
                "mushroom",
                True,
                False
            )
        )
        await resource.run(
            StringFindReplaceModifier,
            StringFindReplaceConfig(
                "compukidmike",
                "caterpillar",
                True,
                False
            )
        )
        await resource.run(
            StringFindReplaceModifier,
            StringFindReplaceConfig(
                "redactd",
                "rbs",
                True,
                False
            )
        )
Press any key to win Challenge 1
OK, now on to Challenge 1! For those of you who didn’t participate in BadgeCon: You win Challenge 1 on the DEF CON Badge if you play the melody to Edward Grieg’s Peer Gynt.
Peer Gynt is nice, but some of us can’t play the piano (or are too lazy). We want to win Challenge 1 without any musical skills/effort.
The reteps writeup points us to a two-byte binary patch that does just that. The ofrak_challenge_one function below patches the badge firmware such that pressing any key wins Challenge 1!
					async def ofrak_challenge_one(resource: Resource):
      """
      Win challenge 1 by pressing any key!
      """
      check_challenge_address = 0x10002DF0
      win_address = 0x10002E20
      jump_asm = f"b {hex(win_address)}"
      jump_bytes = await assembler_service.assemble(
          jump_asm, check_challenge_address + 4, ARCH_INFO, InstructionSetMode.THUMB
      )

      await resource.run(
          BinaryInjectorModifier,
          BinaryInjectorModifierConfig([(0x10002DF0 + 4, jump_bytes)]),
      )
You’re welcome.
Autoplay Notes (Piano Player) to win Challenge 1
Jumping right to the win condition is fun and all, but isn’t half the fun of the badge that it makes sounds? What if we could just have it… make sounds? Sounds that happen to make us win?
The goal of this section is to use OFRAK to patch the badge firmware into “Player Piano” mode: When you start Challenge 1, the badge autoplays Peer Gynt for you and you win. This is not too complicated, but it requires us to put on our Reverse Engineer hats and dig deeper into the firmware.
Step 1: Reverse Engineering
The first step was to pull the firmware and throw it into Ghidra. Luckily, we didn’t have to start from scratch.
Step 0: Plagiarize Survey the Literature
Shoutout (again) to the reteps writeup, which was a great starting point. If he shared his Ghidra project, we didn’t see it, but in his writeup we could see one important function labeled and with a full address! What he called z_add_new_note_and_check at 0x10002df0, we called check_challenge, but it does the same thing either way. That was essentially our starting point, from which all other analysis stemmed.
Step 1v2: Reverse Engineering
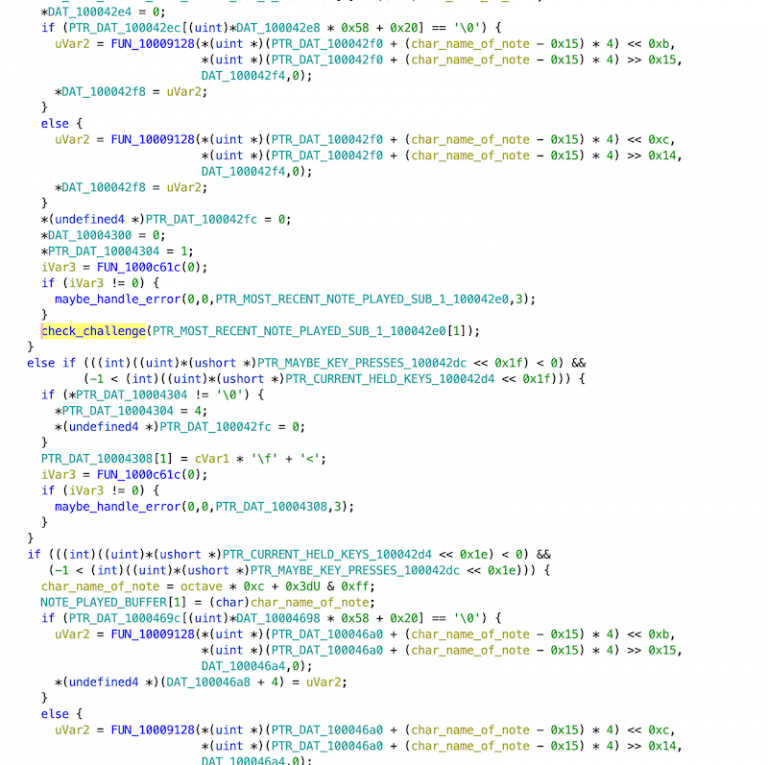
Our first approach was looking at code xrefs to check_challenge since A) that was our foothold and we did not have any other good starting points, and B) the latest note played was passed to this function, so it seemed to make sense to trace that data flow and find out how the latest note played is read. Then, in theory, we could write a new note there programmatically. The immediate problem was that most usages of check_challenge were in a function we affectionately called big_chungus because it was large and hard to understand. The decompilation looked like this:
Which was essentially unusable except in very local instances.
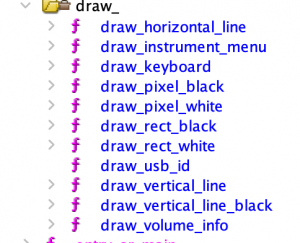
The next approach we took was looking at strings. We quickly found some interesting strings we had seen on the screen, so we followed those references and found a number of functions related to drawing pixels (below screenshot shows them after they were labeled):
This led to the functions that drew each of the menus, which gave us a good idea of the state machine that the firmware uses. Throughout the process, we used OFRAK to experiment with different hypotheses by injecting bits of assembly to poke at addresses. For example:
					async def overwrite_state_pointers(resource):
    # Effect: main menu does not change image when i move to different options
    # (they are still selected, as we can click through them)
    new_state_pointer_bytes = struct.pack("<i", 0x1000544c)
    resource.run(
        BinaryInjectorModifier,
        BinaryInjectorModifierConfig(
            [
                (0x1000e1a0, new_state_pointer_bytes),
                (0x1000e1a4, new_state_pointer_bytes),
                (0x1000e1a8, new_state_pointer_bytes),
                (0x1000e1ac, new_state_pointer_bytes),
                (0x1000e1b0, new_state_pointer_bytes),
            ]
        ),
    )


async def main(ofrak_context):
    root_resource = await ofrak_context.create_root_resource_from_file(BADGE_FW)

    root_resource.add_tag(Program)
    root_resource.add_attributes(arch_info)
    root_resource.add_view(MemoryRegion(START_VM_ADDRESS, FIRMWARE_SIZE))

    await root_resource.save()

    await overwrite_state_pointers(root_resource)

    # And other experiments...

    await root_resource.save()
    await root_resource.flush_to_disk(OUTPUT_FILE)
This helped us to confirm or reject these hypotheses. It was also just fun to change the behavior. We used this function to change all of the keys’ associated light colors to green, since the code for that is all in a big regularly-patterned block and we could iterate over it at constant offsets:
					async def set_all_key_lights(resource, rgb):
      first_color_load_vaddr = 0x10004cf0
      color_loads_offset = 0xe

      set_red_instr = f"movs r0, #0x{rgb[0]:x}"
      set_green_instr = f"movs r1, #0x{rgb[1]:x}"
      set_blue_instr = f"movs r2, #0x{rgb[2]:x}"

      mc = await assembler_service.assemble(
          "\n".join([set_blue_instr, set_green_instr, set_red_instr]),
          first_color_load_vaddr,
          arch_info,
          InstructionSetMode.THUMB,
      )

      resource.run(
          BinaryInjectorModifier,
          BinaryInjectorModifierConfig(
              [
                  (color_load_vaddr, mc)
                  for color_load_vaddr in range(first_color_load_vaddr, 0x10004dc2, color_loads_offset)
              ]
          ),
      )
After mucking around for a while, we were not completely sure we had found the “source” of the notes. We had some ideas, though they would require more complex experiments, which would be cumbersome to write in assembly. At this point, we decided to set up the OFRAK PatchMaker for the badge firmware.
Step 2: PatchMaker
The PatchMaker is a Python package for building code patch blobs from source and injecting them into an executable OFRAK resource. In this case, we wanted to be able to “mod” the badge firmware by just writing out some C code with full access to the existing functions and data already in the device.
The first step is to set up the toolchain configuration:
TOOLCHAIN_CONFIG = ToolchainConfig(
    file_format=BinFileType.ELF,
    force_inlines=False,
    relocatable=False,
    no_std_lib=True,
    no_jump_tables=True,
    no_bss_section=True,
    compiler_optimization_level=CompilerOptimizationLevel.SPACE,
    check_overlap=True,
)
TOOLCHAIN_VERSION = ToolchainVersion.GNU_ARM_NONE_EABI_10_2_1
This is pretty standard stuff for C-patching an existing firmware. We decided to use the PatchFromSourceModifier to do that actual patching, as it hides some of the nitty-gritty of building a patch (though it consequently has fewer options than going through the core PatchMaker API).
The next step is to define the symbols that can be used from the patch source code. These need to be exposed to PatchMaker by adding some LinkableSymbol data structure to the existing Program:
					LINKABLE_SYMBOLS = [
    # Existing variables in binary
    LinkableSymbol(0x20026eea, "notes_held_bitmap", LinkableSymbolType.RW_DATA, InstructionSetMode.NONE),
    LinkableSymbol(0x200019d8, "octave", LinkableSymbolType.RW_DATA, InstructionSetMode.NONE),
    LinkableSymbol(0x20001991, "most_recent_note_played", LinkableSymbolType.RW_DATA, InstructionSetMode.NONE),
    LinkableSymbol(0x200063d8, "notes_played", LinkableSymbolType.RW_DATA, InstructionSetMode.NONE),
    LinkableSymbol(0x20026f01, "instrument", LinkableSymbolType.RW_DATA, InstructionSetMode.NONE),

    # Existing functions in binary
    LinkableSymbol(0x10005074, "draw_rect_white", LinkableSymbolType.FUNC, InstructionSetMode.THUMB),
    LinkableSymbol(0x10004fc4, "write_character", LinkableSymbolType.FUNC, InstructionSetMode.THUMB),
    LinkableSymbol(0x1000503c, "write_text", LinkableSymbolType.FUNC, InstructionSetMode.THUMB),

]

# ... Then later add to resource with:

await resource.run(
        UpdateLinkableSymbolsModifier,
        UpdateLinkableSymbolsModifierConfig(tuple(LINKABLE_SYMBOLS)),
    )
And they need to be exposed to the C code by declarations, as one might normally see in a header:
					#include <stdint.h>

extern uint16_t notes_held_bitmap;
extern uint8_t octave;
extern uint8_t most_recent_note_played;
extern uint8_t notes_played[];
extern uint8_t instrument;

extern void draw_rect_white(unsigned int x, unsigned int y, unsigned int x_end, unsigned int y_end);
extern void write_character(char c, int x, int y, int color); // 0=white, 1=black
extern void write_text(const char* str, int x, int y, int color); // 0=white, 1=black
Then we could write some C code referencing those; no spoilers though, we’ll show that code later! To actually build it, we create an empty root resource to hold the source code and run PatchFromSourceModifier:
					async def patch_in_function(ofrak_context, root_resource: Resource):
      """
      Patch in the auto-player that plays the sequence to solve challenge 1.
      """
      # Not strictly necessary, but nice to really clear all "free space"
      await overwrite_draw_volume_info(resource)

      source_bundle_r = await ofrak_context.create_root_resource(
          "", b"", tags=(SourceBundle,)
      )
      source_bundle: SourceBundle = await source_bundle_r.view_as(SourceBundle)
      with open(PATCH_SOURCE, "r") as f:
          await source_bundle.add_source_file(f.read(), PATCH_SOURCE)

      await resource.run(
          UpdateLinkableSymbolsModifier,
          UpdateLinkableSymbolsModifierConfig(tuple(LINKABLE_SYMBOLS)),
      )

      await resource.run(
          PatchFromSourceModifier,
          PatchFromSourceModifierConfig(
              source_bundle_r.get_id(),
              {
                  PATCH_SOURCE: (
                      Segment(
                          ".text",
                          DRAW_VOLUME_RANGE.start,
                          0,
                          False,
                          DRAW_VOLUME_RANGE.length() - 0x50,
                          MemoryPermissions.RX,
                      ),
                      Segment(
                          ".rodata",
                          DRAW_VOLUME_RANGE.end - 0x50,
                          0,
                          False,
                          0x50,
                          MemoryPermissions.R,
                      ),
                  ),
              },
              TOOLCHAIN_CONFIG,
              TOOLCHAIN_VERSION,
          ),
      )
The source bundle resource ID, the TOOLCHAIN_CONFIG, and TOOLCHAIN_VERSION were already explained but what about the Segments?
Step 3: Free Space & Segments
In order to inject code, we obviously need a location to inject it into. There are three options for how to obtain this:
- Find some unused space in the binary.
- Enlarge/extend the firmware binary so more bytes are loaded into memory.
- Replace something that already exists in the binary.
These are roughly ordered from “best” to “worst.” Ideally we want to change as little possible in the binary. In this situation though, we were limited to the third option:
- We did not have complete knowledge of the binary and could not say with 100% confidence that some part was unused (this is usually the case).
- We did not yet have an OFRAK packer/unpacker for uf2, the file format the binary was in.
So the next task was to choose something to overwrite. We found the function that drew the little volume slider on the side, and this seemed a good choice because:
- It would free up a decent amount of space (over 256 bytes to drop THUMB code in).
- It was called often and consistently (alongside other screen-updating code).
- Removing it would give us some real estate on the right edge of the screen to write/draw new stuff to!
We verified that this would have no ill effects by gutting the contents of the function with nop instructions:
					async def overwrite_draw_volume_info(resource):
      """
      Creates free space! But you no longer get to see the current volume and the nice arrows
      telling you which way to adjust it.
      """
      # Creates free space! But you no longer get to see the current volume
      # and the nice arrows telling you you can adjust it

      return_instruction = await assembler_service.assemble(
          "mov pc, lr",
          DRAW_VOLUME_RANGE.end - 2,
          ARCH_INFO,
          InstructionSetMode.THUMB,
      )

      nop_sled = await assembler_service.assemble(
          "\n".join(
              ["nop"] * int((DRAW_VOLUME_RANGE.length() - len(return_instruction)) / 2)
          ),
          DRAW_VOLUME_RANGE.start,
          ARCH_INFO,
          InstructionSetMode.THUMB,
      )

      final_mc = nop_sled + return_instruction
      assert len(final_mc) == DRAW_VOLUME_RANGE.length()

      await resource.run(
          BinaryInjectorModifier,
          BinaryInjectorModifierConfig([(DRAW_VOLUME_RANGE.start, final_mc)]),
      )
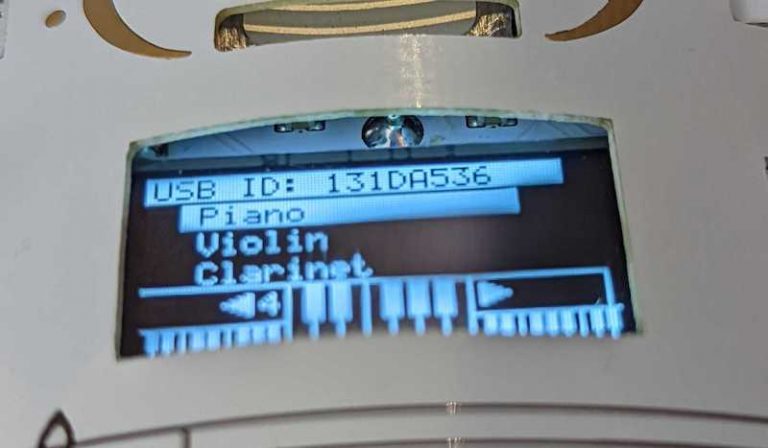
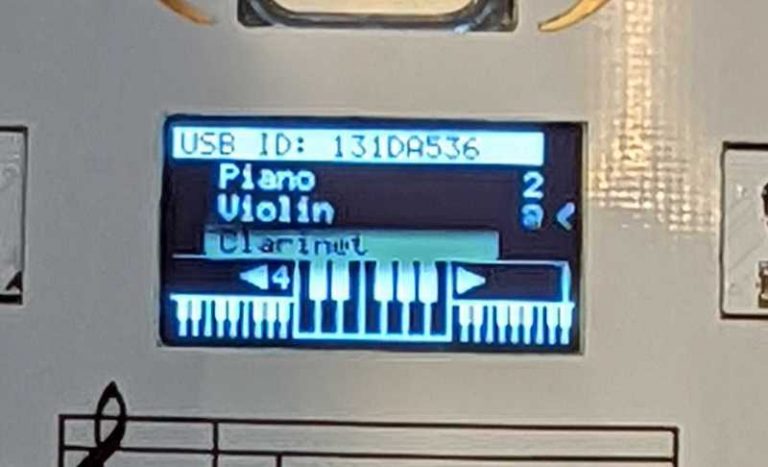
If we are just patching in some compiled C patch over the existing code, NOPing it out first isn’t strictly necessary, but it is a good sanity check that removing the function is probably fine. It also verifies the function does what we think it does: The volume slider is gone!
With our target address picked out, we defined the PatchMaker Segments where our compiled code and data would be inserted:
					Segment(
    ".text",
    DRAW_VOLUME_RANGE.start,
    0,
    False,
    DRAW_VOLUME_RANGE.length() - 0x50,
    MemoryPermissions.RX,
),
Segment(
    ".rodata",
    DRAW_VOLUME_RANGE.end - 0x50,
    0,
    False,
    0x50,
    MemoryPermissions.R,
),
The first is for the code, and the second is a healthy allocation for read-only data, like constants and strings.
At this point we were ready to start writing some C.
Step 4: The Payload
We wrote a number of experiments in C code, experimenting with various memory addresses and functions we were investigating. C is brilliant because it is so much nicer to work in than assembly, but just as unsafe. One trick we used liberally was the ability to cast memory locations to whatever pointer type we wanted: this allowed us to quickly iterate and peek/poke addresses that we thought contained interesting data Here are some snippets from our experiments:
					char instrument = *((char*) 0x20026f01);
write_character(instrument + 0x30 , 0x70, 12, 0);

char most_recent_c = most_recent_note_played;  // is an index form, not the actual note string
write_character(most_recent_c, 0x70, 22, 0);

write_character(notes_played[0x2d - 1], 0x7a, 22, 0);


int button_held = *((int*) 0xd0000004);
// Just copying the Ghidra decomp for these comparisons
// It's easier than thinking about which bit is being checked
if (-1 < (button_held << 0x10)) {
    write_character('U', 0x70, 22, 0);
}
if (-1 < (button_held << 0xf)) {
    write_character('D', 0x70, 22, 0);
}
else if (-1 < (button_held << 0xe)) {
    write_character('L', 0x70, 22, 0);
}
else if (-1 < (button_held << 0xd)) {
    write_character('R', 0x70, 22, 0);
}
This writes out the index of the currently selected instrument, and below that draws the two most recently played notes.
The characters drawn (“@”, “<“) representing the notes just happen to be ASCII; they are uint8_t indexes in essentially a long array of all possible notes in all octaves, so 84 values. G# in the lowest octave is the first visible “character”, at 0x20 meaning ” ” (space), below this the draw_character function just draws a white rectangle. Then B in the highest octave is the highest byte, 0x6B (“k”). Here “@” and “<” mean the most recent notes played are E and C in the 4th octave.
Recall that write_character is a function analyzed from the existing binary, and we can call it and link against it like writing normal C code! This is the power of PatchMaker.
At this point we had a good loop: Follow some code and/or data in Ghidra for a while until we think we understand it, then write a C patch to use that knowledge to test our theory. After a little bit, we had found a bitmap at 0x20026eea that seemed to store the info about which keys were currently held; some experiments confirmed this. At this point, we had all the information we needed to write a “Player Piano” for the badge!
Step 5: Forward Engineering
After all the reverse engineering, there were a few “forward” engineering challenges to consider, so we’ll just rapid fire through them:
Timing
We wanted the notes to be audible one after the other, so that meant we had to time them. We didn’t find any timing functions, and probably would not “trust” them even if we did. We decided to just use a counter we would increment each time our function was called (like a C static local variable) and play/increment notes according to that. This meant we needed some R/W space, which we implemented quick & dirty by finding some free scratch space and defining pointers to those as LinkableSymbols.
We got the addresses by going to the memory segment we had defined in Ghidra for in-memory RW data, and finding the address at which we stopped seeing references. Luckily this was 0x20026f04, not near an obvious page-end boundary, so we felt reasonably confident we could read/write to it as much as we wanted. Then we defined the LinkableSymbols for it:
					FREE_SCRATCH_SPACE = 0x20026f04
...

# Added these to the UpdateLinkableSymbolsModifierConfig shown earlier:

LinkableSymbol(FREE_SCRATCH_SPACE, "counter", LinkableSymbolType.RW_DATA,InstructionSetMode.NONE),
LinkableSymbol(FREE_SCRATCH_SPACE + 0x8, "seq_i", LinkableSymbolType.RW_DATA,InstructionSetMode.NONE),
LinkableSymbol(FREE_SCRATCH_SPACE + 0x10, "state", LinkableSymbolType.RW_DATA,InstructionSetMode.NONE),
In C we could use those as extern r/w variables:
					extern int counter;
extern int seq_i;
extern int state;

...

counter += 1;


if (counter >= NOTE_PERIOD) {
    seq_i += 1;
    if (seq_i >= (SEQUENCE_LENGTH + REST_COUNT)){
        seq_i = 0;
    }

    counter = 0;
}
else if (counter >= (NOTE_PERIOD - NOTE_HELD_T) && seq_i < SEQUENCE_LENGTH) {
    // write next note here
}
Storing and writing the sequence
Since the target we needed to write notes to was a bitmap, where each bit is a single note, it made sense to define each note as the bit in the bitmap it was mapped to. This could either be represented as bit index (i.e. 0x3 means “third bit”) or a bit mask (i.e. 0x8 means “third bit” because the third bit is set). In the end we chose bit index because it was more compact, requiring only one byte per note in the 12 notes (plus 3 samples).
					typedef enum {
    C = 0,
    C_SHARP = 1,
    D = 2,
    D_SHARP = 3,
    E = 4,
    F = 5,
    F_SHARP = 6,
    G = 7,
    G_SHARP = 8,
    A = 9,
    A_SHARP = 11,
    B = 13,
    SAMPLE_1 = 10,
    SAMPLE_2 = 12,
    SAMPLE_3 = 14,
} note_bit_type;

#define NOTE(bit_idx) (0x1 << bit_idx)
#define CHORD(x, y, z) (NOTE(x) | NOTE(y) | NOTE(z))
Then, we could store the correct sequence as a constant and iterate over that. The correct sequence could be found in memory (in the octave-offset representation we explained in the earlier Payload section) at address 0x1000dac8 (thanks again to reteps for finding this.) Converted to our C enums:
					const note_bit_type note_sequence[] = {
    G, E, D, C, // C@><
    D, E, G, E, // >@C@
    D, C, D, E, // ><>@
    G, E, G, A, // C@CE
    E, A, G, E, // @EC@
    D, C, G, E, // ><C@
    D, C, D, E, // ><>@
    G, E, D, C, // C@><
    D, E, D, E, // >@>@
    G, E, G, A, // C@CE
    E, A, B, G_SHARP, // @EGD
    F_SHARP, E, // B@
};
Then to write the note:
					note_bit_type next_note_bit = note_sequence[seq_i];
notes_held_bitmap |= NOTE(next_note_bit);
Starting playing the sequence
Initially, we had the sequence play in a loop forever, as soon as the “Play” menu came up.
This got a bit annoying. We had already figured out a few of the other inputs we could use to trigger the sequence, and settled on all three of the samples being played at once when in a specific instrument. Then switching out of that instrument would stop the sequence. This was much better for our sanity. We also added some initialization code for the counters, just to be sure they would start at 0. We wrote some specific magic value to one of our scratch variables to keep track of whether the state was initialized or not. A saner alternative would have been to find the initialization/startup code and hook into that, but this was a bit easier.
					if (instrument != AUTOPLAY_INSTRUMENT){
    state = 0x0;
    return;
}

int all_3_samples_held = CHORD(SAMPLE_1, SAMPLE_2, SAMPLE_3);

if (state != 0xed){
    if (!((notes_held_bitmap & all_3_samples_held) ^ all_3_samples_held)){
        counter = 0;
        seq_i = 0;
        state = 0xed;
    }
    else{
        return;
    }
}
We arbitrarily chose the violin as the autoplay instrument.
Closing Thoughts
This was good, fun and an exercise in using OFRAK “recreationally.” We, of course, are partial to OFRAK, but it was great scripting everything in Python and having access to a library of very helpful binary analysis and patching functionality.
Some future additions that could be done on this badge FW modification:
- Making the autoplayer a separate “instrument” so it shows up on the instrument select screen. It would be a neat trick, but you’d have to stop the badge from thinking it’s an actual instrument and trying to play sounds that don’t exist (there appear to be jump tables for each instrument)
- Making multiple new instruments for different pre-set tracks
- Recording sequences of notes as new pre-set tracks at runtime
- Using the various drawing functions to draw pictures according to the notes played, like a music visualizer
All of these would require rather significant additional space, so we would need a way to extend the firmware for sure. Sit tight for an OFRAK Modifier for that!
Some sticking points with OFRAK we noticed that got us thinking:
- It bothered us (aesthetically and practically) that we were defining functions and data in two places: The “extern” declarations in source/header, and the
LinkableSymbolthat actually defined the value. It seems practical and more convenient to define functions along with their type in one place, perhaps just pulling these straight from Ghidra, and have OFRAK creating the declaration and definition without any more user input needed. - Managing data sections (both R and RW) through the
PatchFromSourceModifierAPI is a bit impractical. This can always be tricky with PatchMaker, but the Modifier’s API abstracts away the guts that it is unfortunately necessary to bury your hands in to get things working smoothly. For example, we originally tried to used LLVM instead of GNU, but LLVM stubbornly insisted that extern pointers to data had to first be loaded as an indirect pointer from the.rodatasection, which pointed to an address in the .bss section, where the address of the variable would hopefully be contained. GNU was happy to just load the variable address directly from the.rodatasection. Managing an additional section was more effort than switching toolchains, which is a testament to interoperability and modularity in PatchMaker but a flaw inPatchFromSourceModifier.
Perhaps these will become pull requests you’ll see landing in core OFRAK shortly 
Hope you enjoyed our work! Maybe next you can build something else cool on top of the badge!
— Edward Larson & Jacob Strieb
Symbiote Injection Process
Multi-step analysis and calibration: How Symbiote integration works
RBS’s core technology is highly effective in any embedded device environment, from cars to heavy industry, because it does not require access to source code, or any hardware modifications.
Symbiote Injection Process
Multi-step analysis and calibration: How Symbiote integration works
RBS’s core technology is highly effective in any embedded device environment, from cars to heavy industry, because it does not require access to source code, or any hardware modifications.
Symbiote Injection Process
Multi-step analysis and calibration: How Symbiote integration works
RBS’s core technology is highly effective in any embedded device environment, from cars to heavy industry, because it does not require access to source code, or any hardware modifications.
On-device security is still controversial. Some industry professionals and manufacturers push back against the very idea of it because of an outdated conviction that devices deep in the technology stack are beyond the reach of cyberattack, or simply do not present a sufficiently attractive target. Others believe that embedded devices do not have the resources to support a robust on-host security.
Red Balloon’s research is a strong proof point against the idea that this level of security isn’t needed. And on-device security is becoming more common, as firewalls and encrypted protocols have been introduced to many endpoints at this level.
But runtime monitoring and protection, such as Red Balloon’s Symbiote technology, has yet to be widely accepted, and many of our potential customers cite limited device resources as an impediment. While convinced of the utility and necessity of embedded security, some remain concerned that any manipulation of device firmware will result in decreased effectiveness, regular crashes, or even terminal inoperability.
Given the sophisticated engineering of these devices, the caution is understandable. But Symbiote technology prioritizes device functionality. In addition to defending against n-day and zero-day attacks, including those that bypass traditional security controls, the Symbiote integration process uses advanced firmware analysis, unpacking, and repacking technology to prevent any damage or compromise of the original device firmware.
The combination of technologies executes the dual functions of improving device security and protecting core device functionality.
Symbiote is not an out-of-the-box solution. As with other embedded device technologies, deployment on a device requires time, and it must be carried out by skilled professionals to ensure safe, correct device operation. Red Balloon engineers typically undertake a thorough analysis of the device and its functionality before a Symbiote deployment is attempted.
We have seen a gradual adoption of device security before. The introduction of endpoint protections such as firewalls, antivirus and access controls to devices in control rooms, without disrupting operation, also required skilled and dedicated engineering. Early adopters received a two-fold benefit from this careful approach: They received security before their competitors, and built in time to deal with unavoidable complications, without serious disruption to their processes.
Today, operators who rely on embedded devices are at a similar juncture. They can begin a security upgrade within a window that allows sufficient time to improve devices and the security tools deployed on them. The window may be closing, as embedded devices are increastingly targeted by malicious actors in many systems. But we are confident that ultimately, security deployments on these devices will be as simple and non-disruptive as they are for other endpoints in the technology stack.[1]
The core technologies: OFRAK, ABR, BSR, and Symbiote
Symbiote injection depends on interrelated technologies that identify and remove extraneous code from the host firmware; randomize the firmware; unpack, analyze, and repack the firmware; and deploy Symbiote payloads into the firmware. These include:
Open Firmware Reverse Analysis Konsole (OFRAK): OFRAK is a framework for unpacking, analyzing, modifying, and repacking a device’s firmware images. It is the technological framework through which automated firmware hardening is performed and Symbiotes are integrated. The OFRAK framework is a force-multiplier tool — and it integrates into any development environment.
- Autotomic Binary Reduction (ABR): While this is an automated process, note that autotomic refers to a form of self-amputation and discarding of an appendage or unnecessary part. In this case, what is discarded is firmware that is not utilized in the device’s functioning or memory. This facilitates Symbiote injection by freeing up memory space in the firmware, and also hardens the device’s security posture by removing unnecessary code that an attacker could utilize.
- Binary Structure Randomization (BSR): Utilizing analytic functions, BSR restructures the binary layout of code and data inside the firmware, with links that preserve its functionality while creating a new sequence.
- Symbiote: A symbiote is a minute chunk of code, usually a few kylobytes, which is injected into the host’s binary code. The number of Symbiotes varies with each deployment, and theoretically can number anywhere between a single instantiation or thousands. Once injected, each Symbiote will monitor the specific policy it is assigned and send alerts when any variation or deviation is detected.
The firmware analyzing process
OFRAK does not require source code, and operates on binaries. However, device manufacturers typically supply a development binary that includes debugging symbols, and a means to load modified firmware binaries on the device to aid analysis. (It is possible to analyze and identify firmware components without the above, and this may be required when Red Balloon engages a device end user who does not have access to the files.)
The OFRAK unpacking engine will analyze all the firmware call tables and functions to determine how and when firmware objects come into operation, which can be removed, and what parts support core functions. This analysis sets up the initial stages of firmware modification: binary reduction and binary structure randomization.
The firmware hardening process
Binary reduction, via ABR, serves the dual purpose of hardening the firmware by removing extraneous code (which could be exploited by an attacker) and creating space for the injection of Symbiotes. ABR automatically maps call paths, and builds out a code graph that identifies services and information that is never called, or should not be called.
This extraneous code can either be safely removed or replaced with a stub that allows the firmware to continue running without risk of a code crash. The binary reduction creates space in the firmware image, and can help the device to work faster. ABR also generates a report of all changes to facilitate review.
With the binary reduction complete, the firmware code can be randomized by advanced polymorphic engines that create a distinct new code, which can defeat attacks that rely on knowledge of code layout. The BSR function then utilizes the space created by ABR and moves blocks of code and memory, identifies all places where the original function was removed, and updates the call map.
Combined, ABR and BSR provide important additional layers of security while maintaining a meticulous record of the original firmware, every change in code and a map of the new firmware image.[2]
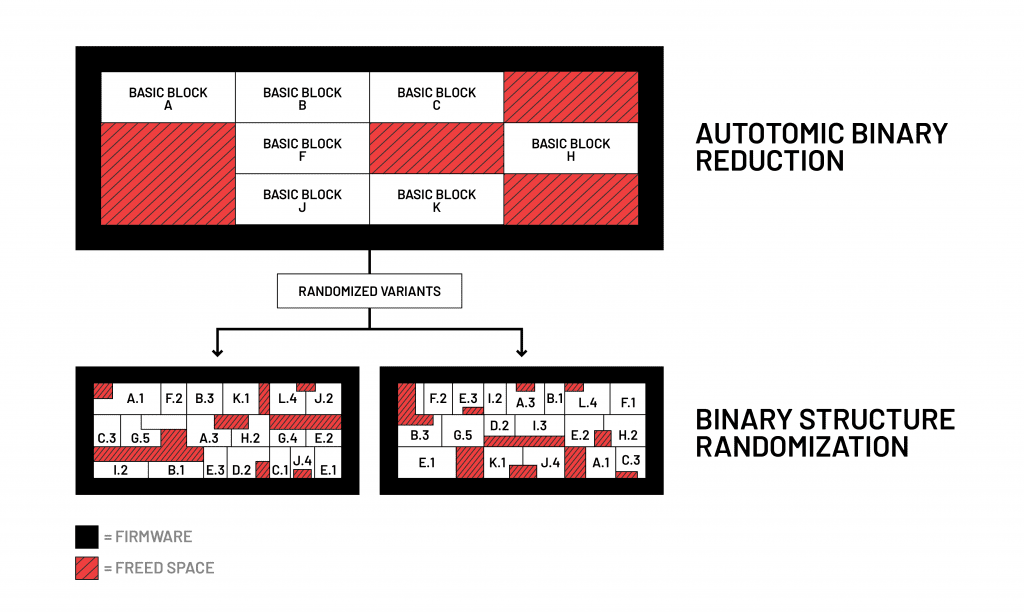
ABR and BSR work in sequence, with ABR first removing unused pieces of binary code and BSR using the freed space to create a randomized — and therefore stronger — firmware structure.
Why modify binary, and not source code?
Source code is often proprietary, and many companies are understandably reluctant to allow third parties to access it or refine it. By working in binary, copyright issues can be avoided, leaving the manufacturer to update the source code once the binary modification is complete. The new firmware is functionally equivalent to the original, which facilitates future source code updates. In some cases, an end user may wish to update a device for which the original source code is not available.
Selecting Symbiote placement
The process for injecting the Symbiotes includes automatic identification of a large number of injection points, and the selection of a random subset for Symbiote invocation. This means each randomized instance is distinct from all other injected systems.
The process begins by identifying every function in the firmware through analysis of the binary. This leads to the identification of usable, or “hookable” functions into which the Symbiotes can be injected without any disruption of normal operation .
The Symbiote injection process is designed to balance detection resolution functionality with the device workload requirements. It dynamically utilizes CPU cycles from the host device at intervals via an adaptive scheduler that helps prevent an injected Symbiote from adversely impacting performance or corrupting the device firmware. As independent digital “life forms,” the Symbiotes co-exist with arbitrary executables in a mutually defensive arrangement. As such, Symbiotes are designed to simultaneously protect their host through their detection capabilities while maintaining the parameters for core functionality.
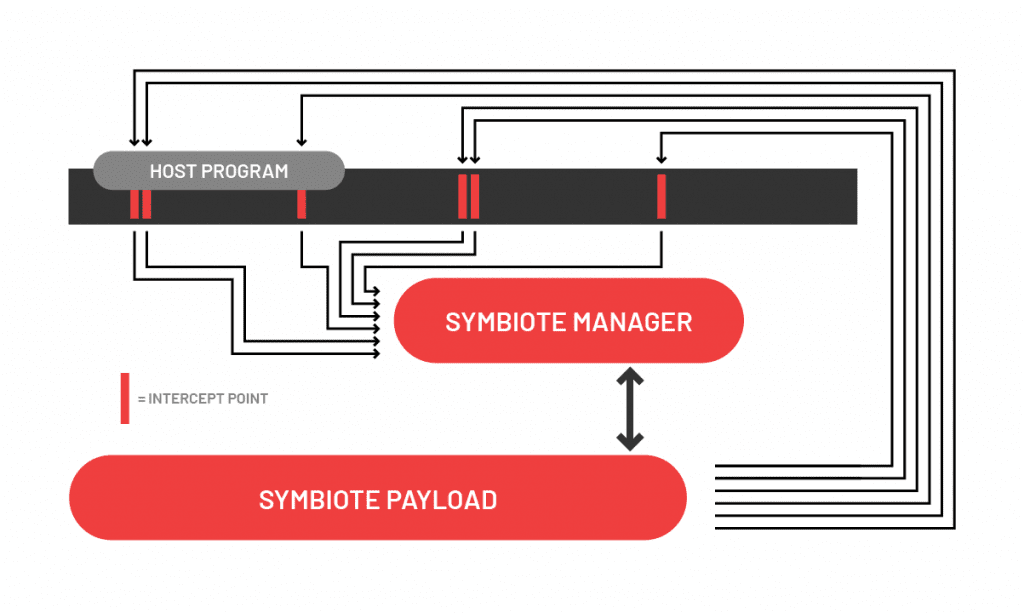
Each intercept point, or “hook,” is a potential injection point. The Symbiote manager maintains visibility of the device function to detect any interference with core functionality or at instances with low CPU utilization.
What is a Symbiote?
A Symbiote is a code structure embedded in situ into the firmware of an embedded system. The Symbiote tightly co-exists with its host executable in a mutually defensive arrangement, sharing computational resources with its host while simultaneously protecting the host against exploitation and unauthorized modification.
Each Symbiote includes a payload (the actual defensive mechanism), a manager (which ensures the native OS can safely execute, and prevents the native OS from overwriting the memory chunks used to store payloads’ execution context records) and user-defined policy engine (which has a checksum of every new process that runs and automatically compares this against the device user’s defined whitelist of known, allowed processes).
Repacking the firmware and tuning Symbiotes: Calibration before field deployment
Once the injection points are established, OFRAK repackages the firmware to its original state, with the addition of the Symbiote payloads. The repacking engine uses the call tables and unpacking analysis to establish that all functions remain intact.
At this point in the process, it is possible that Symbiote scheduler configurations will need to be tuned to avoid peaking the processing load or interrupting essential functionality. This process typically is undertaken in coordination with the device manufacturer, who can provide performance overhead and detection latency goals to help establish the modified firmware will run as expected in its field deployment.
The goal is to establish a percentage of baseload Symbiote can utilize and which processes can never be interrupted. The tuning process allows the engineers to make adjustments if these parameters are not adhered to after injection. The vendor’s input at this stage can be useful, since their engineering staff should have a native understanding of the device functionality. That said, Red Balloon’s research staff has abundant resources and device firmware expertise to leverage when assistance is necessary.
Red Balloon encourages device manufacturers to use a firmware signature verification process once the Symbiote injection and tuning is complete.
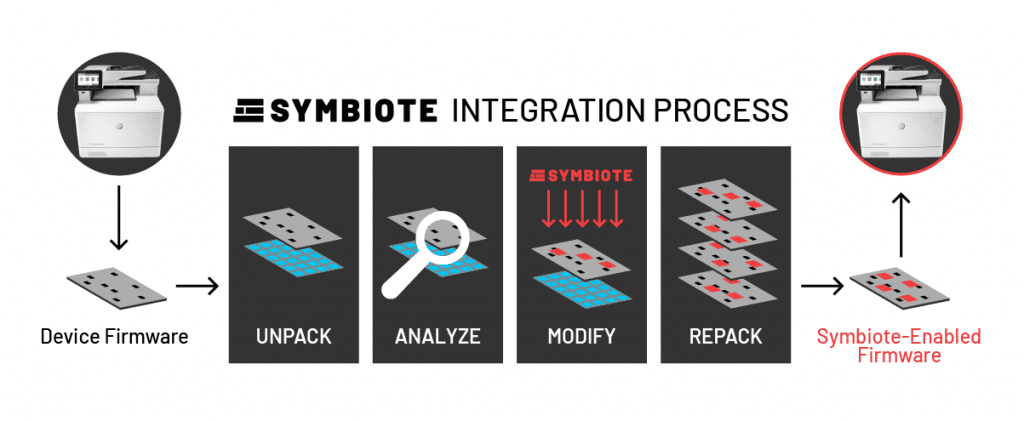
The Symbiote injection process creates modified firmware that must be tuned to avoid function interference and minimize process
Why Symbiote is not ‘antivirus’ for embedded devices
Antivirus is blacklist technology that must be installed onto or into an operating system, which makes it dependent on that system’s features and integrity, and subject to regular updates.
By contrast, Symbiotes do not operate on top of or as part of the protected application or operating system. They are infused into a protected executable that does not depend on a trust relationship with its host. Since it looks for effects and changes, it operates as a whitelist, and does not require regular updates. Symbiote also can protect all the levels of the device, including bootloader, OS, applications and memory.
Takeaway: A multi-step engineering process for safe deployment
Symbiote injection is a mature process that has enabled billions of hours of error-free runtime on devices in the field and many more in testing deployments. The deployment process involves tuning, and the firmware adaptation may initially pull an excessive number of CPU cycles or interfere with functions that are necessary to device functionality. This is why the multi-step implementation and testing process is essential.
Red Balloon has leveraged its extensive knowledge of device or reverse engineering to develop a security technology that is OS-agnostic and can be deployed without any available source code. That said, we recognize and value the device manufacturer’s knowledge of their product. At this stage of Symbiote’s evolution, an OEM’s detailed knowledge can still be tremendously beneficial to our engineering process. Our willingness to work with other engineers through a mutually supportive technology build process is critical to establishing a new standard for embedded device technology.
On-device security is still controversial. Some industry professionals and manufacturers push back against the very idea of it because of an outdated conviction that devices deep in the technology stack are beyond the reach of cyberattack, or simply do not present a sufficiently attractive target. Others believe that embedded devices do not have the resources to support a robust on-host security.
Red Balloon’s research is a strong proof point against the idea that this level of security isn’t needed. And on-device security is becoming more common, as firewalls and encrypted protocols have been introduced to many endpoints at this level.
But runtime monitoring and protection, such as Red Balloon’s Symbiote technology, has yet to be widely accepted, and many of our potential customers cite limited device resources as an impediment. While convinced of the utility and necessity of embedded security, some remain concerned that any manipulation of device firmware will result in decreased effectiveness, regular crashes, or even terminal inoperability.
Given the sophisticated engineering of these devices, the caution is understandable. But Symbiote technology prioritizes device functionality. In addition to defending against n-day and zero-day attacks, including those that bypass traditional security controls, the Symbiote integration process uses advanced firmware analysis, unpacking, and repacking technology to prevent any damage or compromise of the original device firmware.
The combination of technologies executes the dual functions of improving device security and protecting core device functionality.
Symbiote is not an out-of-the-box solution. As with other embedded device technologies, deployment on a device requires time, and it must be carried out by skilled professionals to ensure safe, correct device operation. Red Balloon engineers typically undertake a thorough analysis of the device and its functionality before a Symbiote deployment is attempted.
We have seen a gradual adoption of device security before. The introduction of endpoint protections such as firewalls, antivirus and access controls to devices in control rooms, without disrupting operation, also required skilled and dedicated engineering. Early adopters received a two-fold benefit from this careful approach: They received security before their competitors, and built in time to deal with unavoidable complications, without serious disruption to their processes.
Today, operators who rely on embedded devices are at a similar juncture. They can begin a security upgrade within a window that allows sufficient time to improve devices and the security tools deployed on them. The window may be closing, as embedded devices are increastingly targeted by malicious actors in many systems. But we are confident that ultimately, security deployments on these devices will be as simple and non-disruptive as they are for other endpoints in the technology stack.[1]
The core technologies: OFRAK, ABR, BSR, and Symbiote
Symbiote injection depends on interrelated technologies that identify and remove extraneous code from the host firmware; randomize the firmware; unpack, analyze, and repack the firmware; and deploy Symbiote payloads into the firmware. These include:
Open Firmware Reverse Analysis Konsole (OFRAK): OFRAK is a framework for unpacking, analyzing, modifying, and repacking a device’s firmware images. It is the technological framework through which automated firmware hardening is performed and Symbiotes are integrated. The OFRAK framework is a force-multiplier tool — and it integrates into any development environment.
- Autotomic Binary Reduction (ABR): While this is an automated process, note that autotomic refers to a form of self-amputation and discarding of an appendage or unnecessary part. In this case, what is discarded is firmware that is not utilized in the device’s functioning or memory. This facilitates Symbiote injection by freeing up memory space in the firmware, and also hardens the device’s security posture by removing unnecessary code that an attacker could utilize.
- Binary Structure Randomization (BSR): Utilizing analytic functions, BSR restructures the binary layout of code and data inside the firmware, with links that preserve its functionality while creating a new sequence.
- Symbiote: A symbiote is a minute chunk of code, usually about 200 bytes, that is injected into the host’s binary code. The number of Symbiotes varies with each deployment, and theoretically can number anywhere between a single instantiation or thousands. Once injected, each Symbiote will monitor the specific policy it is assigned and send alerts when any variation or deviation is detected.
The firmware analyzing process
OFRAK does not require source code, and operates on binaries. However, device manufacturers typically supply a development binary that includes debugging symbols, and a means to load modified firmware binaries on the device to aid analysis. (It is possible to analyze and identify firmware components without the above, and this may be required when Red Balloon engages a device end user who does not have access to the files.)
The OFRAK unpacking engine will analyze all the firmware call tables and functions to determine how and when firmware objects come into operation, which can be removed, and what parts support core functions. This analysis sets up the initial stages of firmware modification: binary reduction and binary structure randomization.
The firmware hardening process
Binary reduction, via ABR, serves the dual purpose of hardening the firmware by removing extraneous code (which could be exploited by an attacker) and creating space for the injection of Symbiotes. ABR automatically maps call paths, and builds out a code graph that identifies services and information that is never called, or should not be called.
This extraneous code can either be safely removed or replaced with a stub that allows the firmware to continue running without risk of a code crash. The binary reduction creates space in the firmware image, and can help the device to work faster. ABR also generates a report of all changes to facilitate review.
With the binary reduction complete, the firmware code can be randomized by advanced polymorphic engines that create a distinct new code, which can defeat attacks that rely on knowledge of code layout. The BSR function then utilizes the space created by ABR and moves blocks of code and memory, identifies all places where the original function was removed, and updates the call map.
Combined, ABR and BSR provide important additional layers of security while maintaining a meticulous record of the original firmware, every change in code and a map of the new firmware image.[2]

ABR and BSR work in sequence, with ABR first removing unused pieces of binary code and BSR using the freed space to create a randomized — and therefore stronger — firmware structure.
Why modify binary, and not source code?
Source code is often proprietary, and many companies are understandably reluctant to allow third parties to access it or refine it. By working in binary, copyright issues can be avoided, leaving the manufacturer to update the source code once the binary modification is complete. The new firmware is functionally equivalent to the original, which facilitates future source code updates. In some cases, an end user may wish to update a device for which the original source code is not available.
Selecting Symbiote placement
The process for injecting the Symbiotes includes automatic identification of a large number of injection points, and the selection of a random subset for Symbiote invocation. This means each randomized instance is distinct from all other injected systems.
The process begins by identifying every function in the firmware through analysis of the binary. This leads to the identification of usable, or “hookable” functions into which the Symbiotes can be injected without any disruption of normal operation .
The Symbiote injection process is designed to balance detection resolution functionality with the device workload requirements. It dynamically utilizes CPU cycles from the host device at intervals via an adaptive scheduler that helps prevent an injected Symbiote from adversely impacting performance or corrupting the device firmware. As independent digital “life forms,” the Symbiotes co-exist with arbitrary executables in a mutually defensive arrangement. As such, Symbiotes are designed to simultaneously protect their host through their detection capabilities while maintaining the parameters for core functionality.

Each intercept point, or “hook,” is a potential injection point. The Symbiote manager maintains visibility of the device function to detect any interference with core functionality or at instances with low CPU utilization.
What is a Symbiote?
A Symbiote is a code structure embedded in situ into the firmware of an embedded system. The Symbiote tightly co-exists with its host executable in a mutually defensive arrangement, sharing computational resources with its host while simultaneously protecting the host against exploitation and unauthorized modification.
Each Symbiote includes a payload (the actual defensive mechanism), a manager (which ensures the native OS can safely execute, and prevents the native OS from overwriting the memory chunks used to store payloads’ execution context records) and user-defined policy engine (which has a checksum of every new process that runs and automatically compares this against the device user’s defined whitelist of known, allowed processes).
Repacking the firmware and tuning Symbiotes: Calibration before field deployment
Once the injection points are established, OFRAK repackages the firmware to its original state, with the addition of the Symbiote payloads. The repacking engine uses the call tables and unpacking analysis to establish that all functions remain intact.
At this point in the process, it is possible that Symbiote scheduler configurations will need to be tuned to avoid peaking the processing load or interrupting essential functionality. This process typically is undertaken in coordination with the device manufacturer, who can provide performance overhead and detection latency goals to help establish the modified firmware will run as expected in its field deployment.
The goal is to establish a percentage of baseload Symbiote can utilize and which processes can never be interrupted. The tuning process allows the engineers to make adjustments if these parameters are not adhered to after injection. The vendor’s input at this stage can be useful, since their engineering staff should have a native understanding of the device functionality. That said, Red Balloon’s research staff has abundant resources and device firmware expertise to leverage when assistance is necessary.
Red Balloon encourages device manufacturers to use a firmware signature verification process once the Symbiote injection and tuning is complete.

The Symbiote injection process creates modified firmware that must be tuned to avoid function interference and minimize process
Why Symbiote is not ‘antivirus’ for embedded devices
Antivirus is blacklist technology that must be installed onto or into an operating system, which makes it dependent on that system’s features and integrity, and subject to regular updates.
By contrast, Symbiotes do not operate on top of or as part of the protected application or operating system. They are infused into a protected executable that does not depend on a trust relationship with its host. Since it looks for effects and changes, it operates as a whitelist, and does not require regular updates. Symbiote also can protect all the levels of the device, including bootloader, OS, applications and memory.
Takeaway: A multi-step engineering process for safe deployment
Symbiote injection is a mature process that has enabled billions of hours of error-free runtime on devices in the field and many more in testing deployments. The deployment process involves tuning, and the firmware adaptation may initially pull an excessive number of CPU cycles or interfere with functions that are necessary to device functionality. This is why the multi-step implementation and testing process is essential.
Red Balloon has leveraged its extensive knowledge of device or reverse engineering to develop a security technology that is OS-agnostic and can be deployed without any available source code. That said, we recognize and value the device manufacturer’s knowledge of their product. At this stage of Symbiote’s evolution, an OEM’s detailed knowledge can still be tremendously beneficial to our engineering process. Our willingness to work with other engineers through a mutually supportive technology build process is critical to establishing a new standard for embedded device technology.
On-device security is still controversial. Some industry professionals and manufacturers push back against the very idea of it because of an outdated conviction that devices deep in the technology stack are beyond the reach of cyberattack, or simply do not present a sufficiently attractive target. Others believe that embedded devices do not have the resources to support a robust on-host security.
Red Balloon’s research is a strong proof point against the idea that this level of security isn’t needed. And on-device security is becoming more common, as firewalls and encrypted protocols have been introduced to many endpoints at this level.
But runtime monitoring and protection, such as Red Balloon’s Symbiote technology, has yet to be widely accepted, and many of our potential customers cite limited device resources as an impediment. While convinced of the utility and necessity of embedded security, some remain concerned that any manipulation of device firmware will result in decreased effectiveness, regular crashes, or even terminal inoperability.
Given the sophisticated engineering of these devices, the caution is understandable. But Symbiote technology prioritizes device functionality. In addition to defending against n-day and zero-day attacks, including those that bypass traditional security controls, the Symbiote integration process uses advanced firmware analysis, unpacking, and repacking technology to prevent any damage or compromise of the original device firmware.
The combination of technologies executes the dual functions of improving device security and protecting core device functionality.
Symbiote is not an out-of-the-box solution. As with other embedded device technologies, deployment on a device requires time, and it must be carried out by skilled professionals to ensure safe, correct device operation. Red Balloon engineers typically undertake a thorough analysis of the device and its functionality before a Symbiote deployment is attempted.
We have seen a gradual adoption of device security before. The introduction of endpoint protections such as firewalls, antivirus and access controls to devices in control rooms, without disrupting operation, also required skilled and dedicated engineering. Early adopters received a two-fold benefit from this careful approach: They received security before their competitors, and built in time to deal with unavoidable complications, without serious disruption to their processes.
Today, operators who rely on embedded devices are at a similar juncture. They can begin a security upgrade within a window that allows sufficient time to improve devices and the security tools deployed on them. The window may be closing, as embedded devices are increastingly targeted by malicious actors in many systems. But we are confident that ultimately, security deployments on these devices will be as simple and non-disruptive as they are for other endpoints in the technology stack.[1]
The core technologies: OFRAK, ABR, BSR, and Symbiote
Symbiote injection depends on interrelated technologies that identify and remove extraneous code from the host firmware; randomize the firmware; unpack, analyze, and repack the firmware; and deploy Symbiote payloads into the firmware. These include:
Open Firmware Reverse Analysis Konsole (OFRAK): OFRAK is a framework for unpacking, analyzing, modifying, and repacking a device’s firmware images. It is the technological framework through which automated firmware hardening is performed and Symbiotes are integrated. The OFRAK framework is a force-multiplier tool — and it integrates into any development environment.
- Autotomic Binary Reduction (ABR): While this is an automated process, note that autotomic refers to a form of self-amputation and discarding of an appendage or unnecessary part. In this case, what is discarded is firmware that is not utilized in the device’s functioning or memory. This facilitates Symbiote injection by freeing up memory space in the firmware, and also hardens the device’s security posture by removing unnecessary code that an attacker could utilize.
- Binary Structure Randomization (BSR): Utilizing analytic functions, BSR restructures the binary layout of code and data inside the firmware, with links that preserve its functionality while creating a new sequence.
- Symbiote: A symbiote is a minute chunk of code, usually about 200 bytes, that is injected into the host’s binary code. The number of Symbiotes varies with each deployment, and theoretically can number anywhere between a single instantiation or thousands. Once injected, each Symbiote will monitor the specific policy it is assigned and send alerts when any variation or deviation is detected.
The firmware analyzing process
OFRAK does not require source code, and operates on binaries. However, device manufacturers typically supply a development binary that includes debugging symbols, and a means to load modified firmware binaries on the device to aid analysis. (It is possible to analyze and identify firmware components without the above, and this may be required when Red Balloon engages a device end user who does not have access to the files.)
The OFRAK unpacking engine will analyze all the firmware call tables and functions to determine how and when firmware objects come into operation, which can be removed, and what parts support core functions. This analysis sets up the initial stages of firmware modification: binary reduction and binary structure randomization.
The firmware hardening process
Binary reduction, via ABR, serves the dual purpose of hardening the firmware by removing extraneous code (which could be exploited by an attacker) and creating space for the injection of Symbiotes. ABR automatically maps call paths, and builds out a code graph that identifies services and information that is never called, or should not be called.
This extraneous code can either be safely removed or replaced with a stub that allows the firmware to continue running without risk of a code crash. The binary reduction creates space in the firmware image, and can help the device to work faster. ABR also generates a report of all changes to facilitate review.
With the binary reduction complete, the firmware code can be randomized by advanced polymorphic engines that create a distinct new code, which can defeat attacks that rely on knowledge of code layout. The BSR function then utilizes the space created by ABR and moves blocks of code and memory, identifies all places where the original function was removed, and updates the call map.
Combined, ABR and BSR provide important additional layers of security while maintaining a meticulous record of the original firmware, every change in code and a map of the new firmware image.[2]

ABR and BSR work in sequence, with ABR first removing unused pieces of binary code and BSR using the freed space to create a randomized — and therefore stronger — firmware structure.
Why modify binary, and not source code?
Source code is often proprietary, and many companies are understandably reluctant to allow third parties to access it or refine it. By working in binary, copyright issues can be avoided, leaving the manufacturer to update the source code once the binary modification is complete. The new firmware is functionally equivalent to the original, which facilitates future source code updates. In some cases, an end user may wish to update a device for which the original source code is not available.
Selecting Symbiote placement
The process for injecting the Symbiotes includes automatic identification of a large number of injection points, and the selection of a random subset for Symbiote invocation. This means each randomized instance is distinct from all other injected systems.
The process begins by identifying every function in the firmware through analysis of the binary. This leads to the identification of usable, or “hookable” functions into which the Symbiotes can be injected without any disruption of normal operation .
The Symbiote injection process is designed to balance detection resolution functionality with the device workload requirements. It dynamically utilizes CPU cycles from the host device at intervals via an adaptive scheduler that helps prevent an injected Symbiote from adversely impacting performance or corrupting the device firmware. As independent digital “life forms,” the Symbiotes co-exist with arbitrary executables in a mutually defensive arrangement. As such, Symbiotes are designed to simultaneously protect their host through their detection capabilities while maintaining the parameters for core functionality.

Each intercept point, or “hook,” is a potential injection point. The Symbiote manager maintains visibility of the device function to detect any interference with core functionality or at instances with low CPU utilization.
What is a Symbiote?
A Symbiote is a code structure embedded in situ into the firmware of an embedded system. The Symbiote tightly co-exists with its host executable in a mutually defensive arrangement, sharing computational resources with its host while simultaneously protecting the host against exploitation and unauthorized modification.
Each Symbiote includes a payload (the actual defensive mechanism), a manager (which ensures the native OS can safely execute, and prevents the native OS from overwriting the memory chunks used to store payloads’ execution context records) and user-defined policy engine (which has a checksum of every new process that runs and automatically compares this against the device user’s defined whitelist of known, allowed processes).
Repacking the firmware and tuning Symbiotes: Calibration before field deployment
Once the injection points are established, OFRAK repackages the firmware to its original state, with the addition of the Symbiote payloads. The repacking engine uses the call tables and unpacking analysis to establish that all functions remain intact.
At this point in the process, it is possible that Symbiote scheduler configurations will need to be tuned to avoid peaking the processing load or interrupting essential functionality. This process typically is undertaken in coordination with the device manufacturer, who can provide performance overhead and detection latency goals to help establish the modified firmware will run as expected in its field deployment.
The goal is to establish a percentage of baseload Symbiote can utilize and which processes can never be interrupted. The tuning process allows the engineers to make adjustments if these parameters are not adhered to after injection. The vendor’s input at this stage can be useful, since their engineering staff should have a native understanding of the device functionality. That said, Red Balloon’s research staff has abundant resources and device firmware expertise to leverage when assistance is necessary.
Red Balloon encourages device manufacturers to use a firmware signature verification process once the Symbiote injection and tuning is complete.

The Symbiote injection process creates modified firmware that must be tuned to avoid function
interference and minimize process
Why Symbiote is not ‘antivirus’ for embedded devices
Antivirus is blacklist technology that must be installed onto or into an operating system, which makes it dependent on that system’s features and integrity, and subject to regular updates.
By contrast, Symbiotes do not operate on top of or as part of the protected application or operating system. They are infused into a protected executable that does not depend on a trust relationship with its host. Since it looks for effects and changes, it operates as a whitelist, and does not require regular updates. Symbiote also can protect all the levels of the device, including bootloader, OS, applications and memory.
Takeaway: A multi-step engineering process for safe deployment
Symbiote injection is a mature process that has enabled billions of hours of error-free runtime on devices in the field and many more in testing deployments. The deployment process involves tuning, and the firmware adaptation may initially pull an excessive number of CPU cycles or interfere with functions that are necessary to device functionality. This is why the multi-step implementation and testing process is essential.
Red Balloon has leveraged its extensive knowledge of device or reverse engineering to develop a security technology that is OS-agnostic and can be deployed without any available source code. That said, we recognize and value the device manufacturer’s knowledge of their product. At this stage of Symbiote’s evolution, an OEM’s detailed knowledge can still be tremendously beneficial to our engineering process. Our willingness to work with other engineers through a mutually supportive technology build process is critical to establishing a new standard for embedded device technology.
[1] Symbiote behavior during runtime and reporting also maintains device integrity, and will be covered in a separate article. Here we are focused on the process of building hardened firmware, into which symbiotes can be inserted, and the actual injection of the symbiotes.
[2] In some instances, the OFRAK process may identify sufficient Symbiote injection points without requiring any binary reduction and/or randomization.
